Thank you for choosing our theme. This article is intended to help you get started creating your site with Ohio. Should you face any problems installing the theme the help of this article, please contact us on Ticksy.
To install this theme you must have a working version of WordPress already installed. If you need help installing WordPress, follow the instructions in WordPress Codex. Below are all the useful links for WordPress information.
- WordPress Codex – General info about WordPress and how to install it on your server.
- First Steps With WordPress – General info about multiple topics on WordPress.
- FAQ New To WordPress – The most popular FAQ’s regarding WordPress.
- First Site Guide – Easy to follow step by step guides and tips to help you get online
Picking a hosting provider is a matter of choice based on their location, pricing and services. This is an important decision at the start and we strongly suggest you choose a WordPress friendly hosting provider for using our themes.
Latest technologies are always the best so stick to hosting companies that provide flexibility in your online presence.
Often asked by our clients, we try to determine most appropriate hosting providers for them but it is always your choice based on your goals, so here is the list of hosting companies we recommend (referral links):
Download Theme files from ThemeForest by going to the Downloads tab and finding the Ohio Theme. Click on the Download button. The “All files & Documentation” archive contains everything and the Installable WordPress file only is just the installable WordPress theme file.
The contents of the theme package downloaded from ThemeForest:

Above you can see the structure of the theme archive you download from ThemeForest:
- Bundled Plugins – this folder contains plugins required to work with our theme in case you cannot install them with the prompt or just need a local copy;
- Extras – this folder contains extra files (e.g. text file with a link to get the Figma files);
- Licensing – this folder contains the terms and conditions of the license under which Ohio is distributed and some information on licensing of various parts of the theme in a separate file;
- ohio-child.zip – this archive contains the basic child theme that you can use with our theme. Just installing it won’t hurt and in case you decide to make some changes/extend the source code of the theme, it will be very helpful because it helps not to lose your custom changes after updating the parent theme.
- ohio.zip – this is the theme archive you need to upload to WordPress.
To use the Ohio theme, you must be running WordPress 6.0 or higher, PHP 7.4 or greater, and MySQL 5 or greater on your server. We have tested it on Linux, Mac, and Windows. Below is a list of items you should ensure your host can comply with.
- Check to ensure that your web host has the minimum requirements to run WordPress and themes;
- Always make sure they are running the latest version of WordPress;
- You can download the latest release of WordPress from the official WordPress website;
- Always create secure passwords for FTP and Databases.
Many issues you may run into such as; white screen, demo content fails when importing, empty page content, theme not being saved and other similar issues are all related to low PHP configuration limits. The solution is to increase the PHP limits. You can do this on your own, or contact your hosting provider and ask them to increase those limits to a minimum of the following:
PHP time limit (max_execution_time) 300
PHP memory limit (memory_limit) 256M
Max upload size (upload_max_filesize) 32M
File upload permission (file_uploads) set to Available
Also consider upgrading your PHP version to the latest version, the newer the better.
In most cases, you cannot update the PHP version yourself and need to contact your host about this. The upgrade process is an easy process and should be something your host can do for you without impacting your website or charging you a fee.
There are two ways to install a WordPress theme: using the built-in installer or by uploading it via FTP
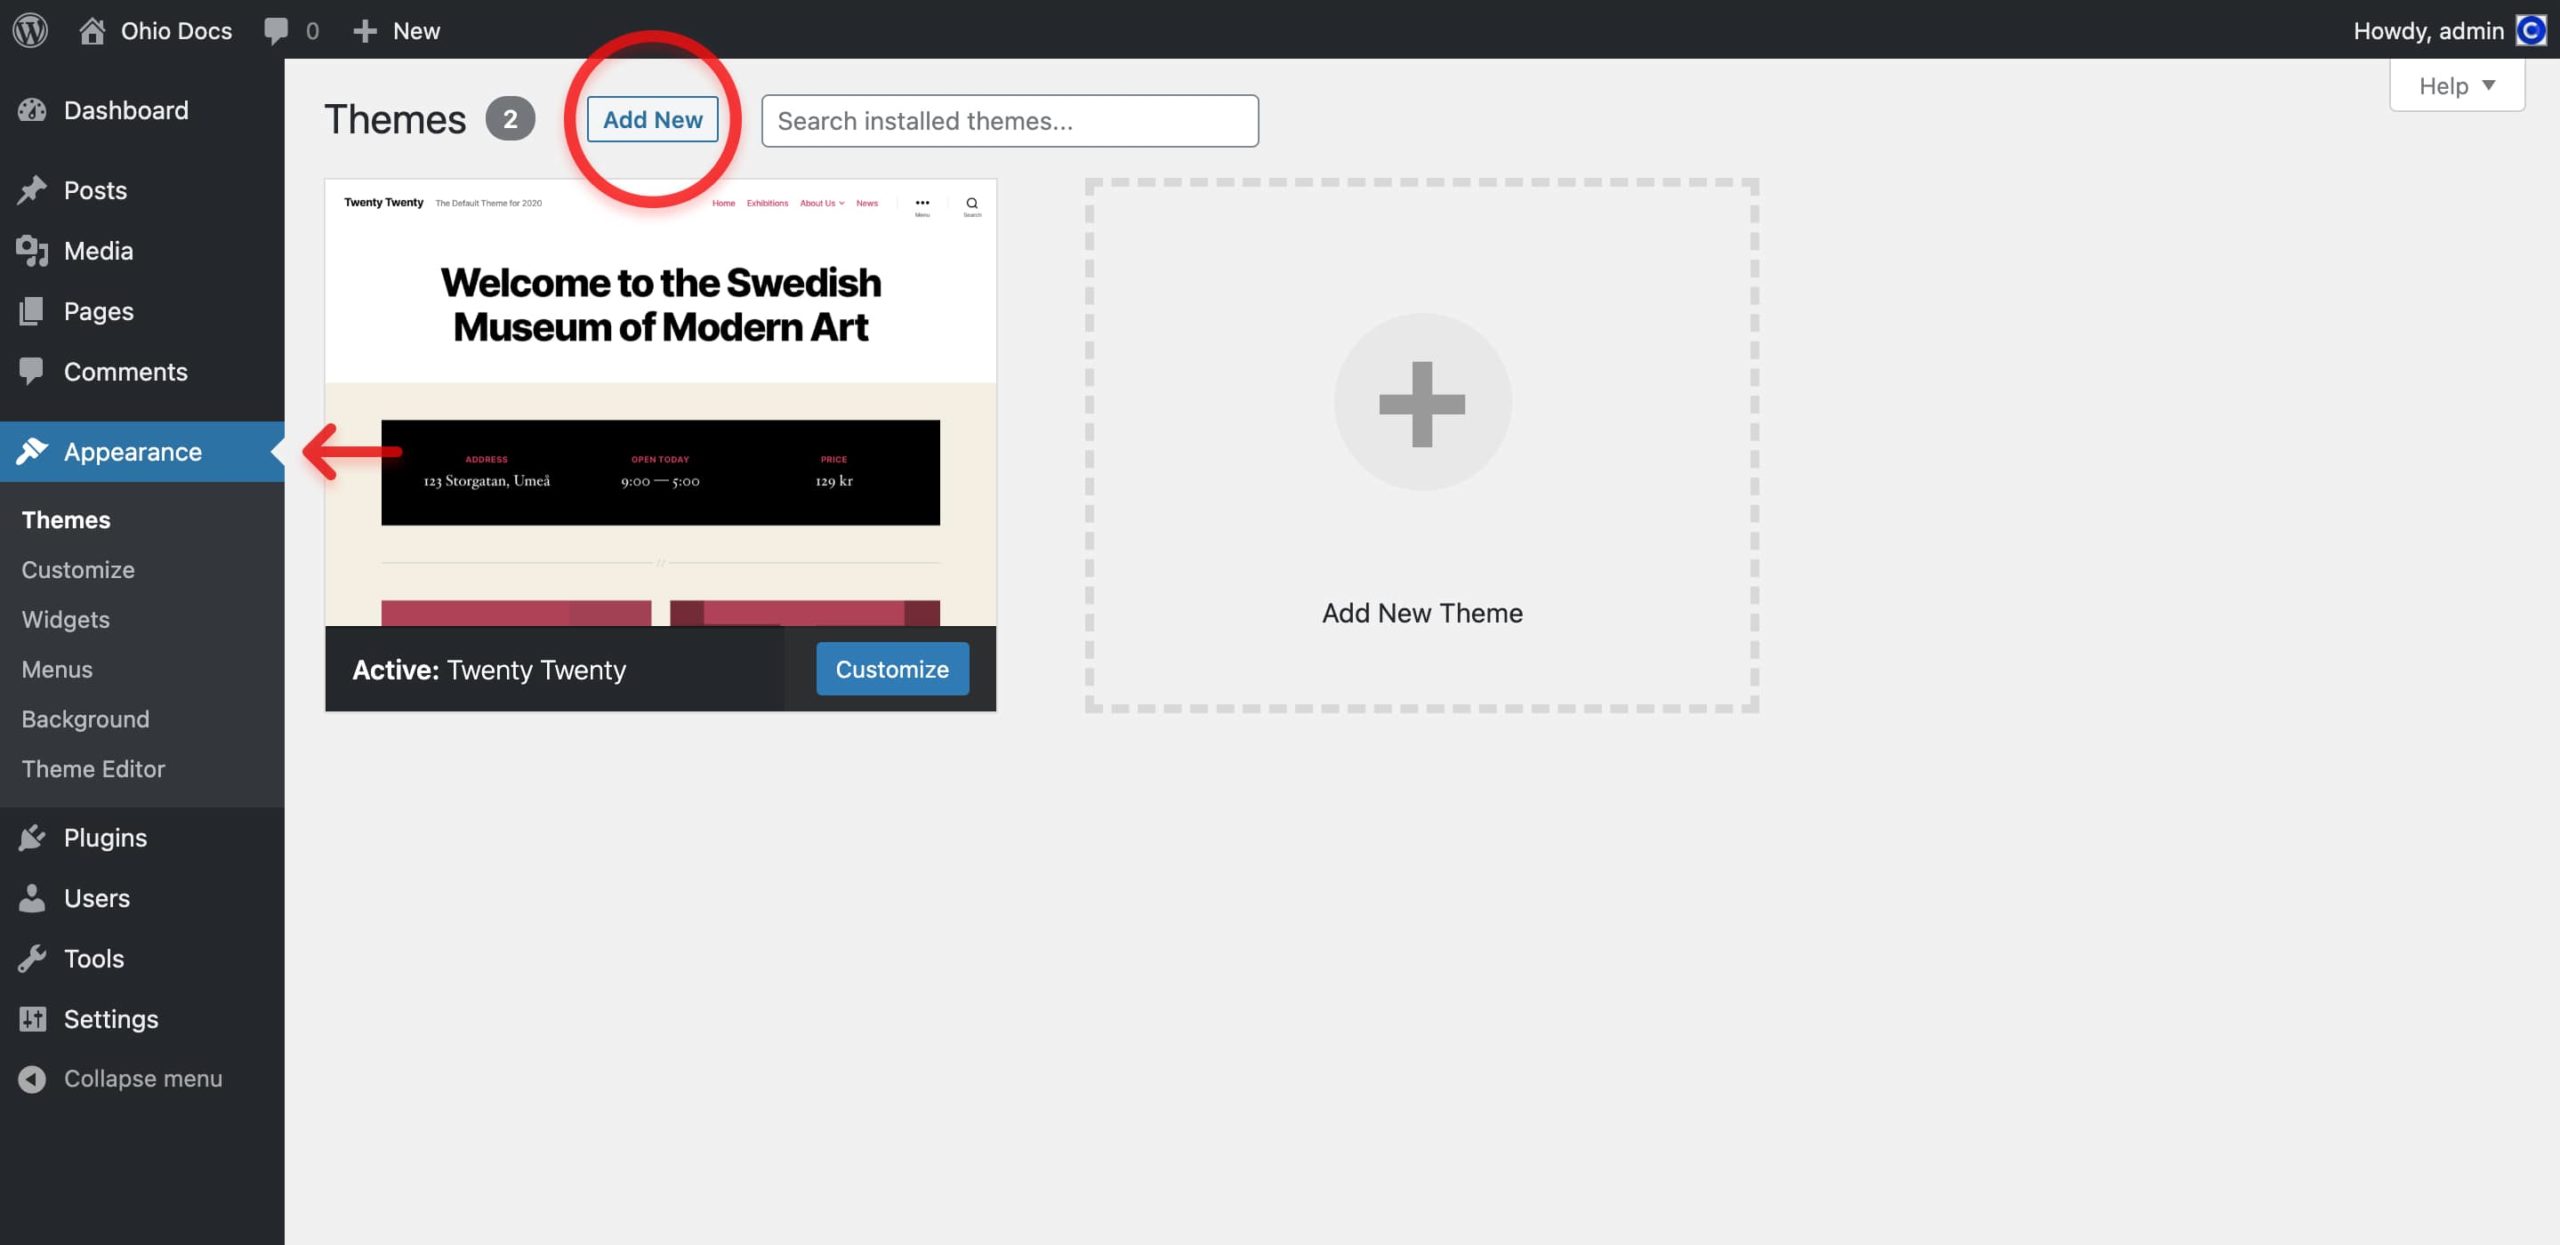
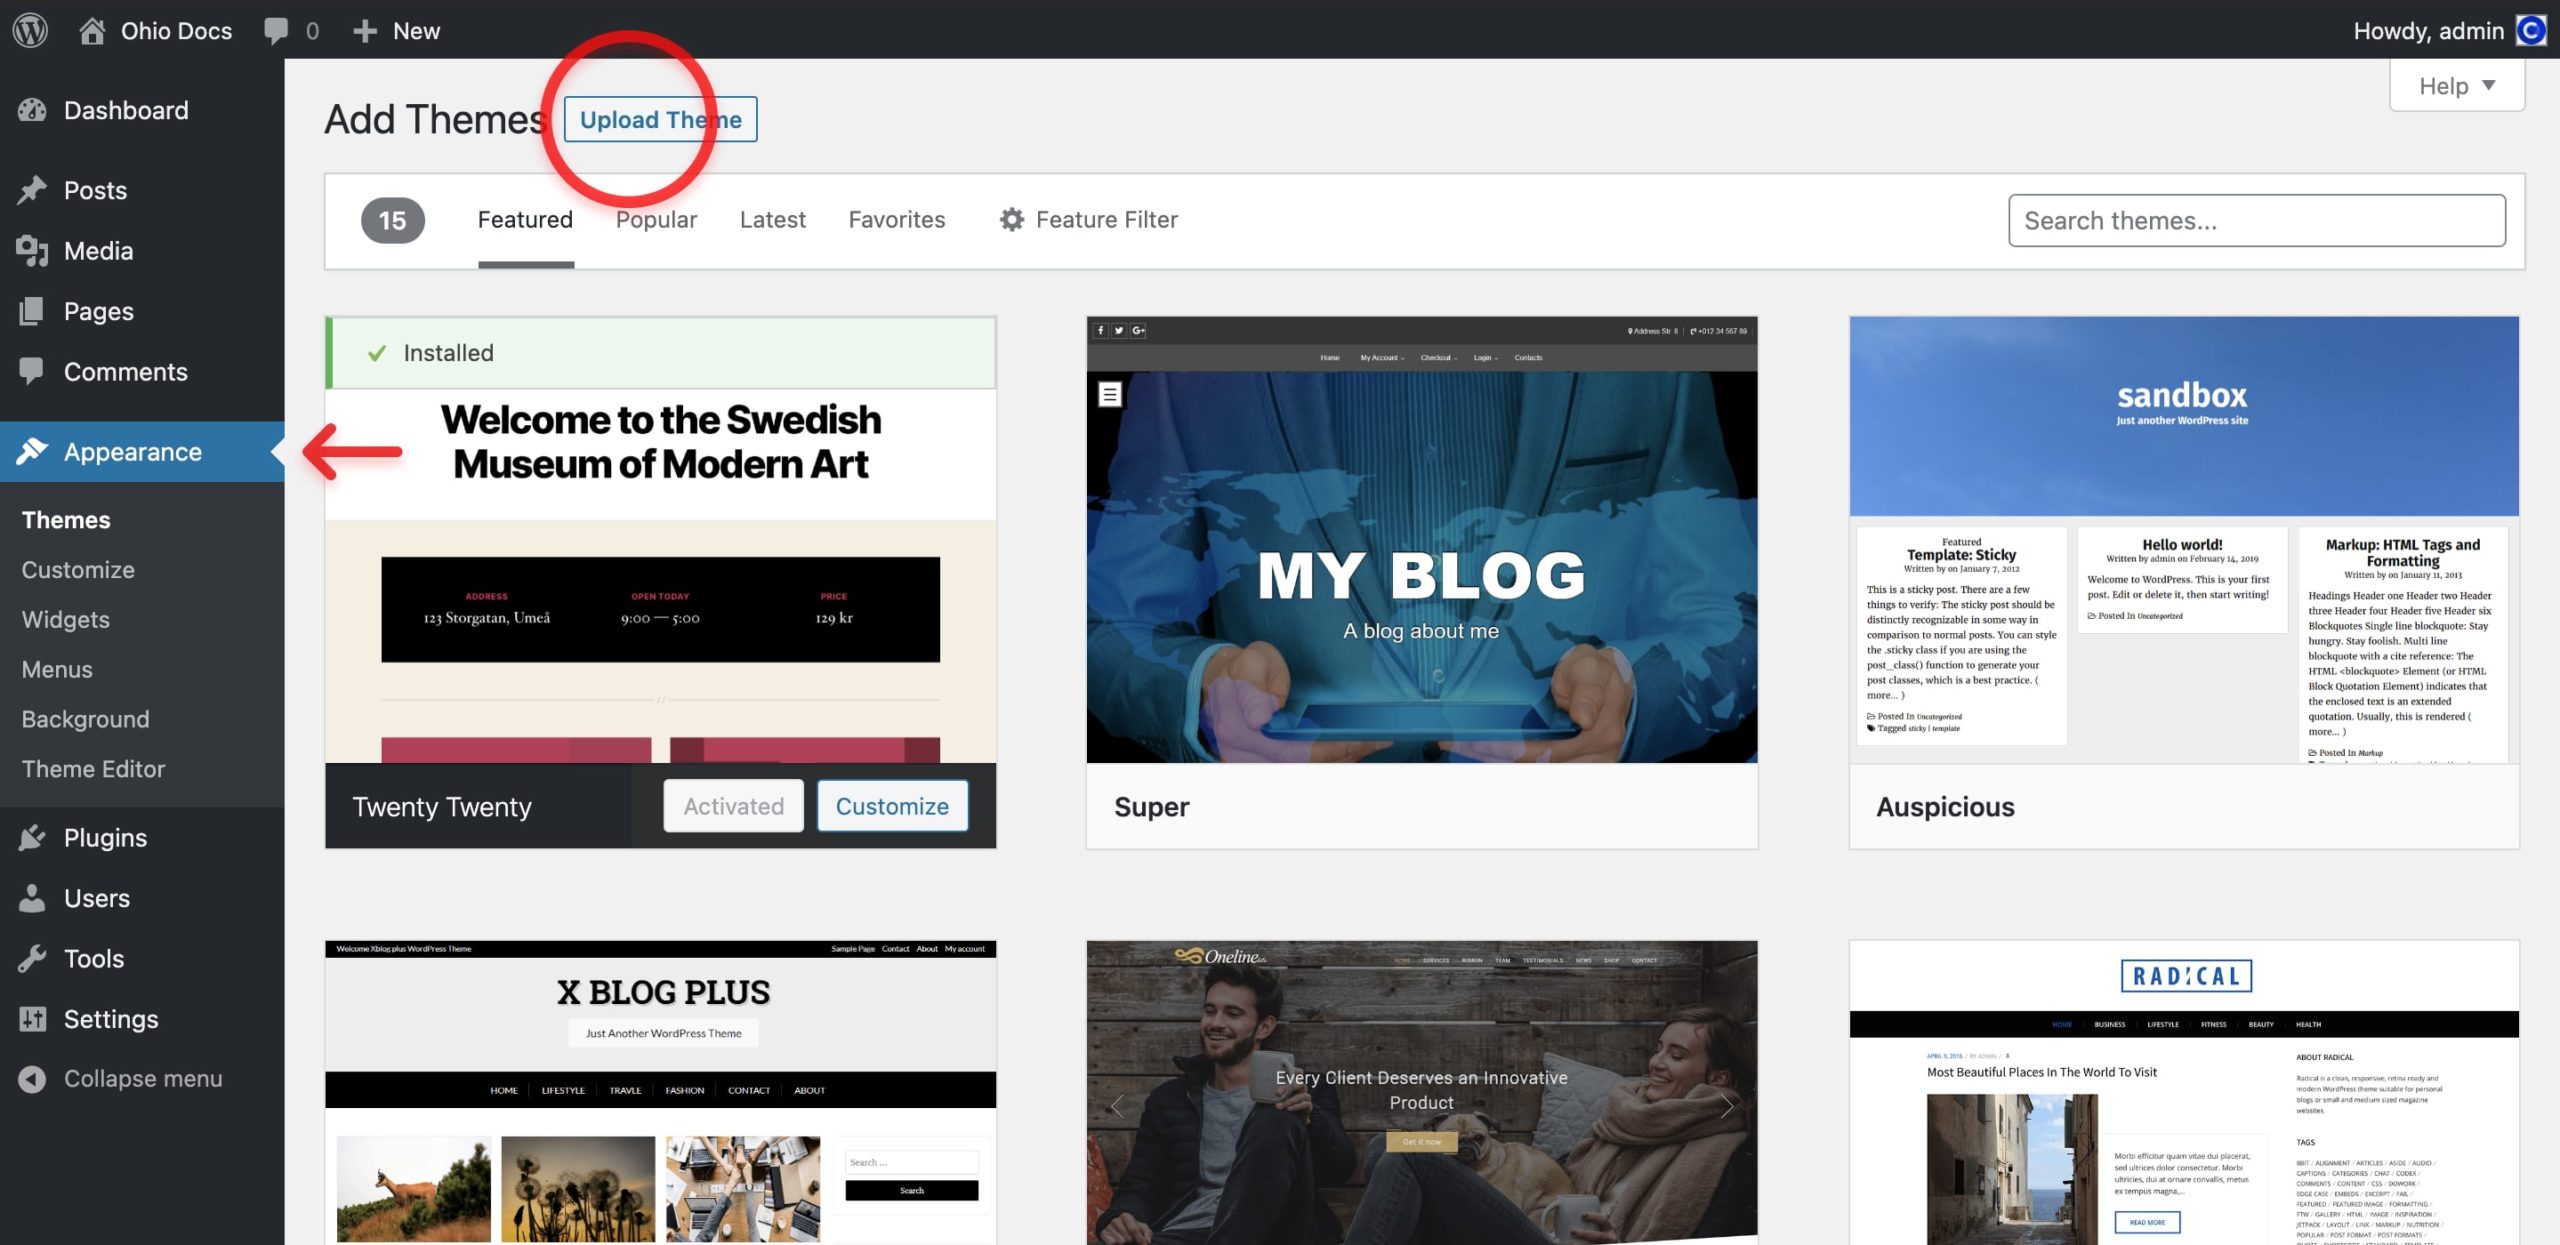
- From the WordPress dashboard go to Appearance → Themes → Add New → Upload Theme;
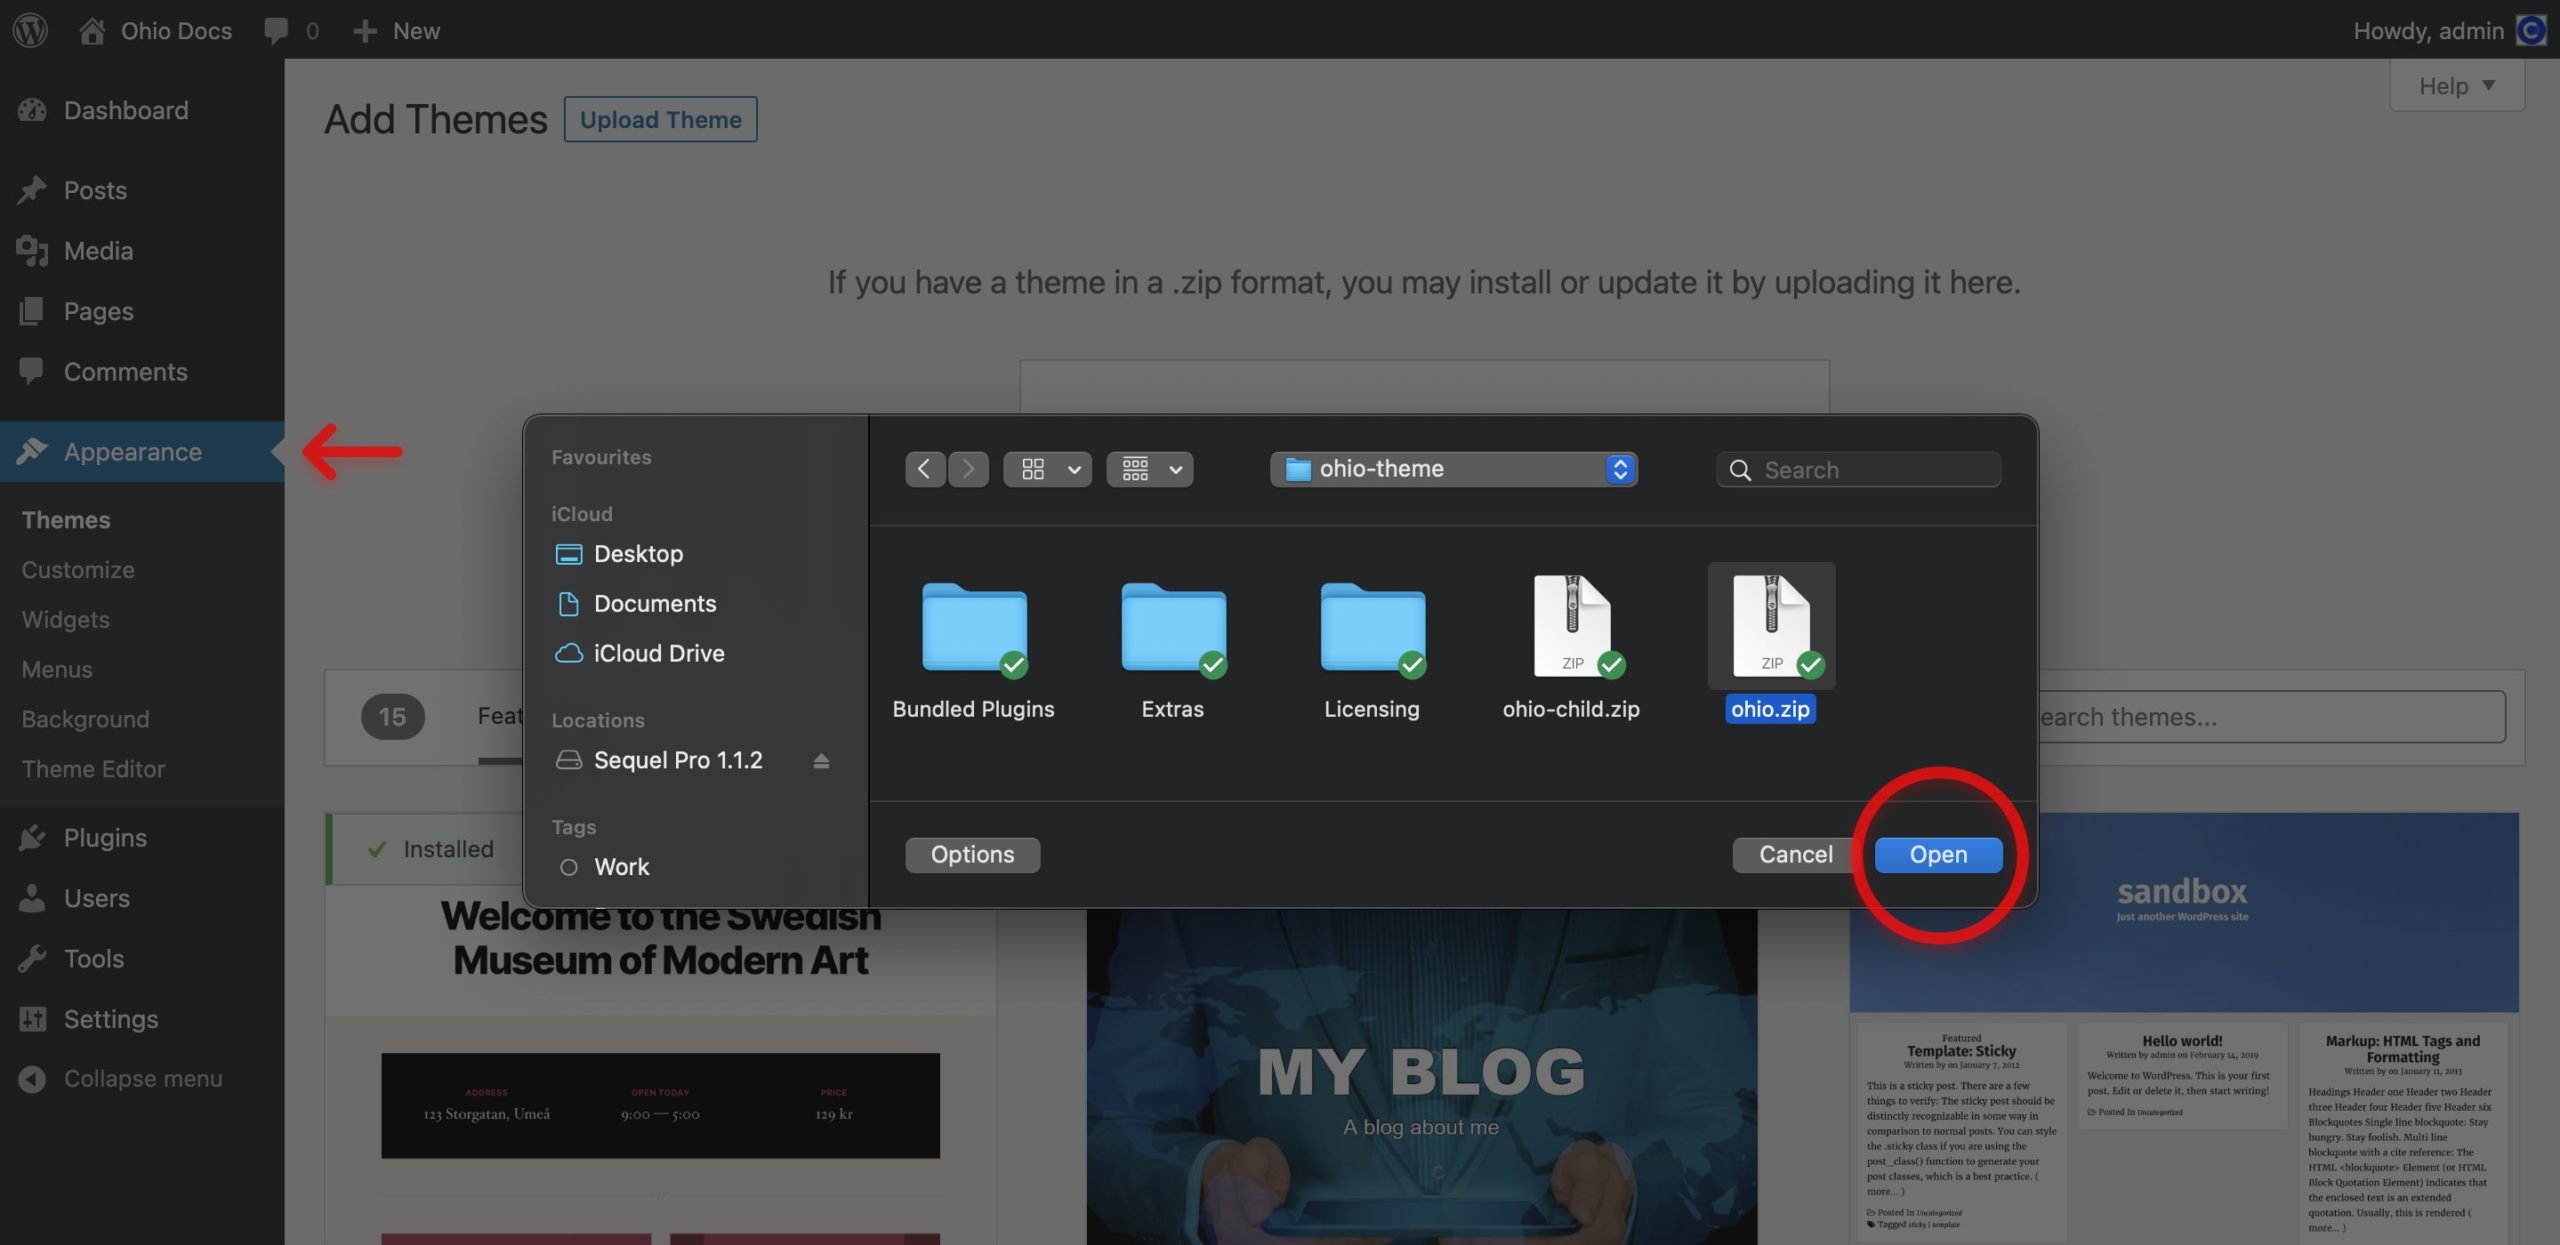
- Click on “Choose File” and select ohio.zip;
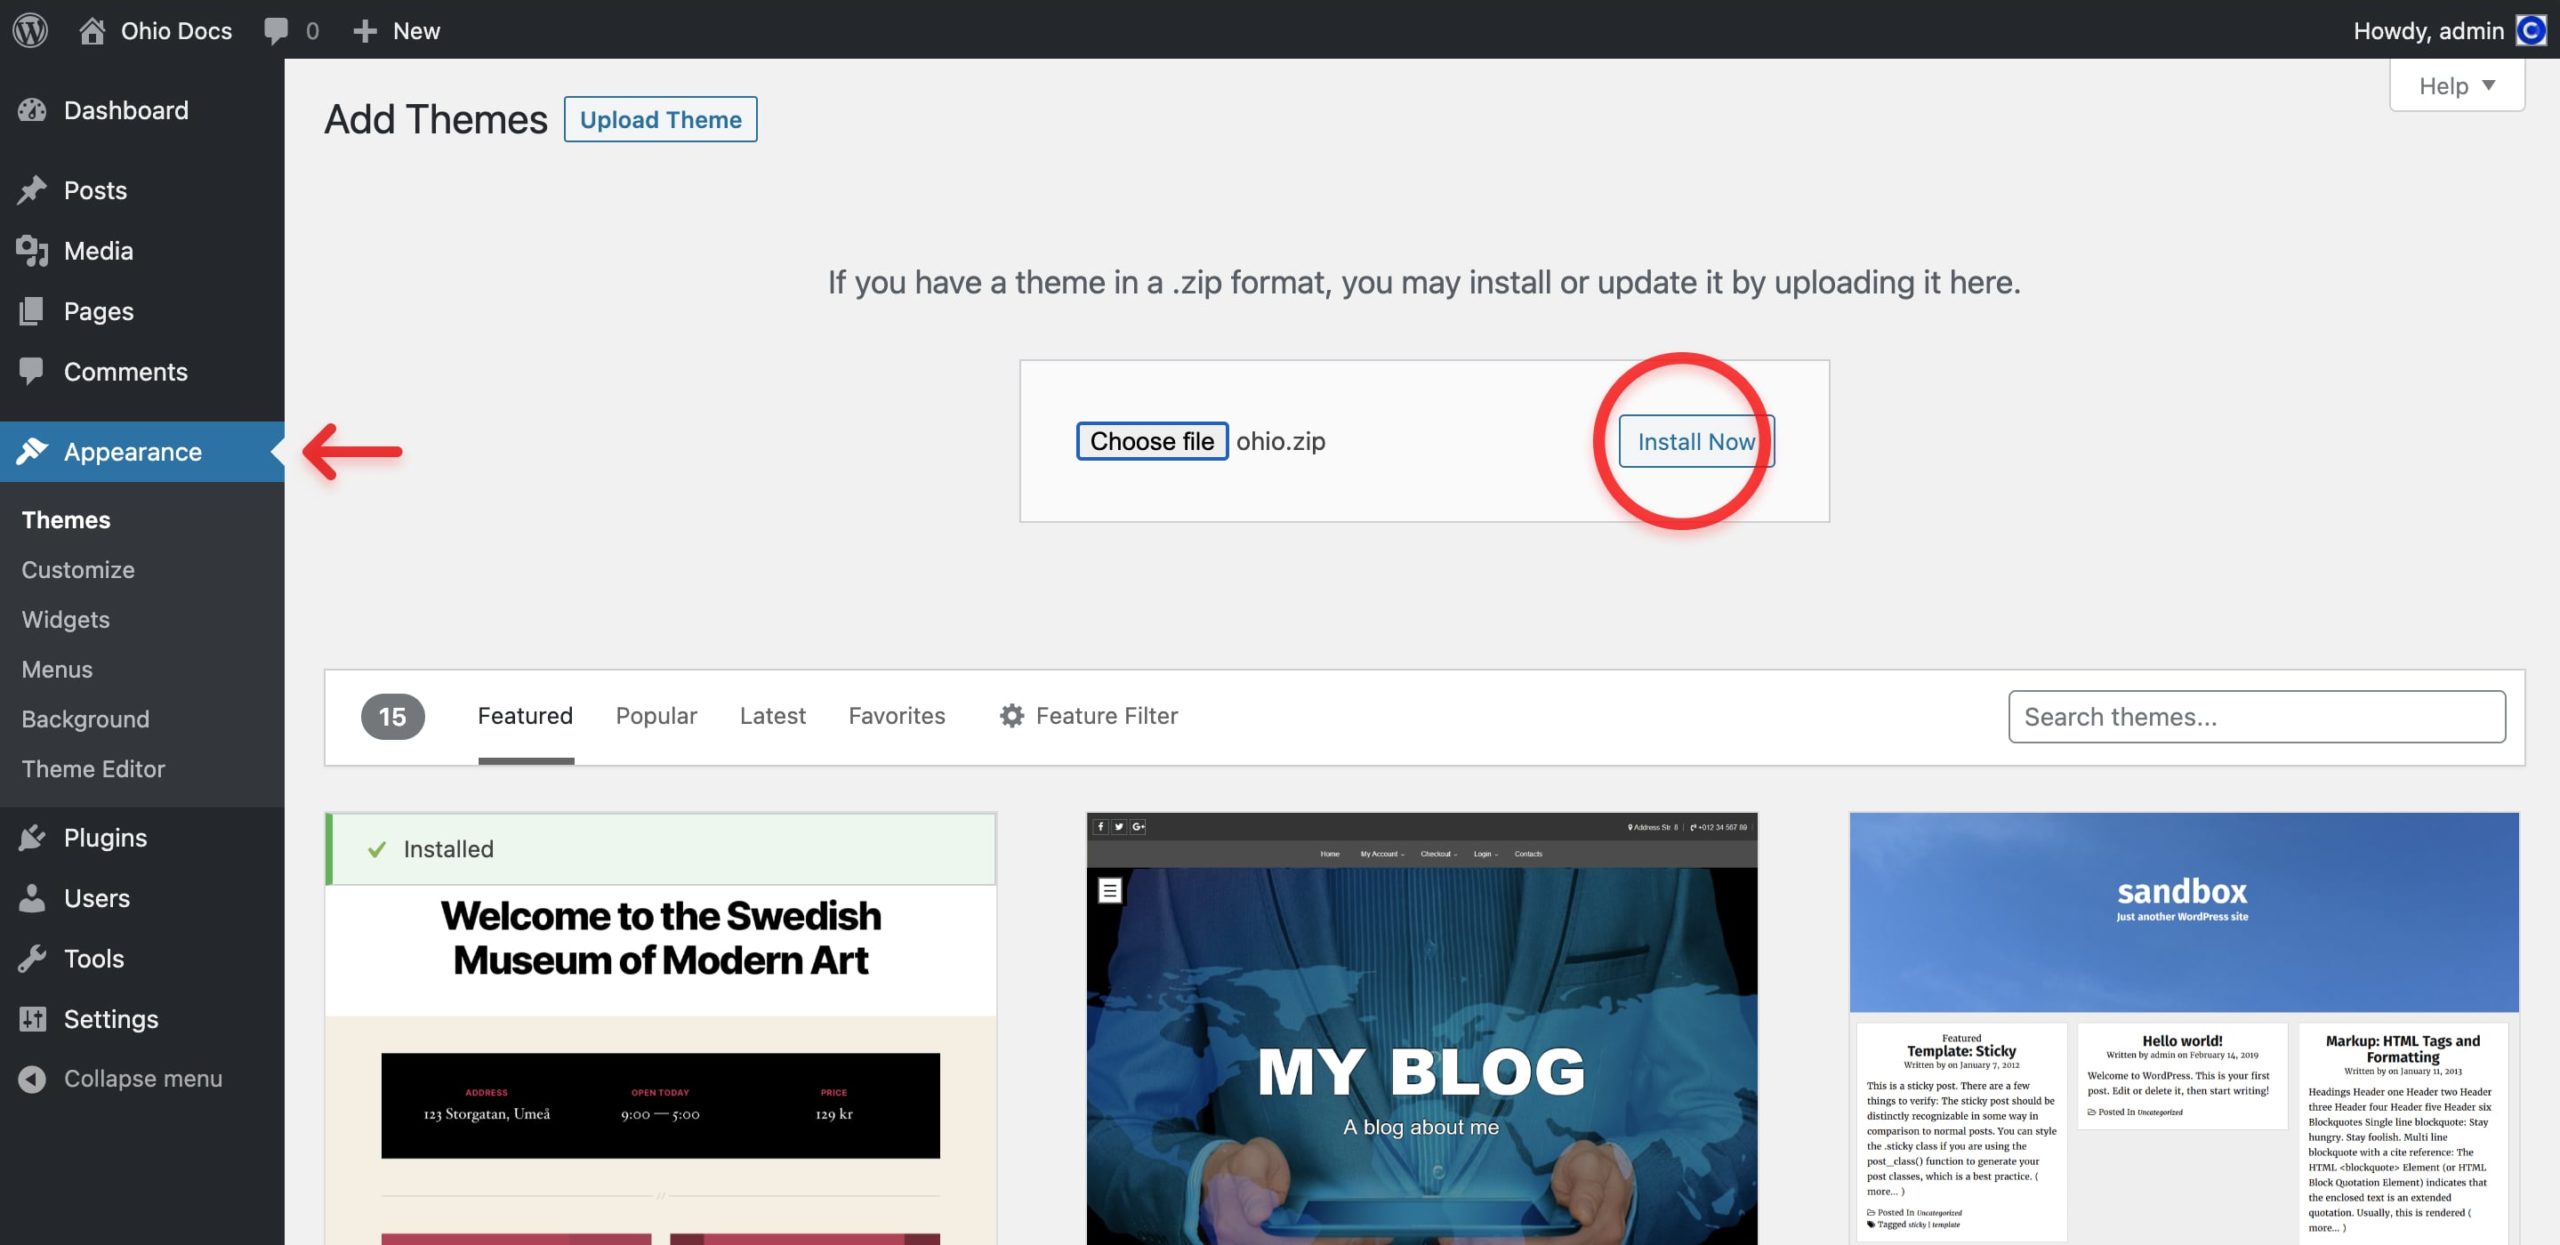
- Click on “Install Now”.
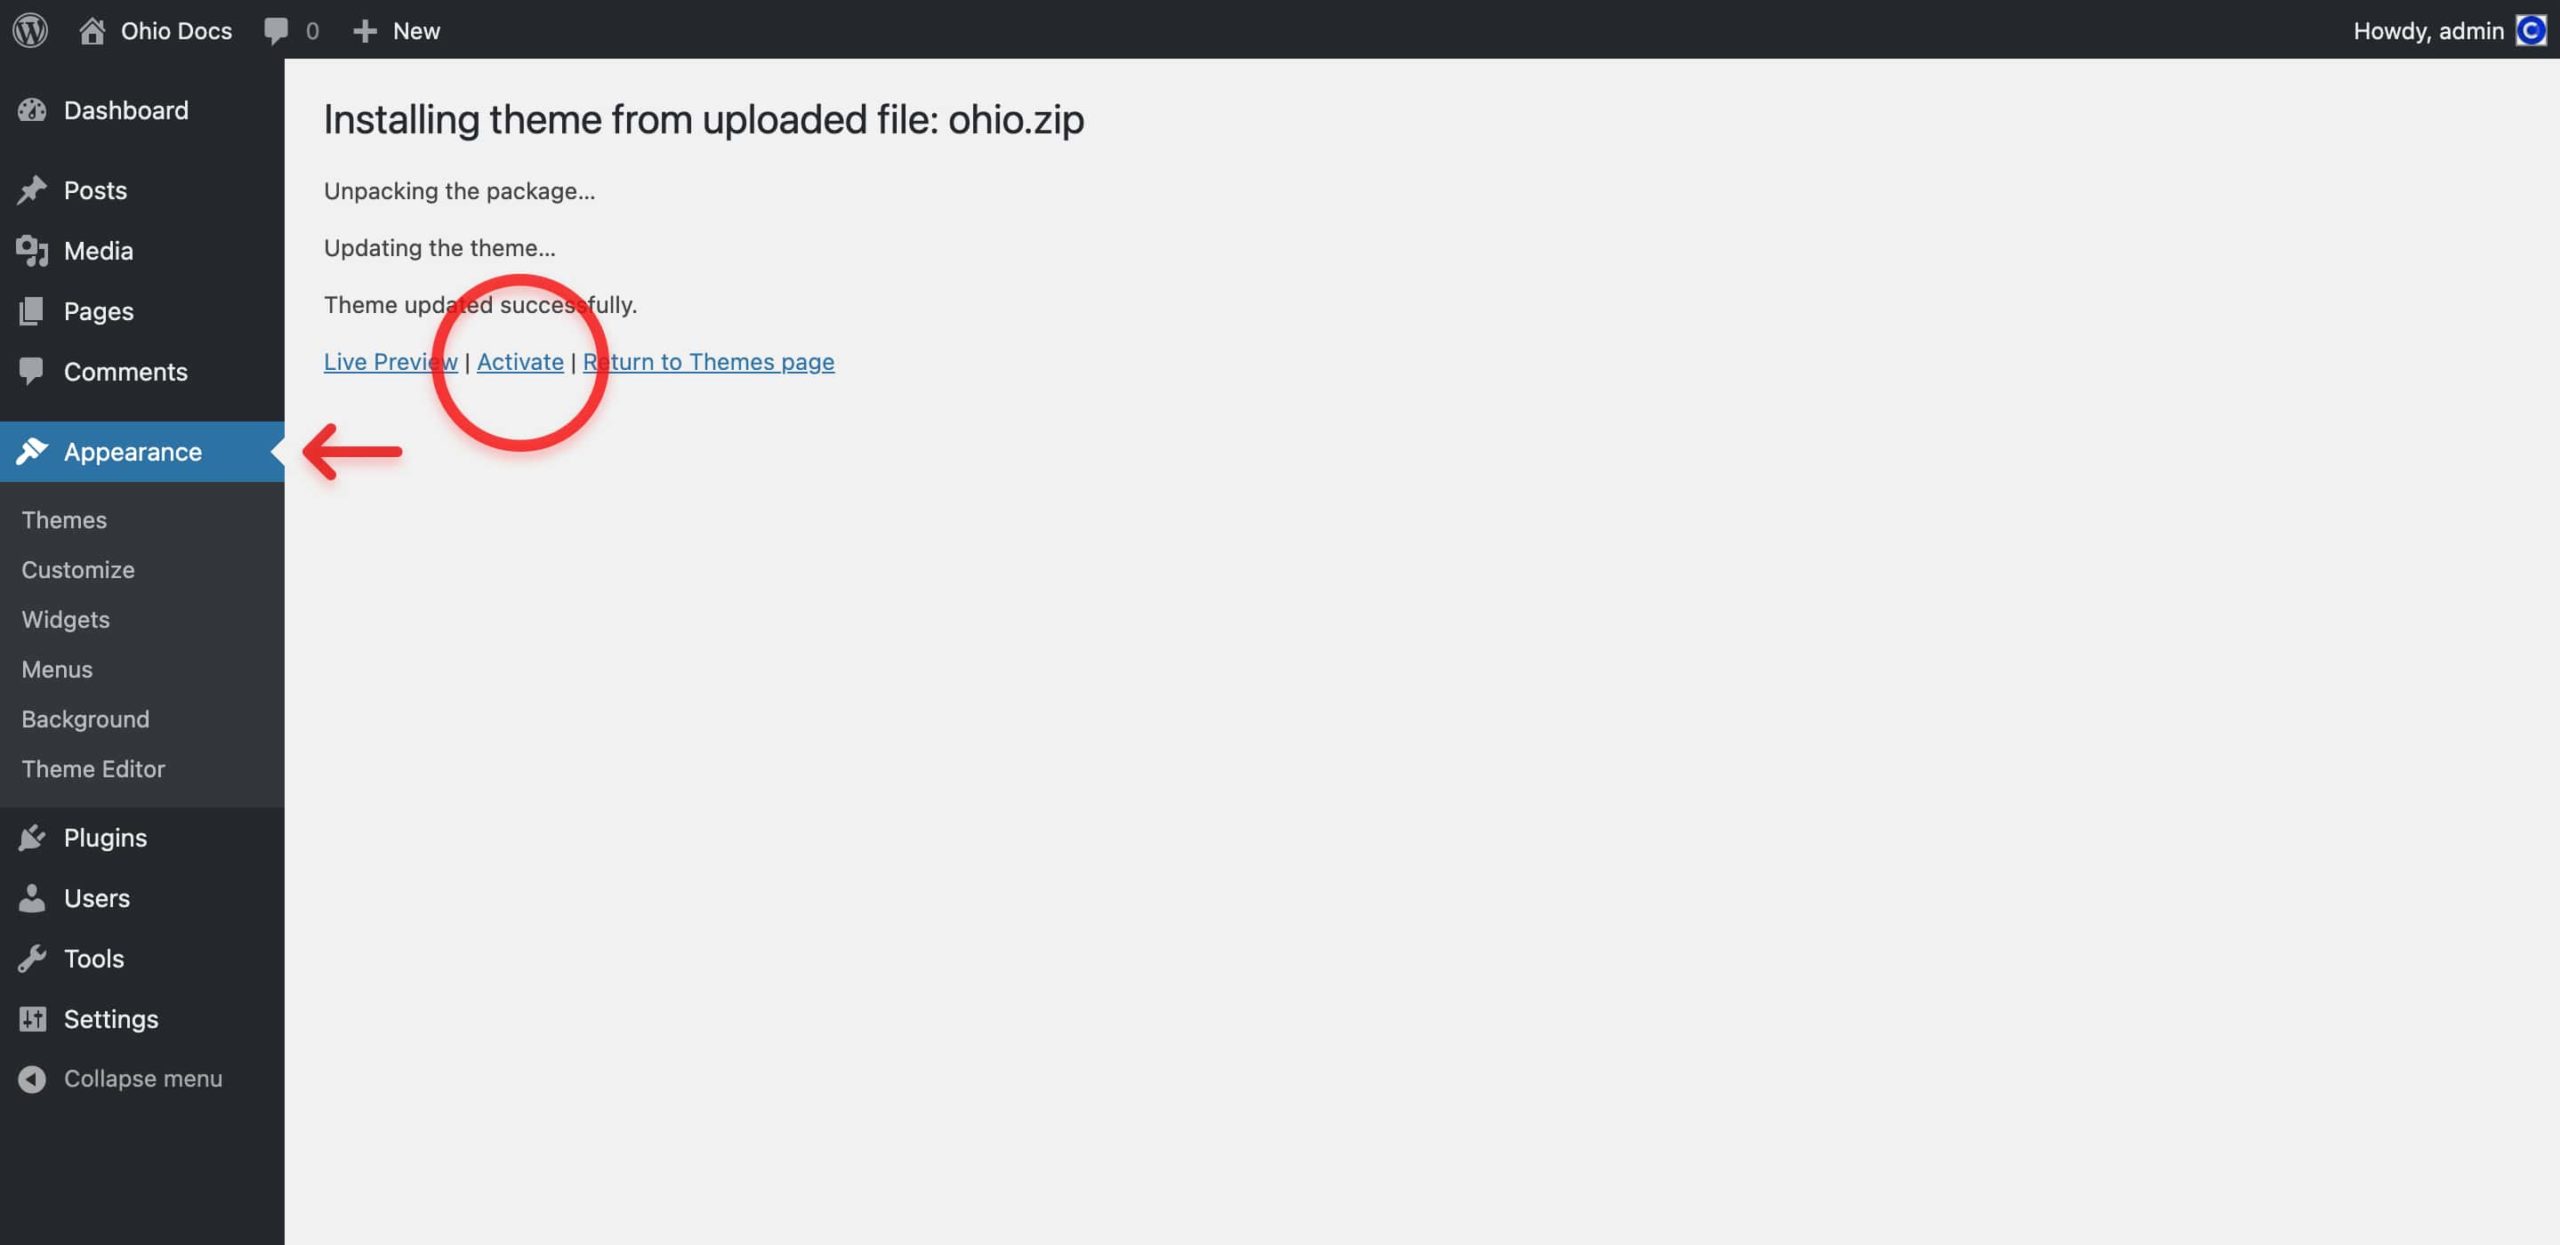
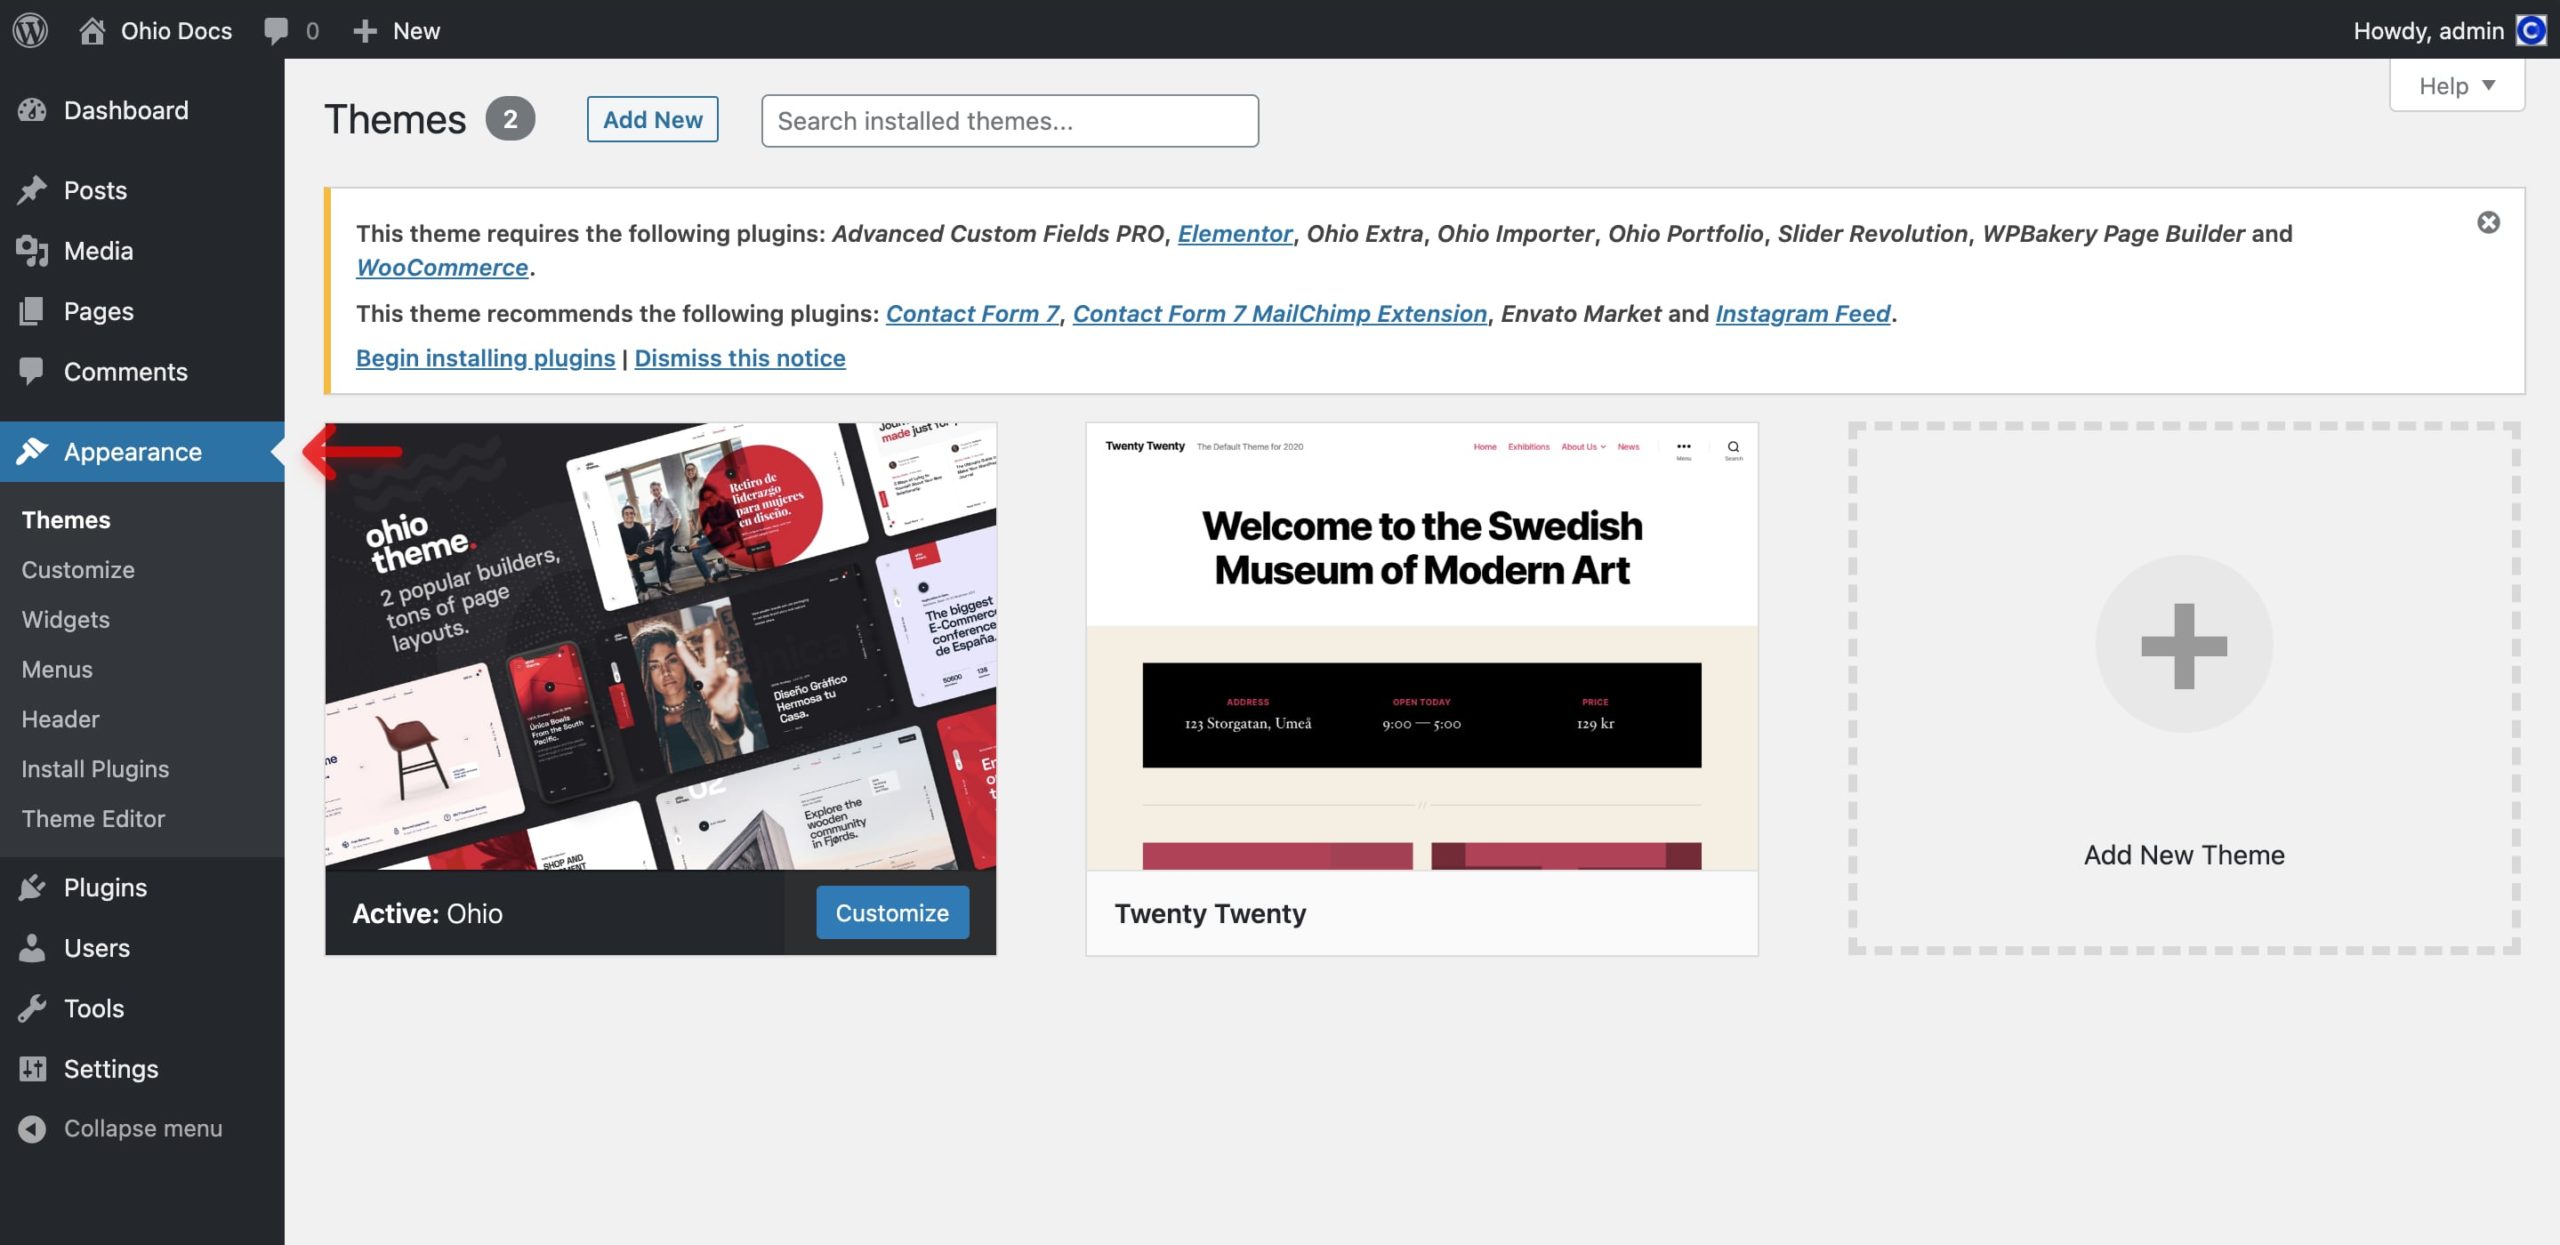
This is a more advanced way to install your theme. To install Ohio via FTP:
- Download the Theme archive and extract the files it contains;
- Use an FTP client to access your hosting server;
- Unzip the ohio.zip archive, put its contents (folder called ohio) in the /wp-content/themes directory provided by WordPress;
- From the WordPress dashboard go to Appearance → Themes, find Ohio and activate it.
When purchasing Ohio Theme from ThemeForest, you have two licensing options. The Regular License, and the Extended License. The billing, licensing terms and process is purely handled by Envato (the company who owns ThemeForest), and we have no control over these aspects. To learn more about what each License is for and which one to purchase, continue reading below.
To be able to install the demo content and use all the Ohio features license activation is required.
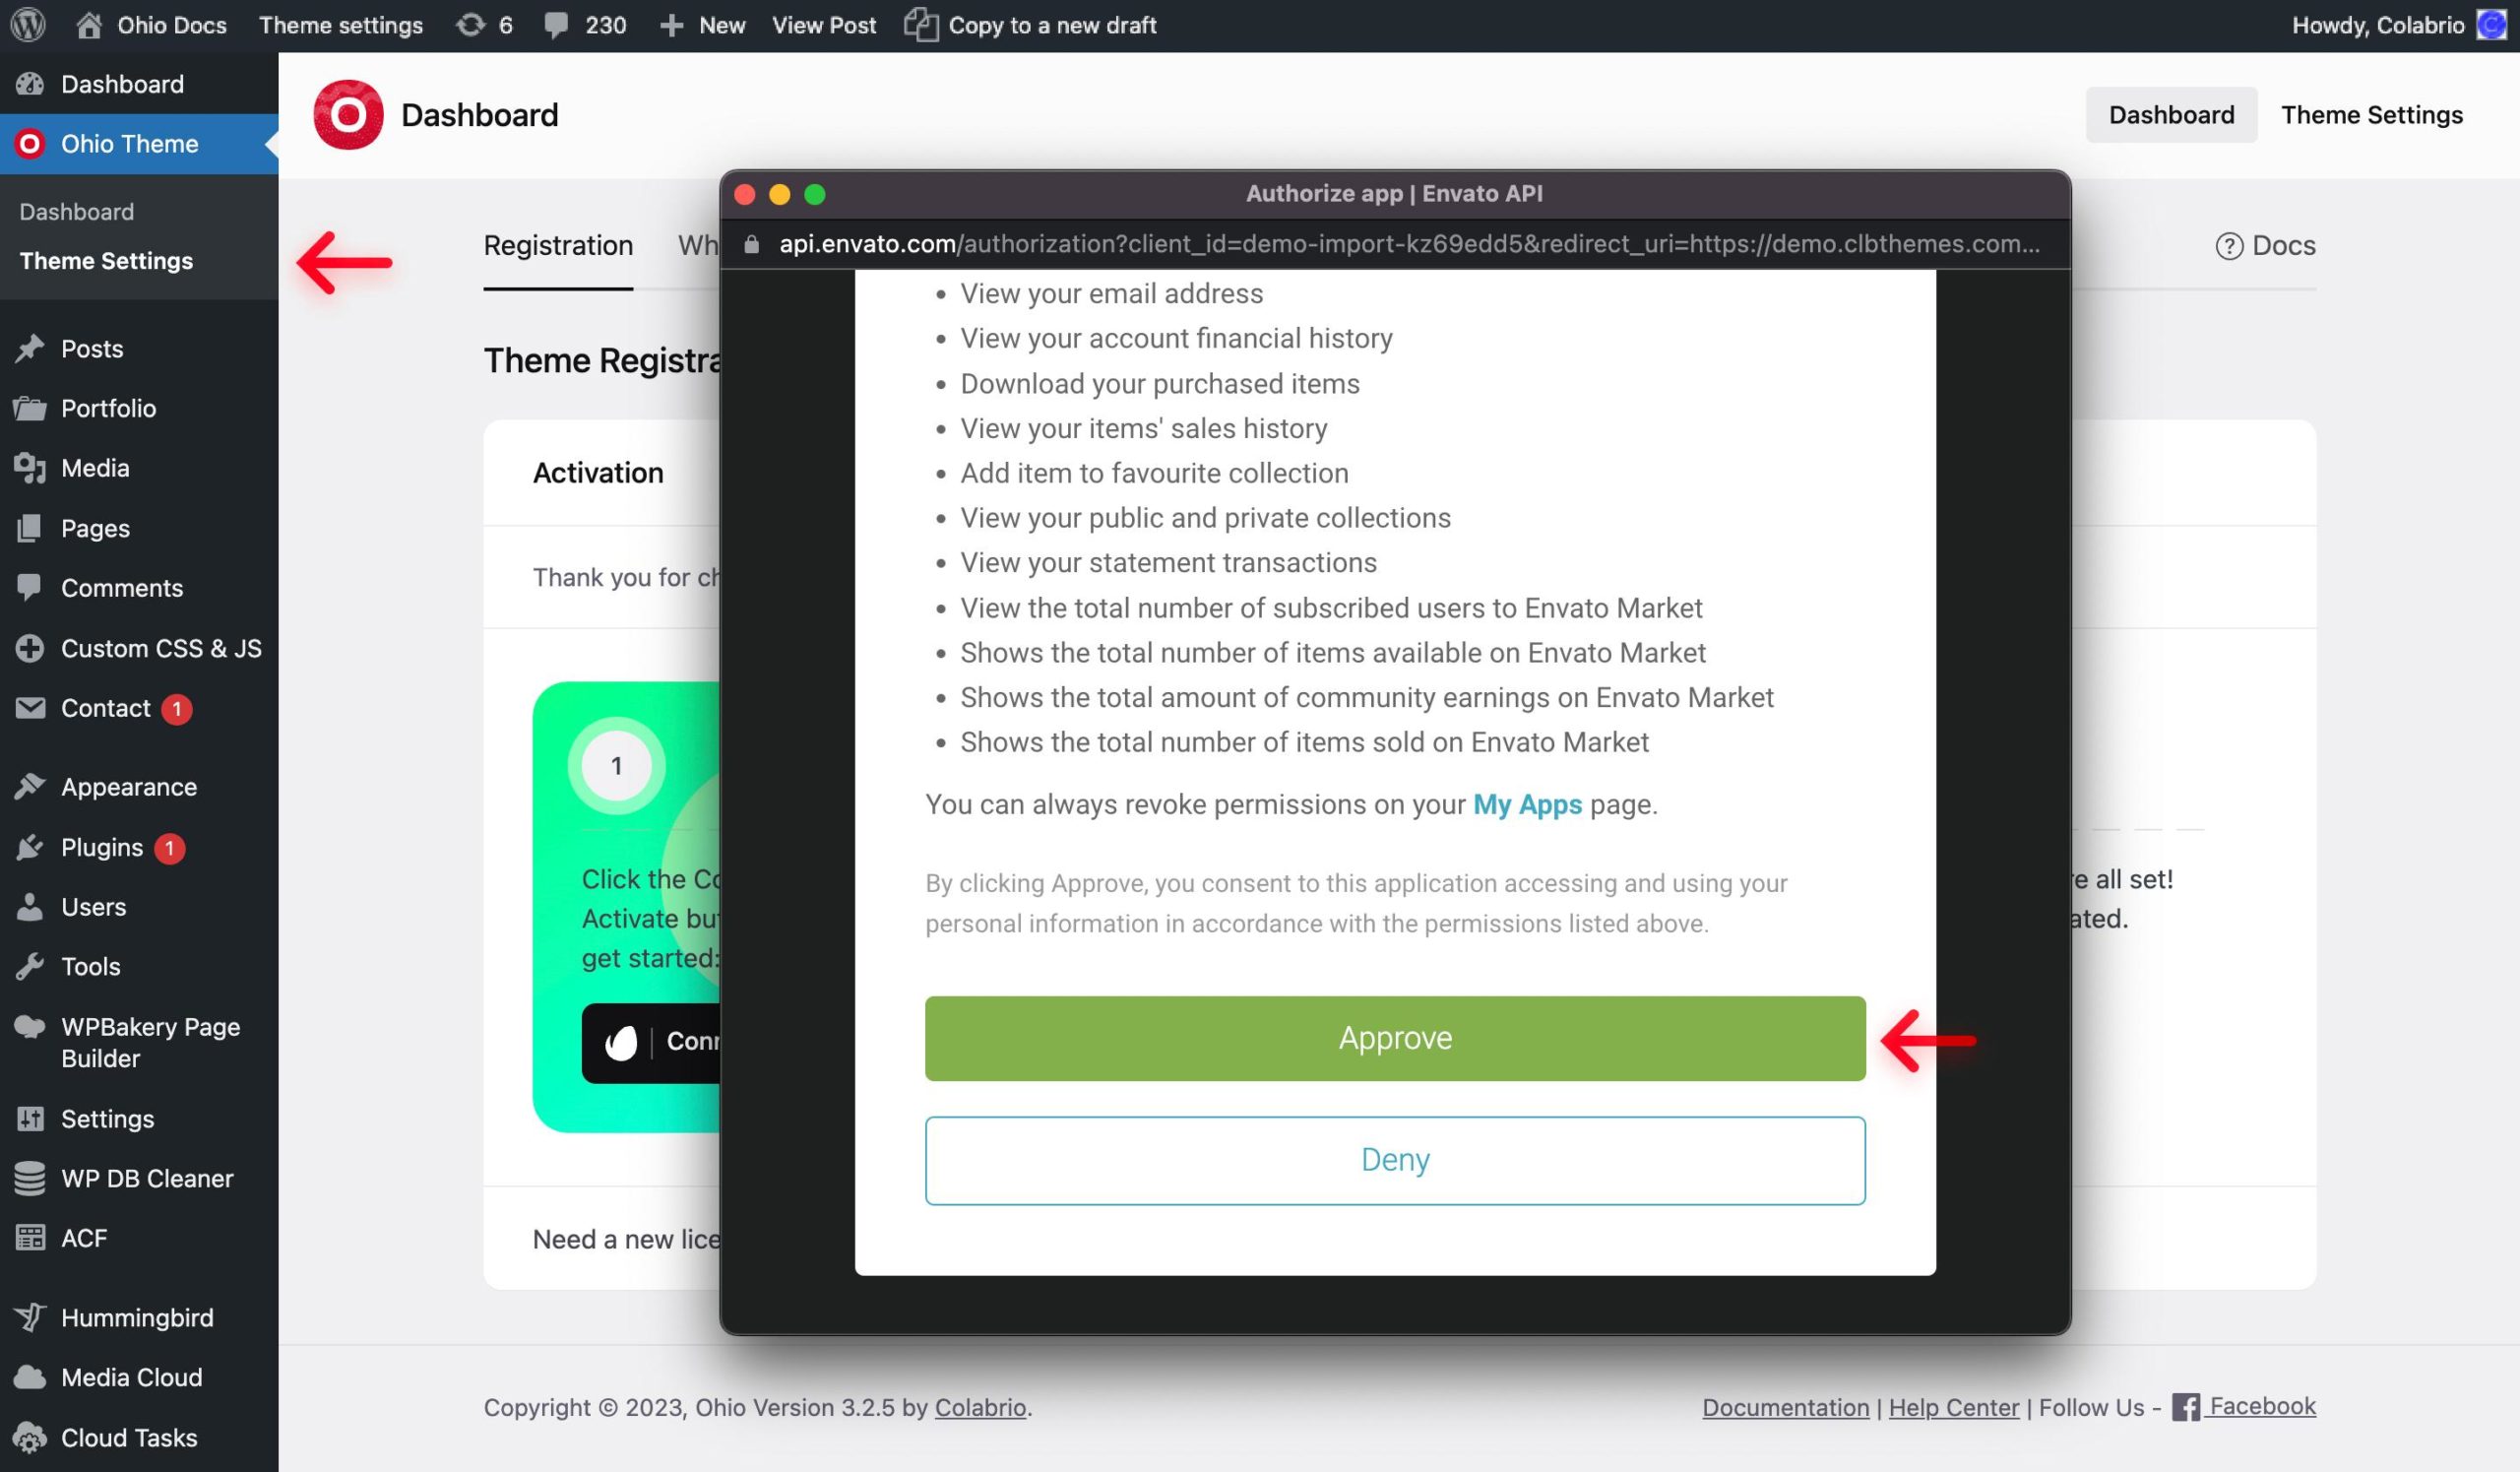
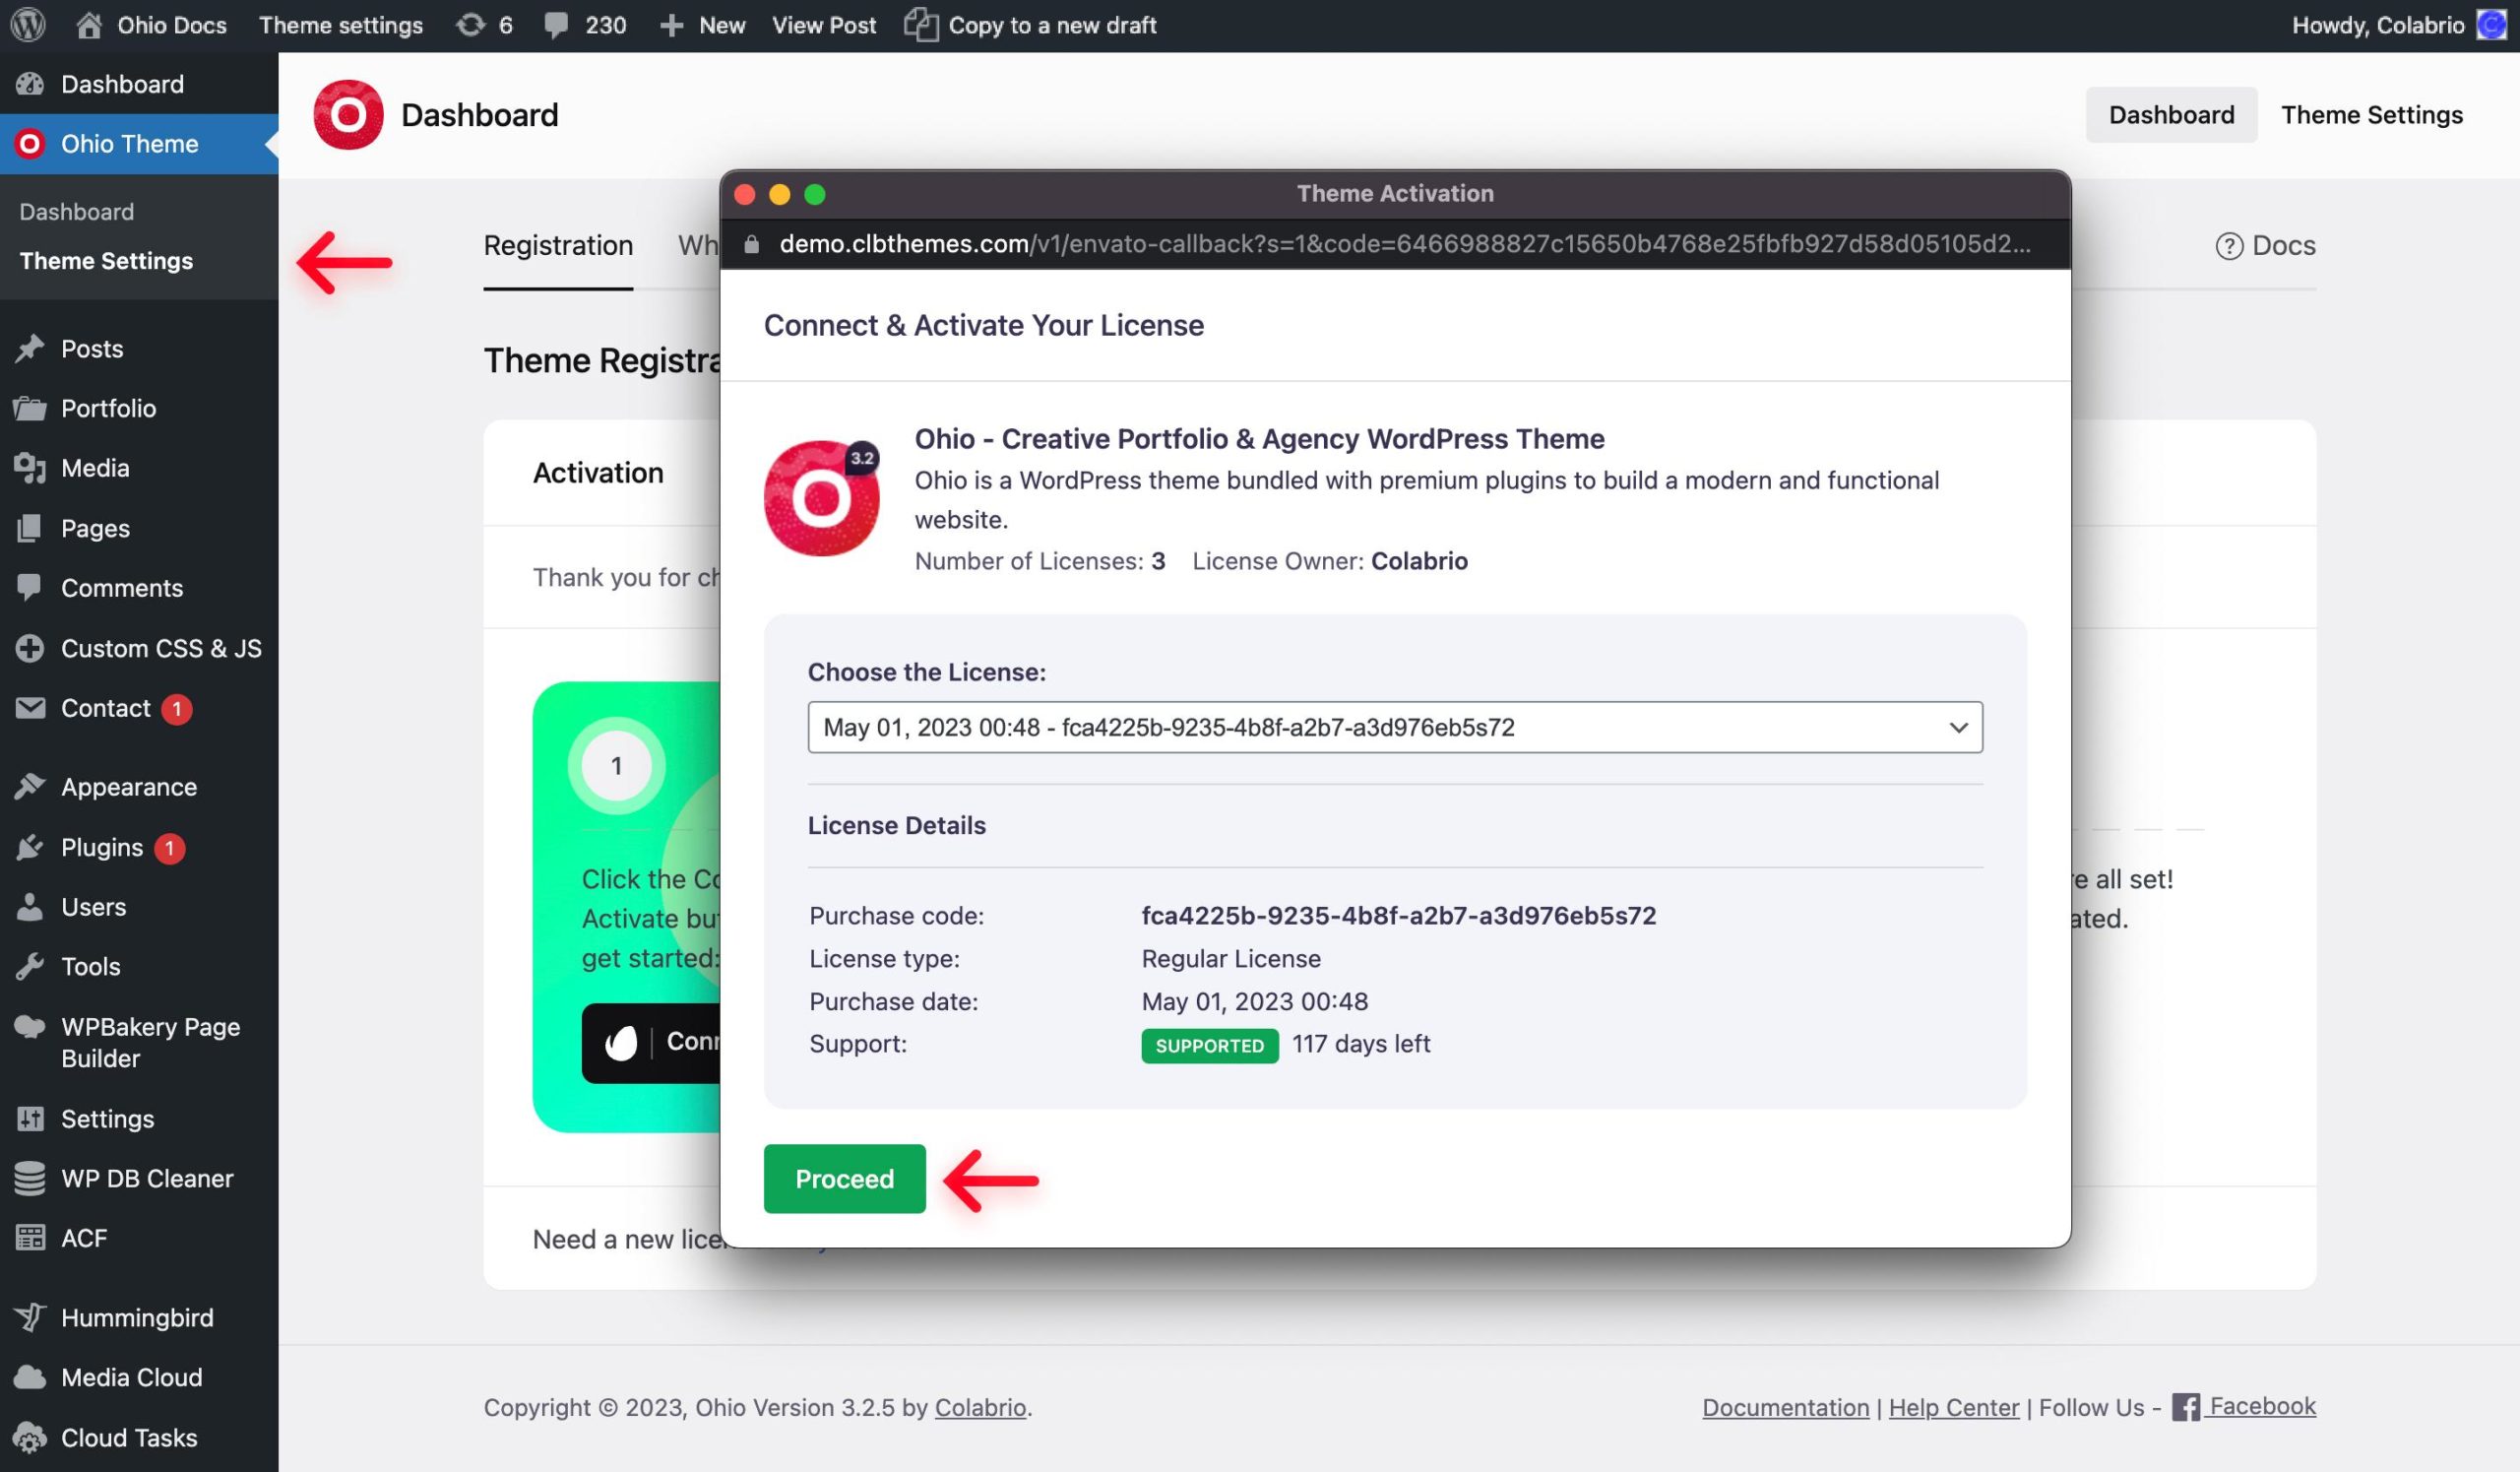
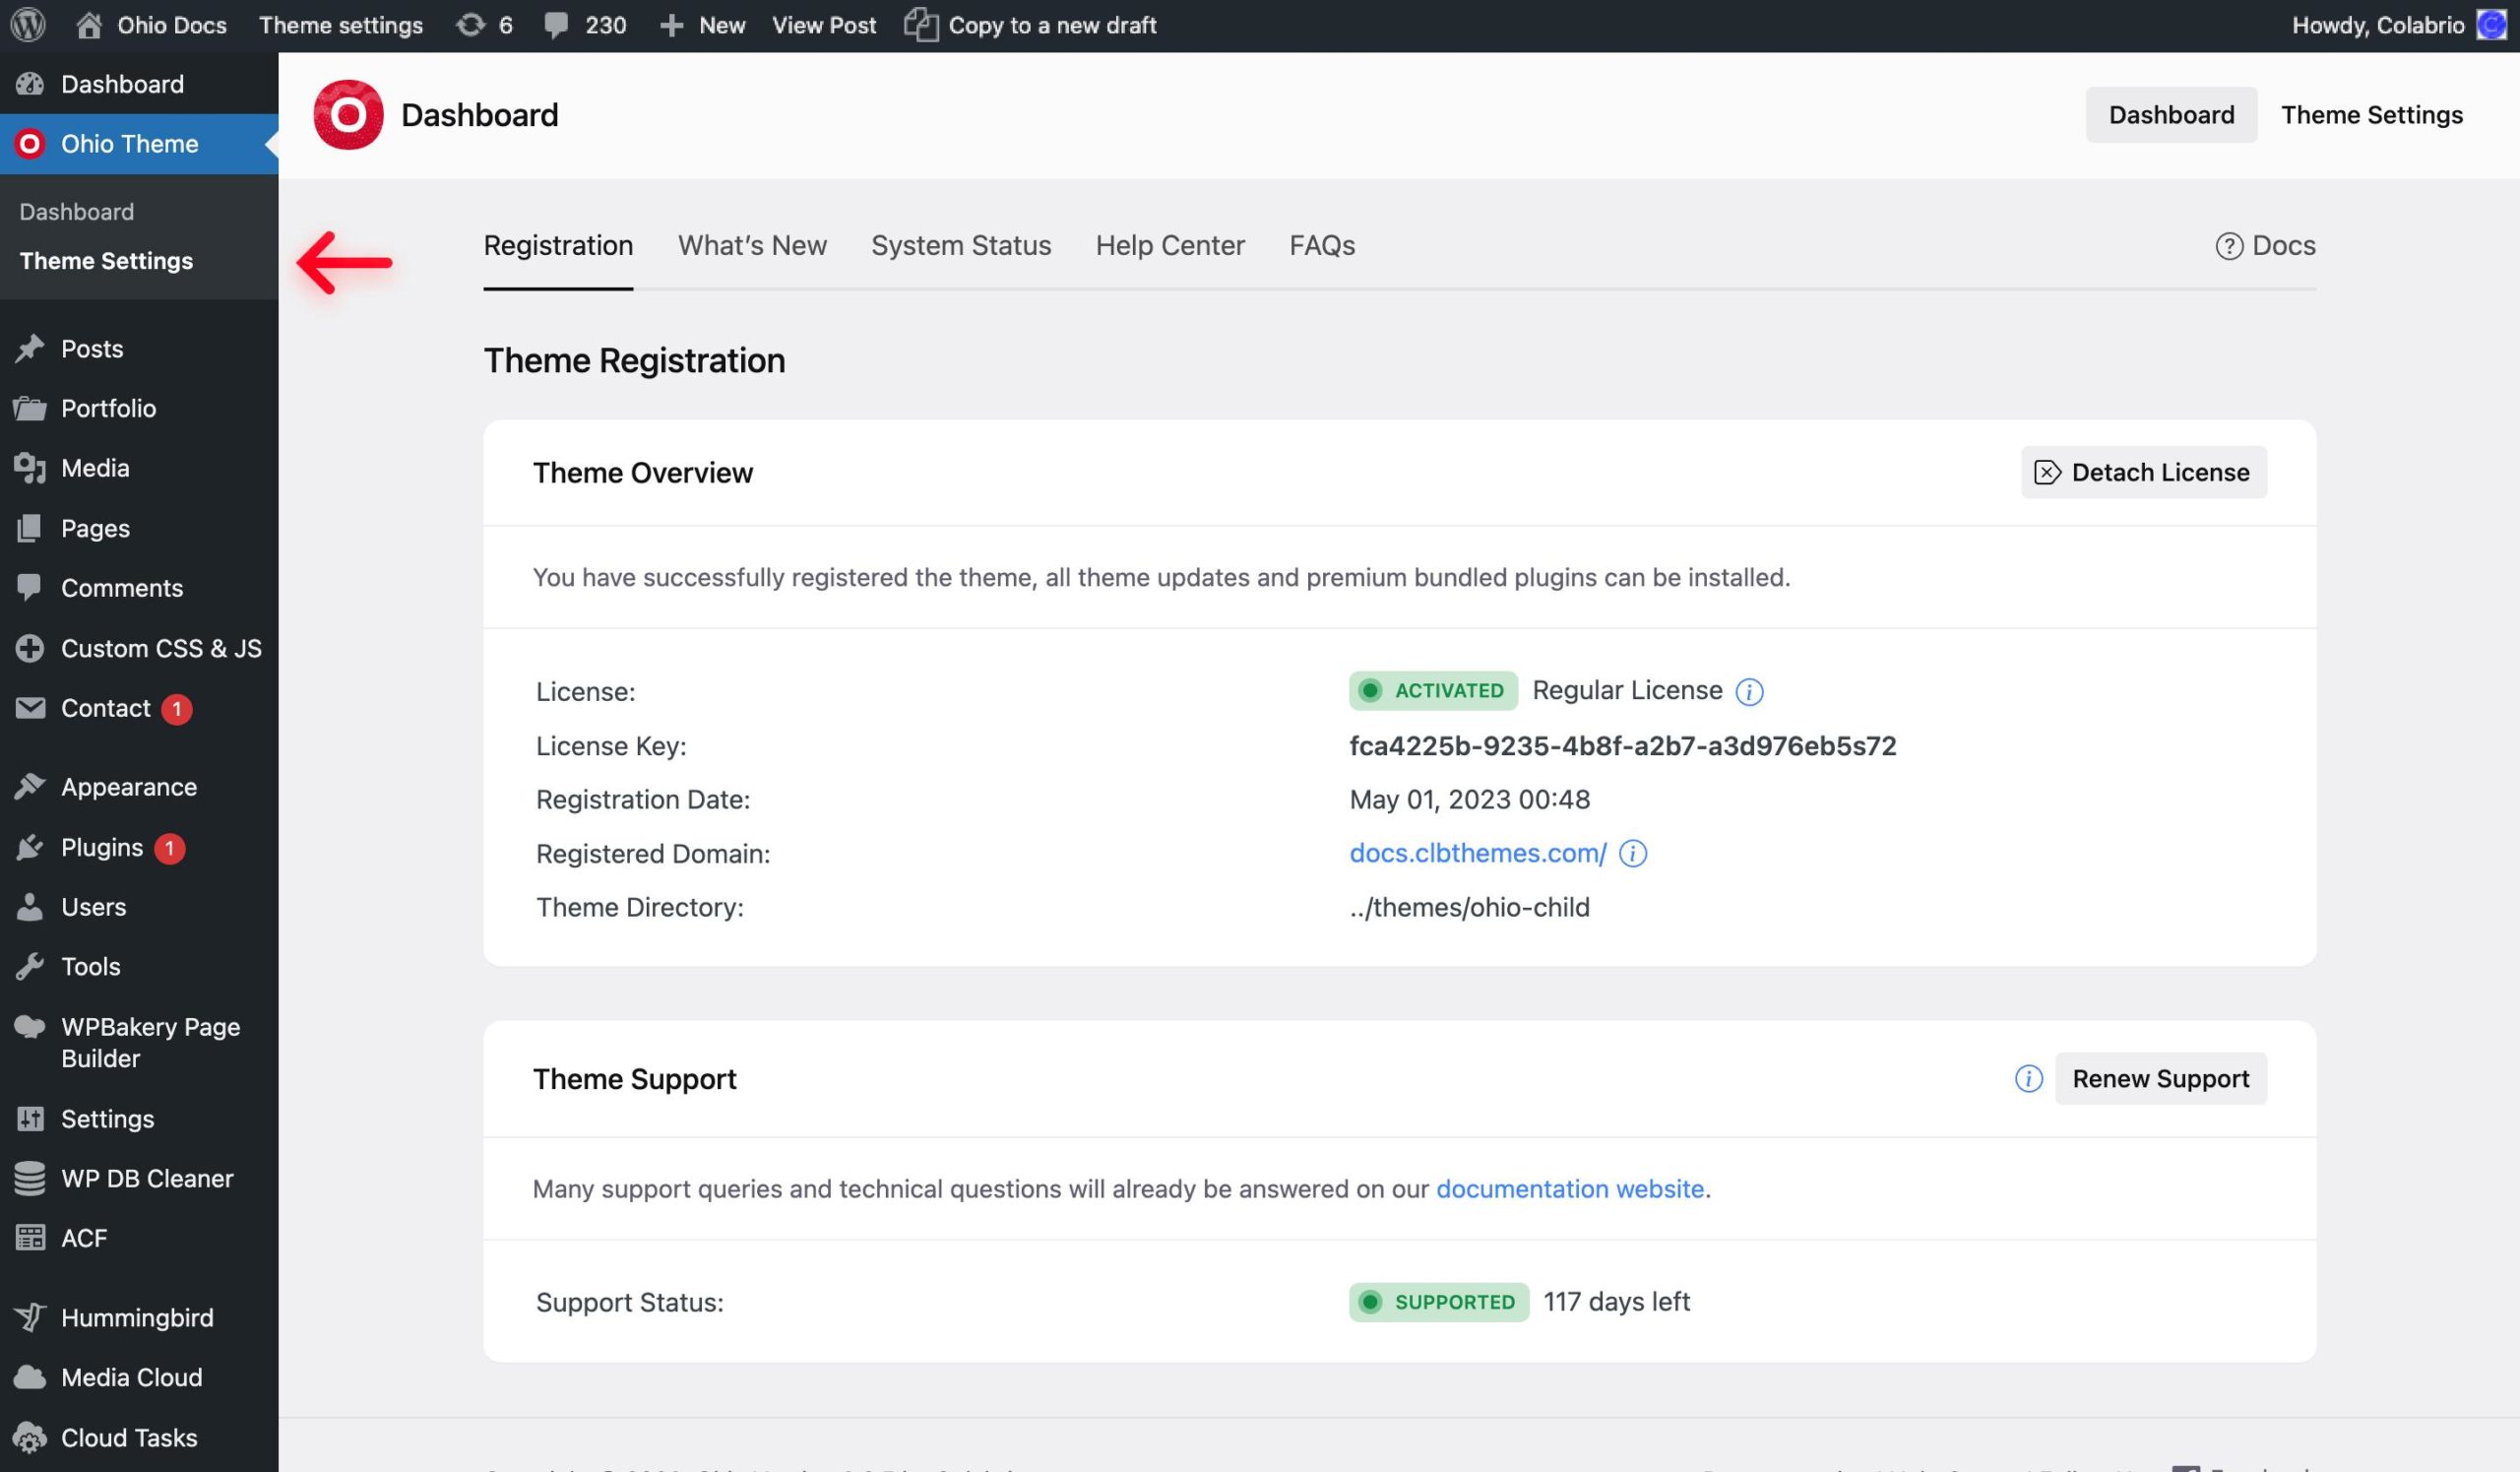
- From the WordPress dashboard go to Ohio Theme → Dashboard;
- Follow the activation steps in the Activation area;
- That’s it, you are all set! The product is activated and you can import the demo content.
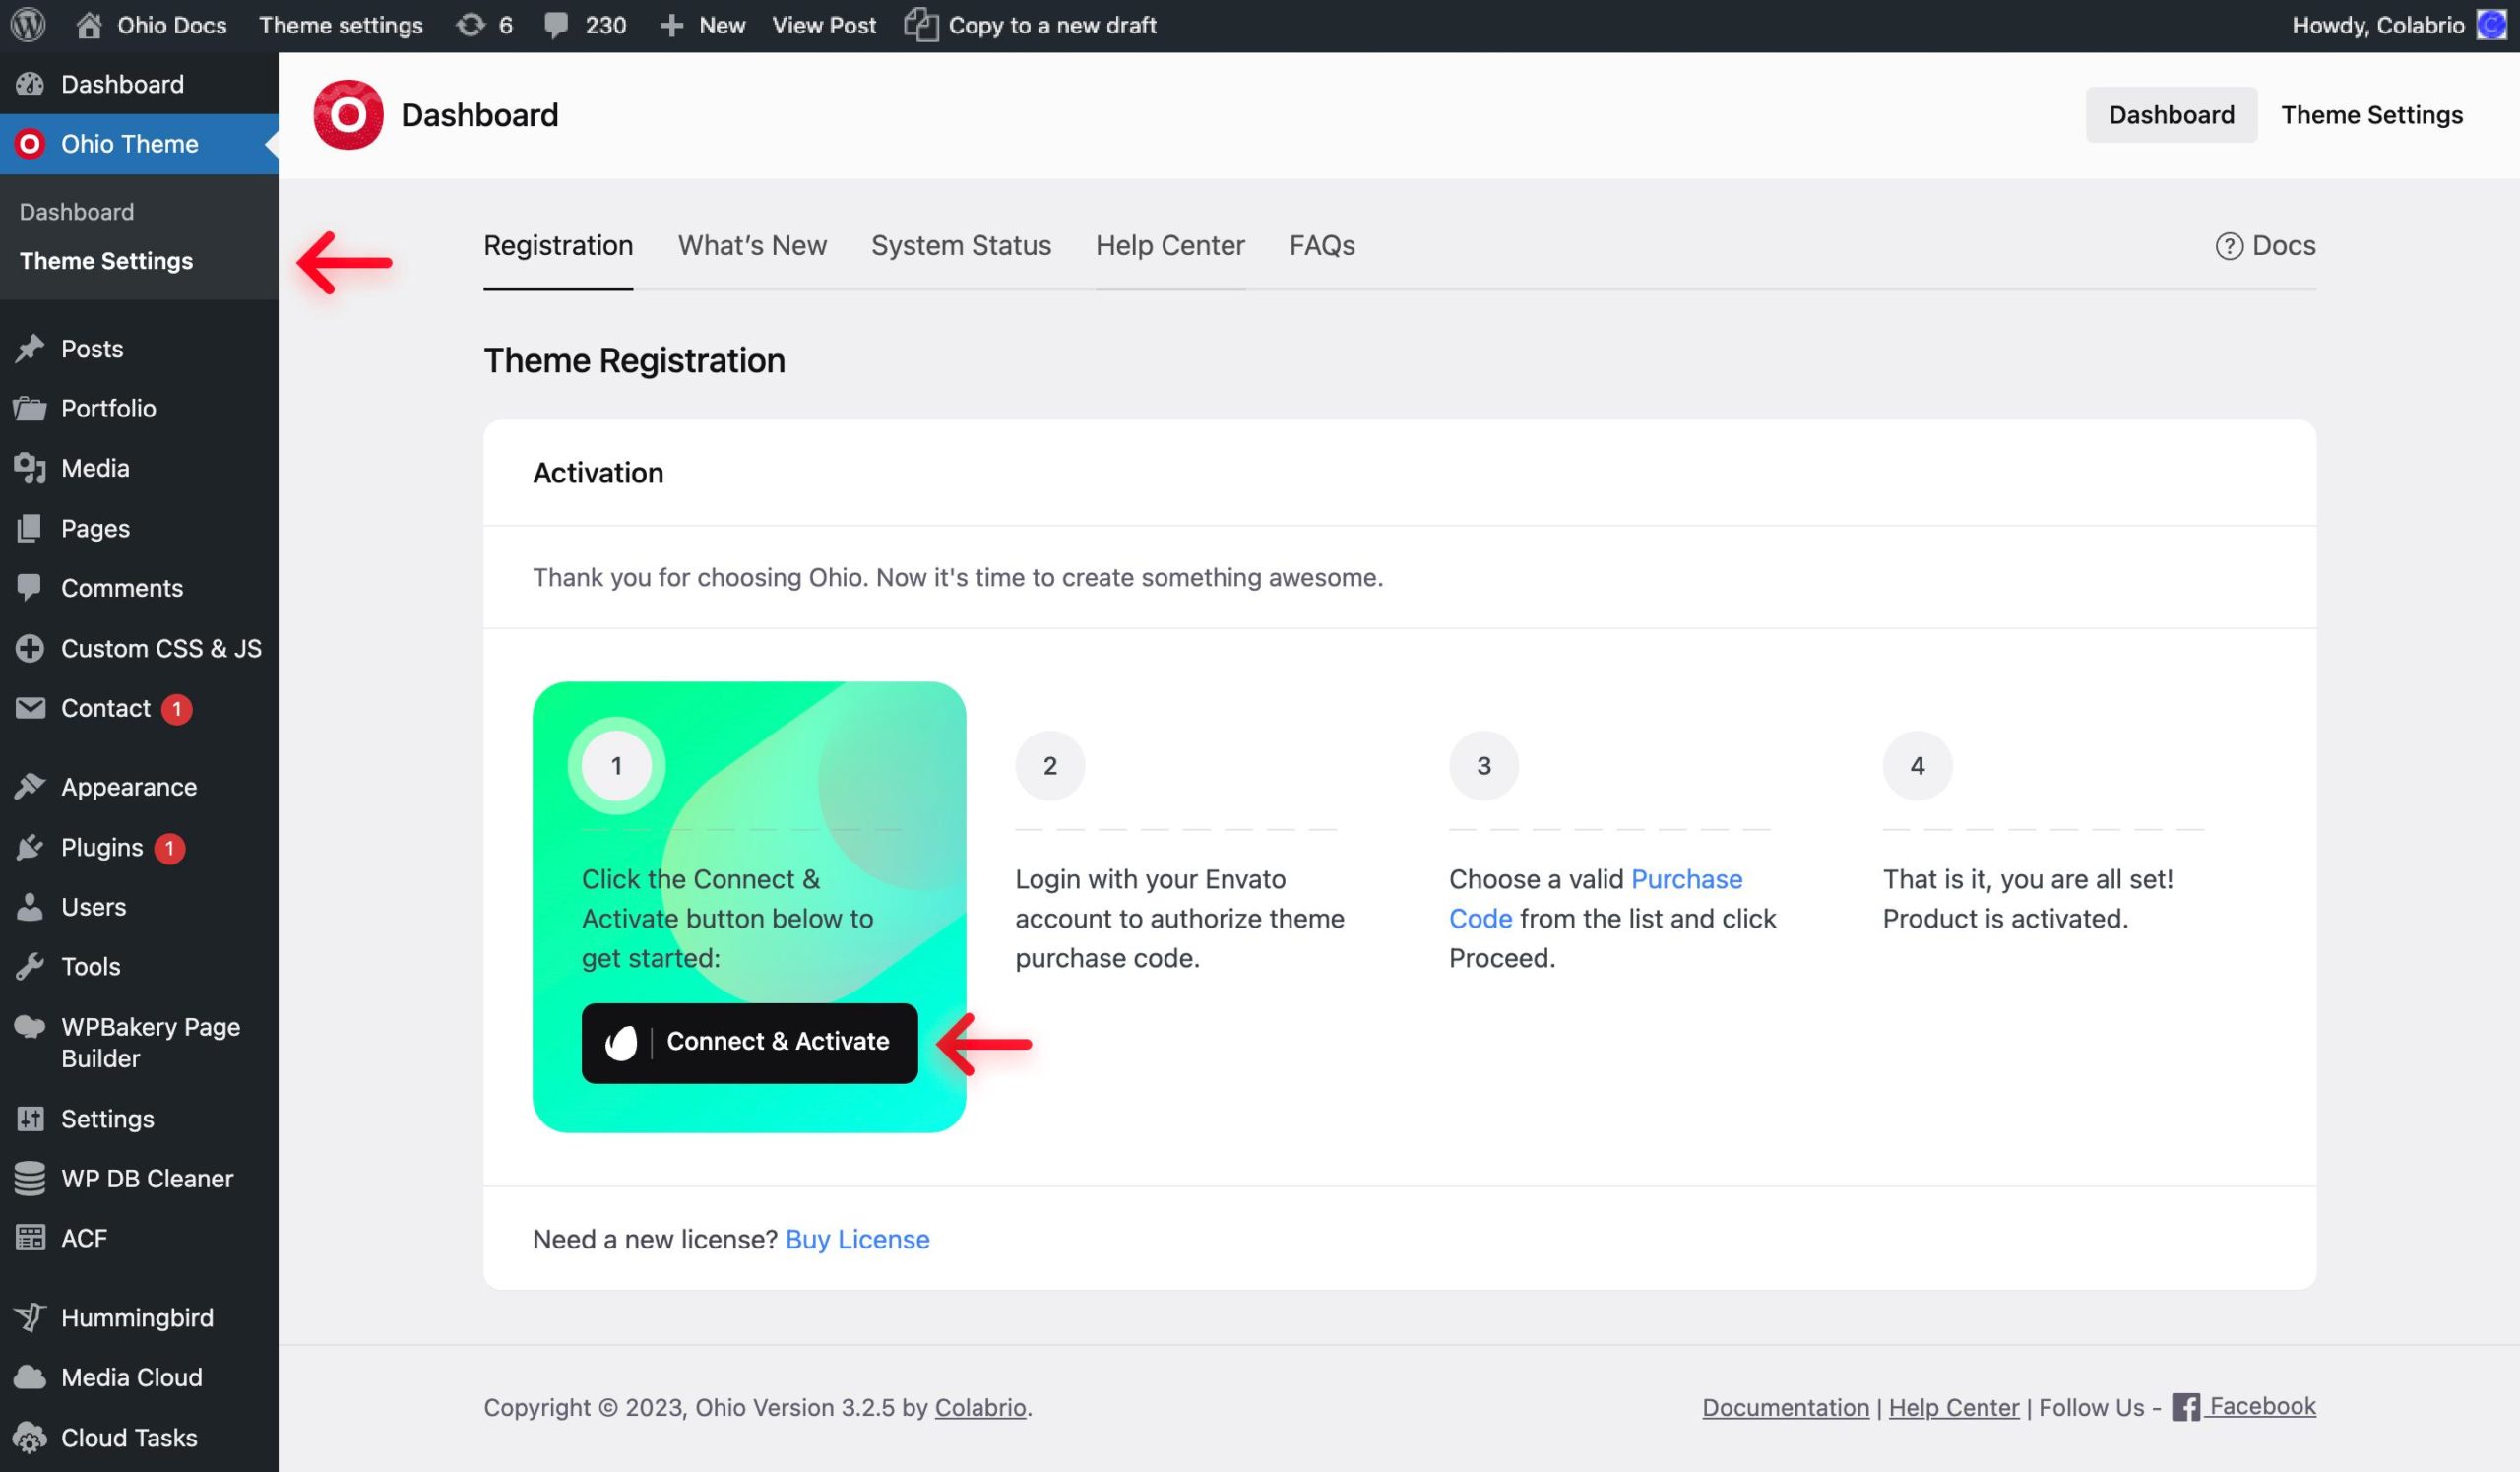
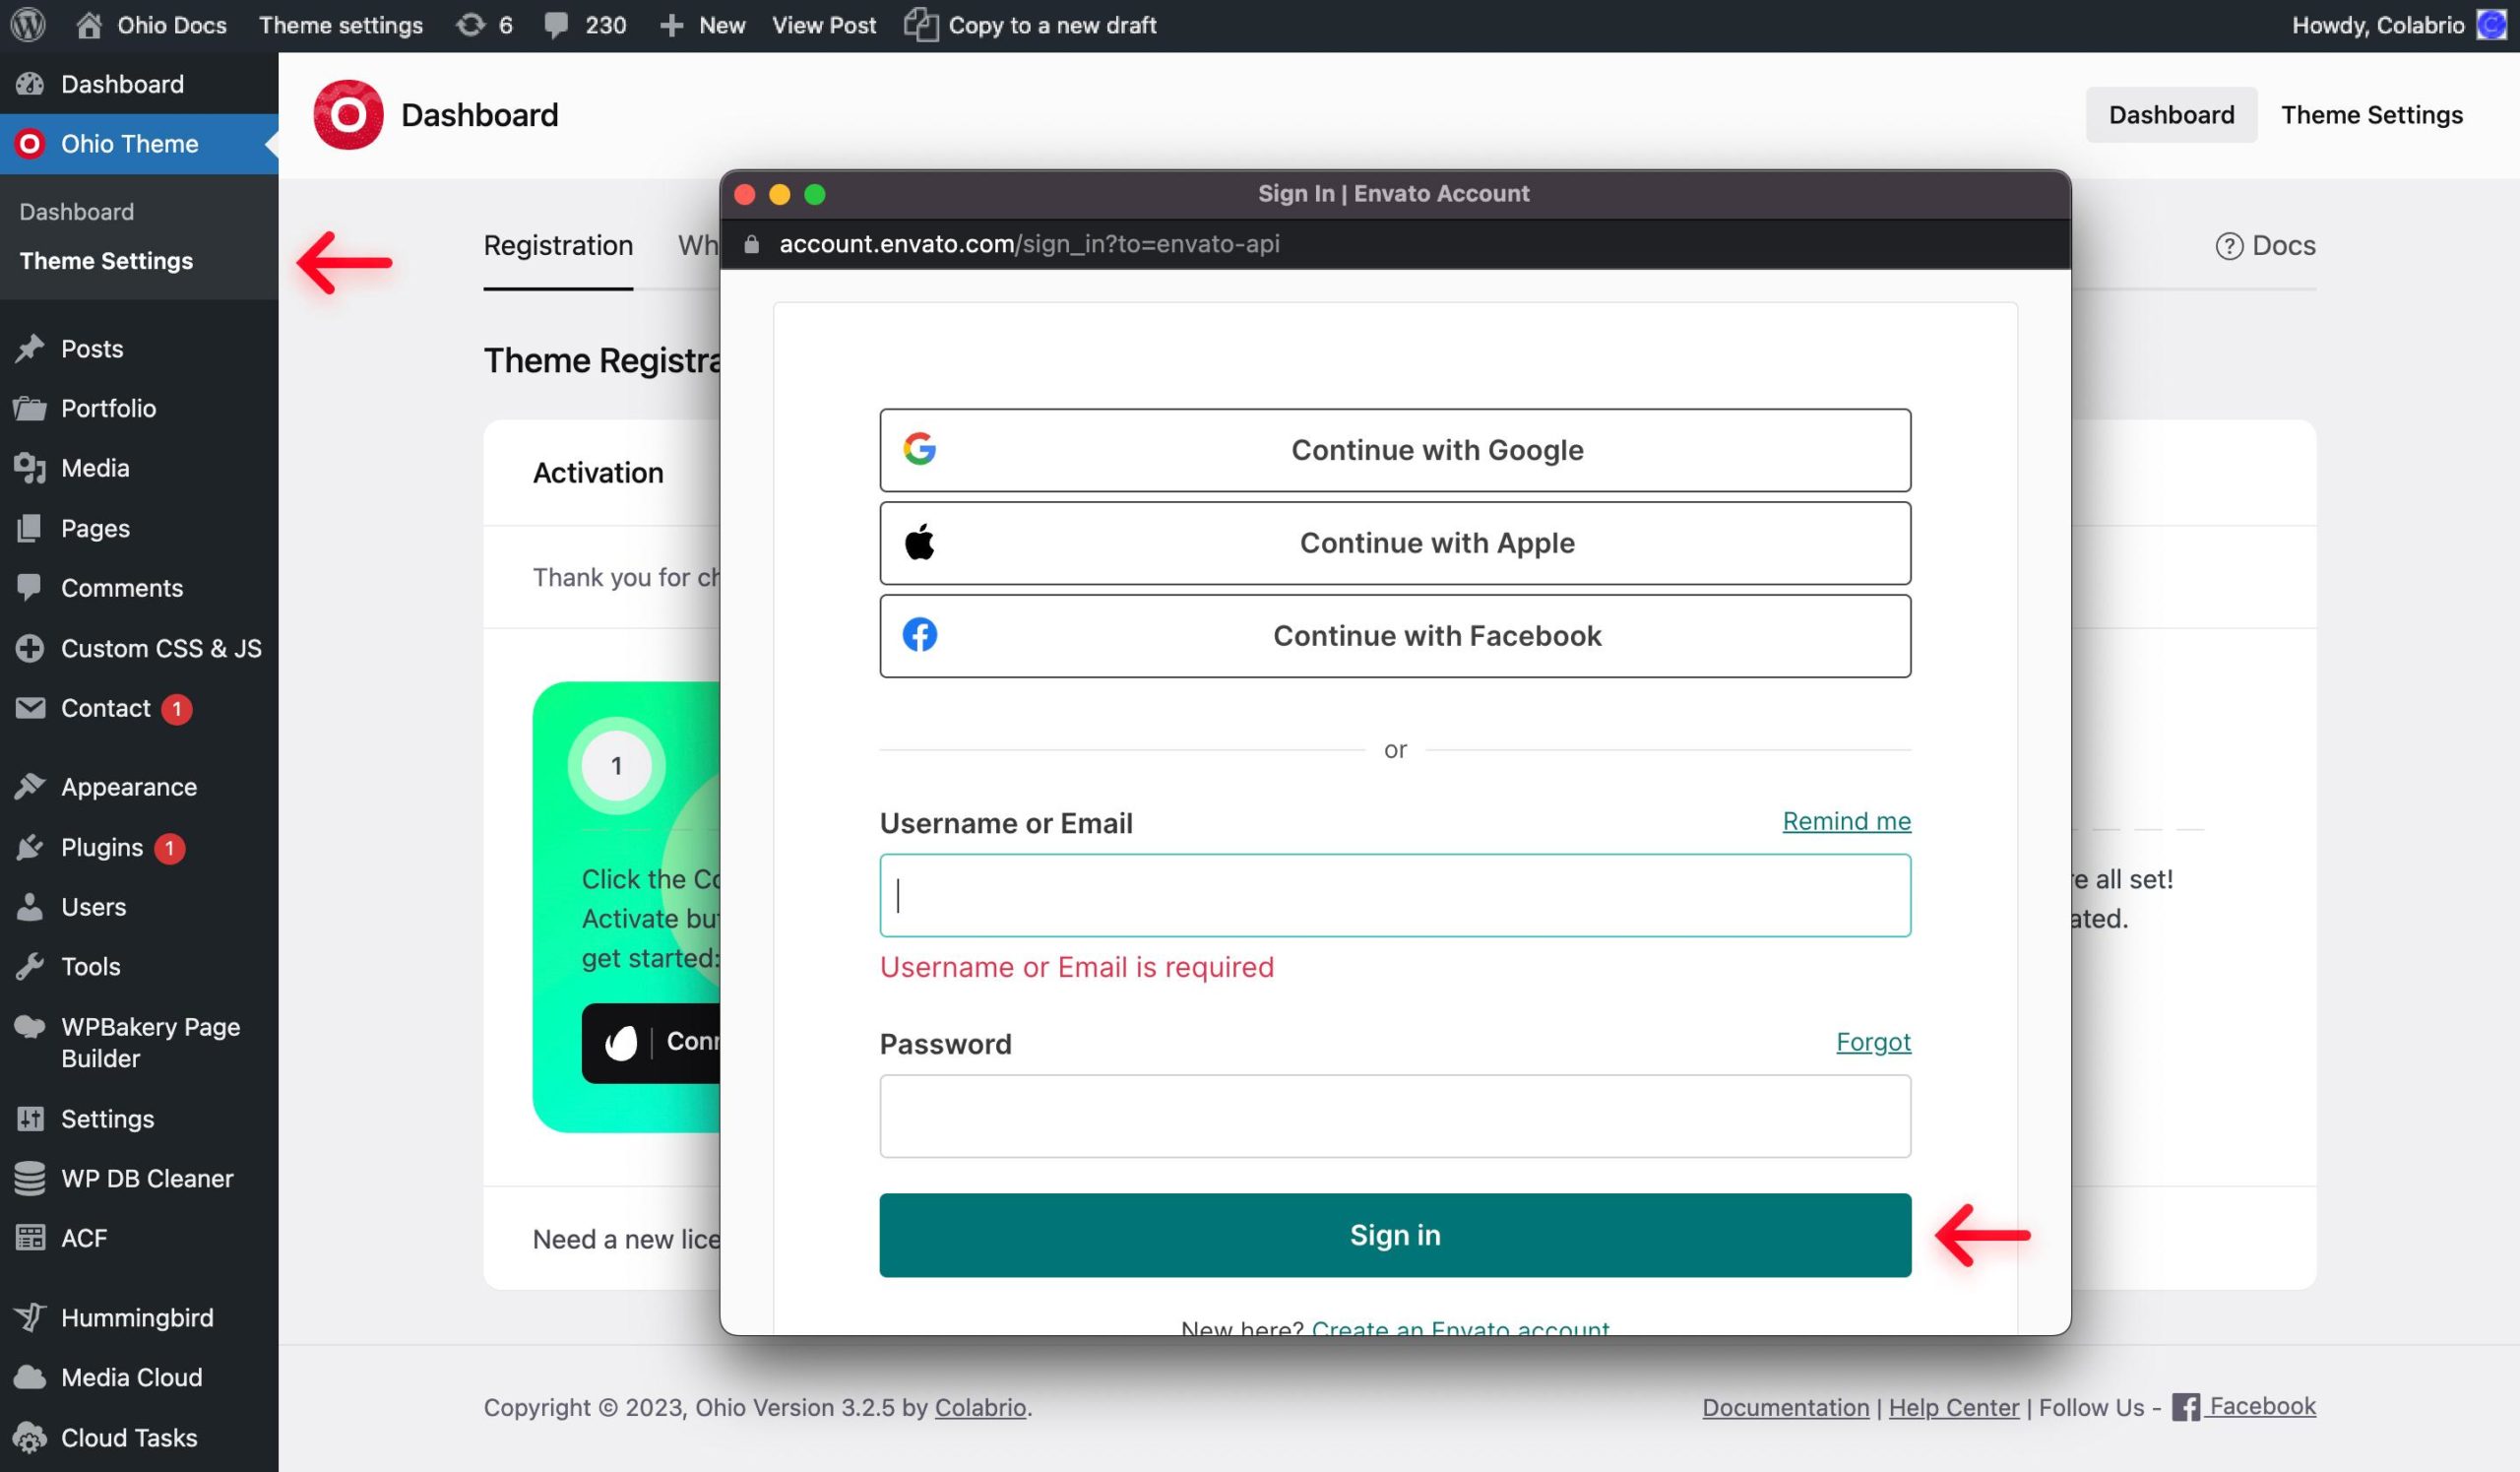
We always update our themes with new features, bug fixes, and improvements.
You can easily update your Ohio theme and enable its auto-updating feature by using Envato Market plugin. It comes with Ohio and can be installed directly from your WordPress dashboard under Appearance > Install Plugins menu.
You have to perform the following steps:
- Go to https://build.envato.com/create-token/ page and generate an Envato API token;
- Give your token a name, agree to the terms and click on the “Create Token” button;
- Copy the generated token;
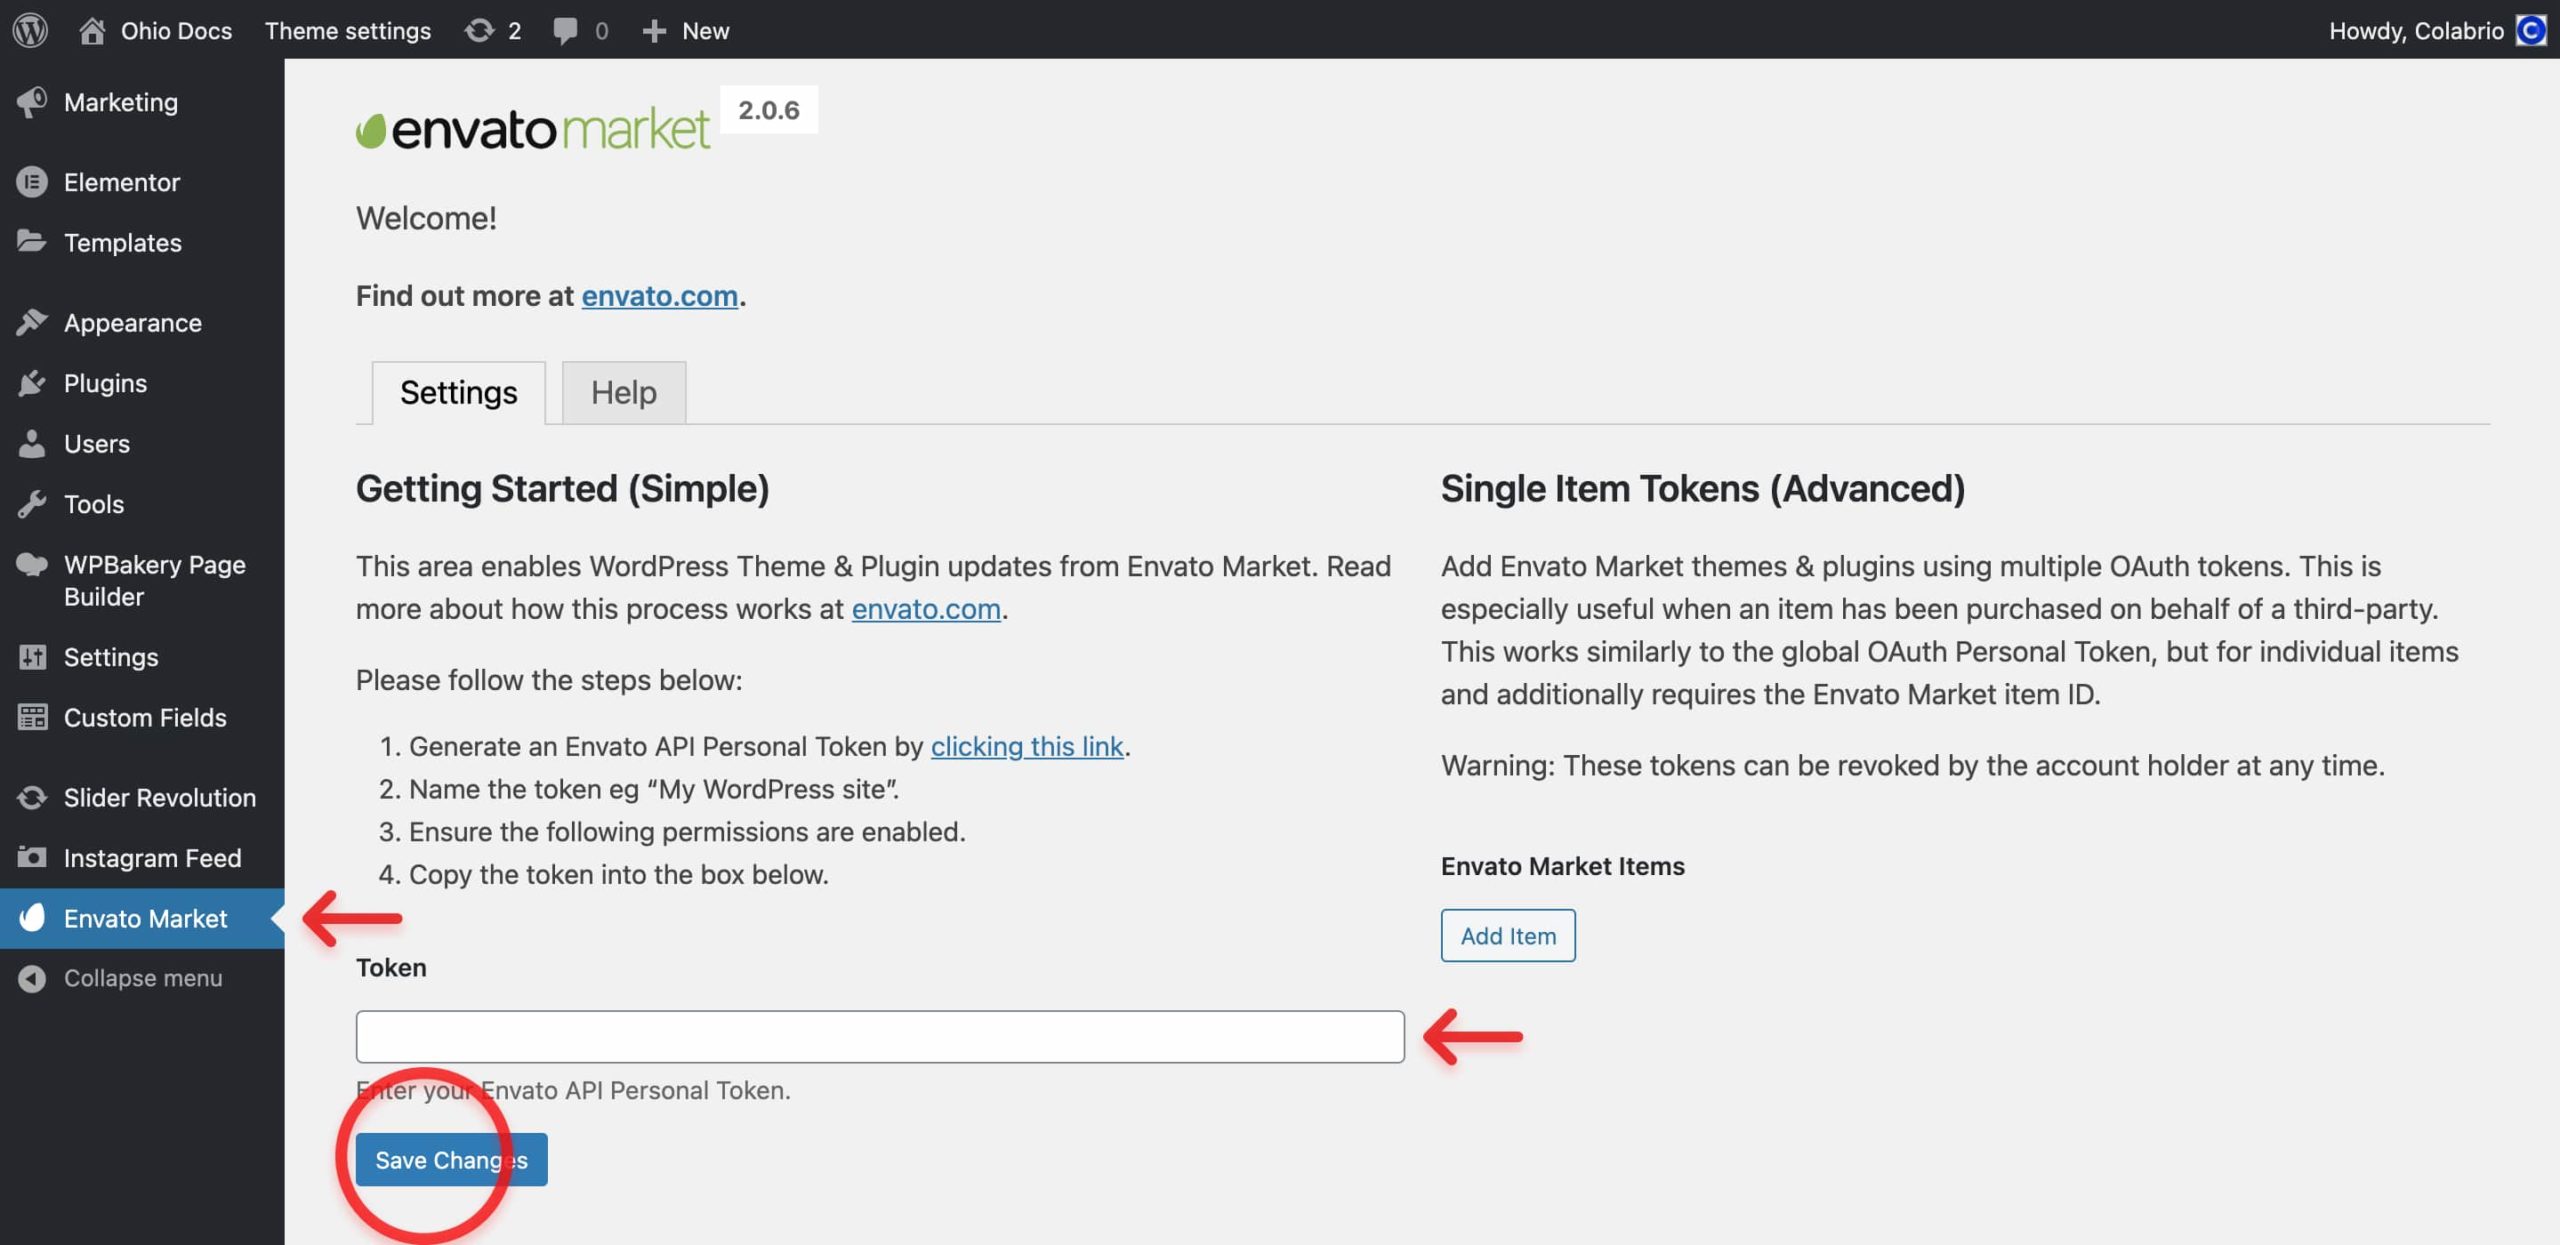
- From the WordPress dashboard go to Envato Market and paste your token in the Token line;
- Finally don’t forget to save the changes.
Now that you have the Envato Market plugin set up, you can:
- From the WordPress dashboard go to Appearance → Themes and see if there is any updates.
Alternatively you can update your theme manually, the same way it is installed manually via FTP. This will not erase your current pages/settings and is a valid updating option.
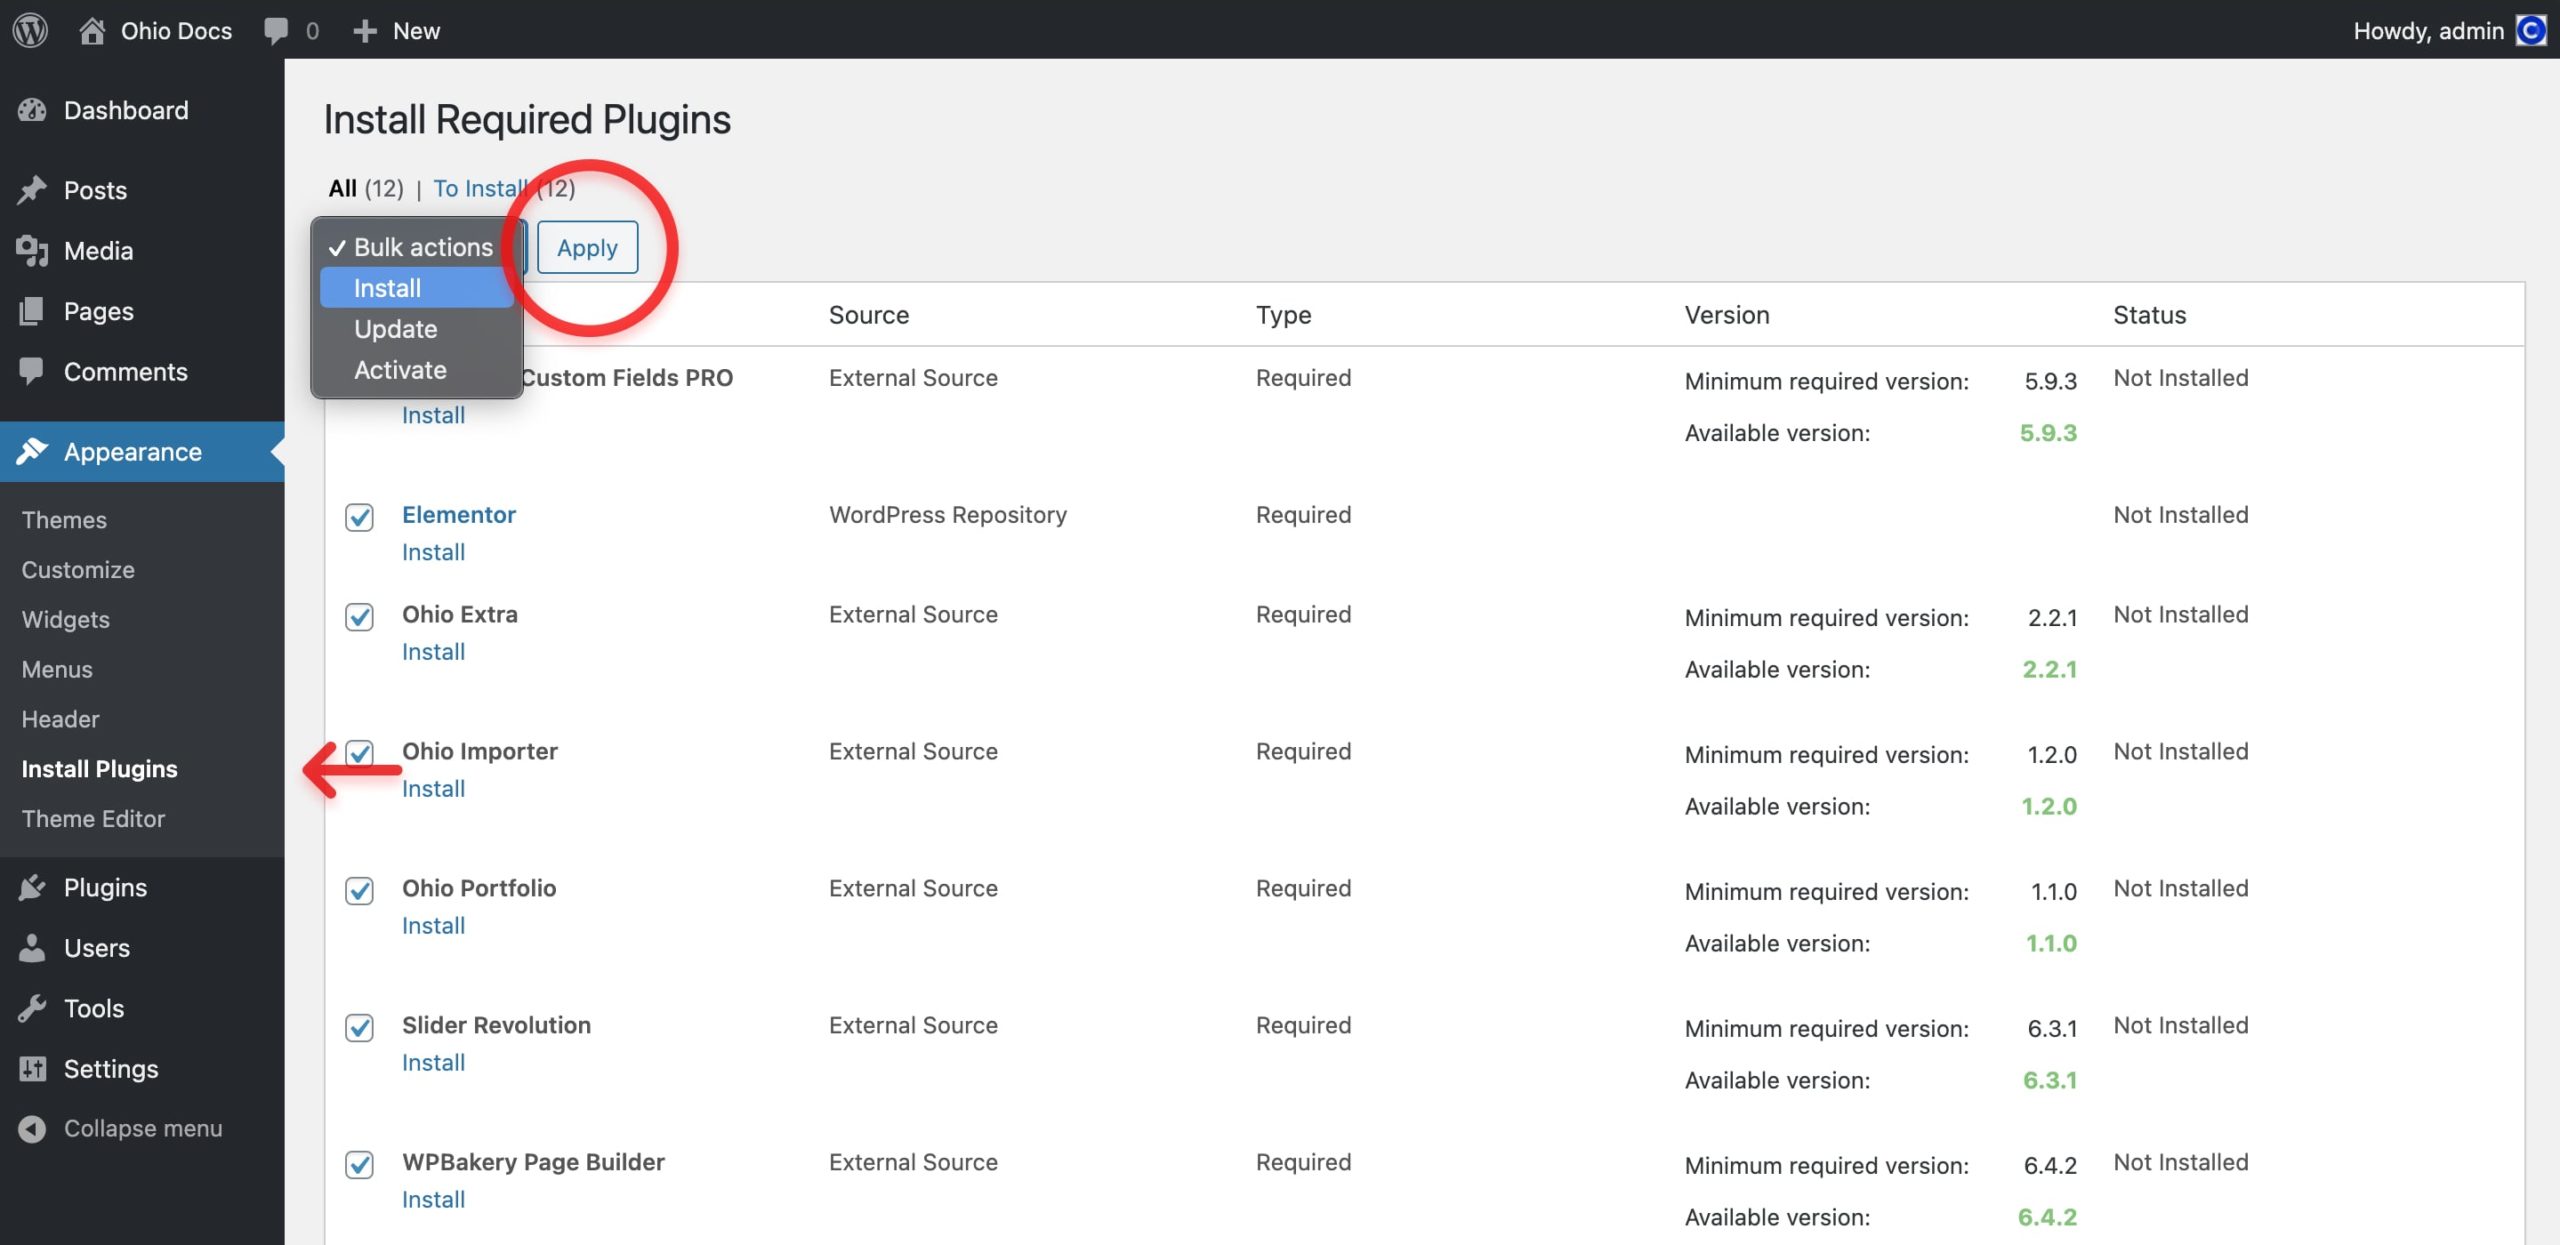
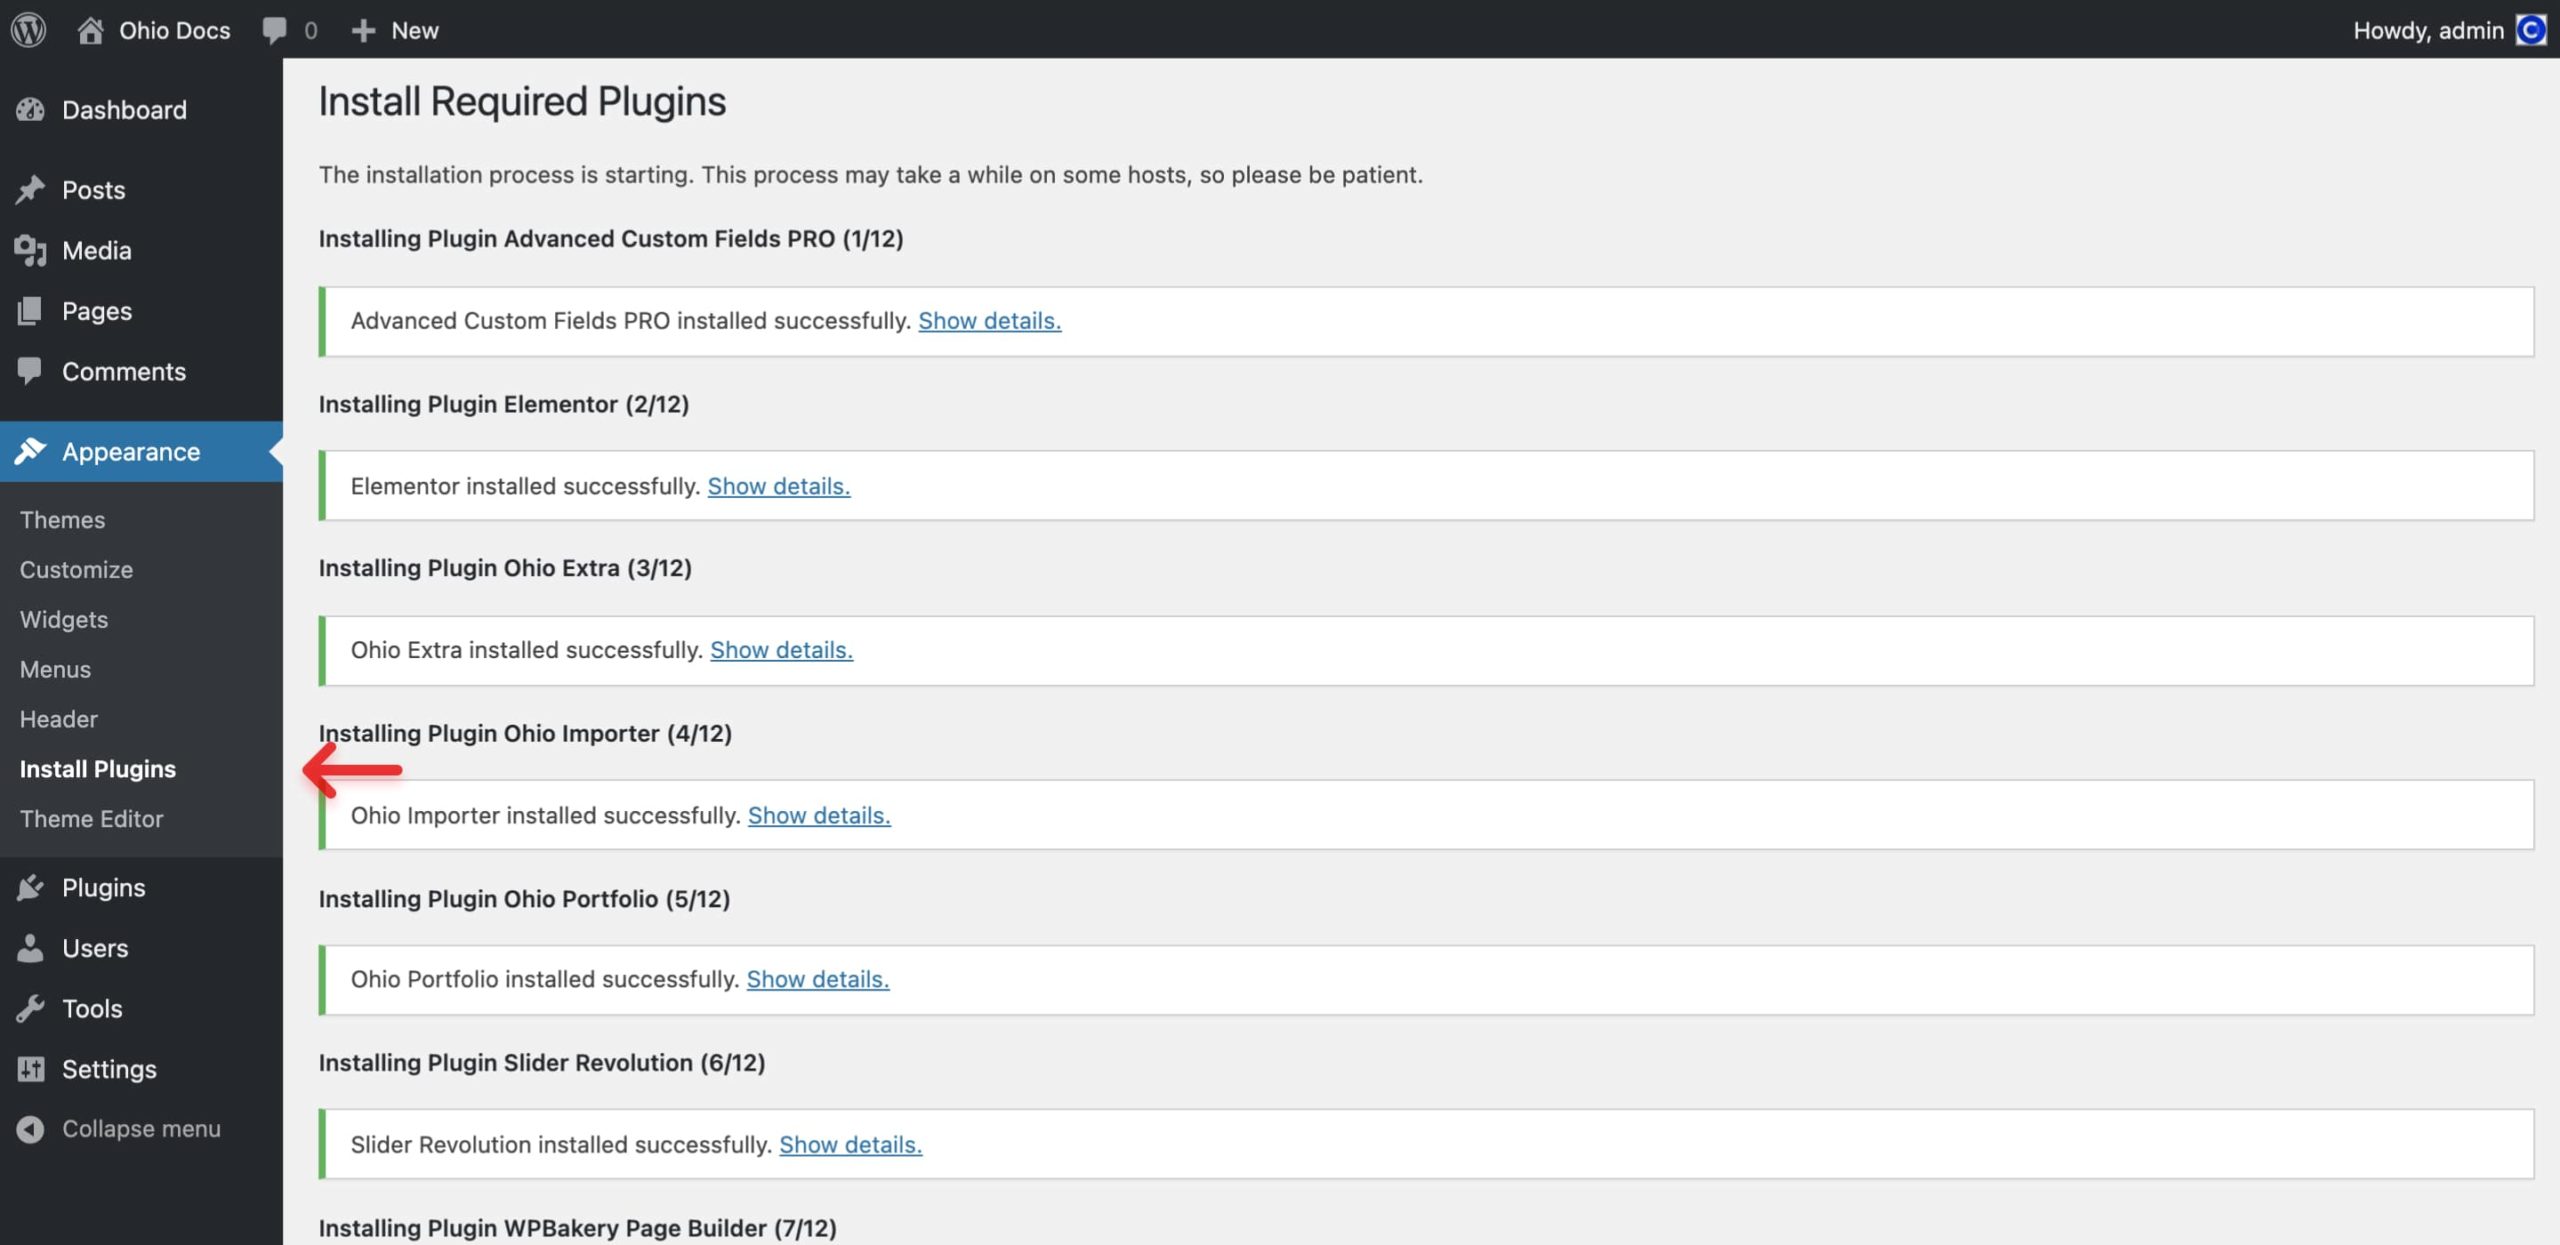
Ohio theme requires a set of core and additional plugins to function correctly. A plugin is an additional component that offers functionality and features beyond a typical WordPress installation. Without them, most of its functionality is not available. After installing the theme you will be prompted to install the required plugins at the top of your dashboard. Alternatively, you can:
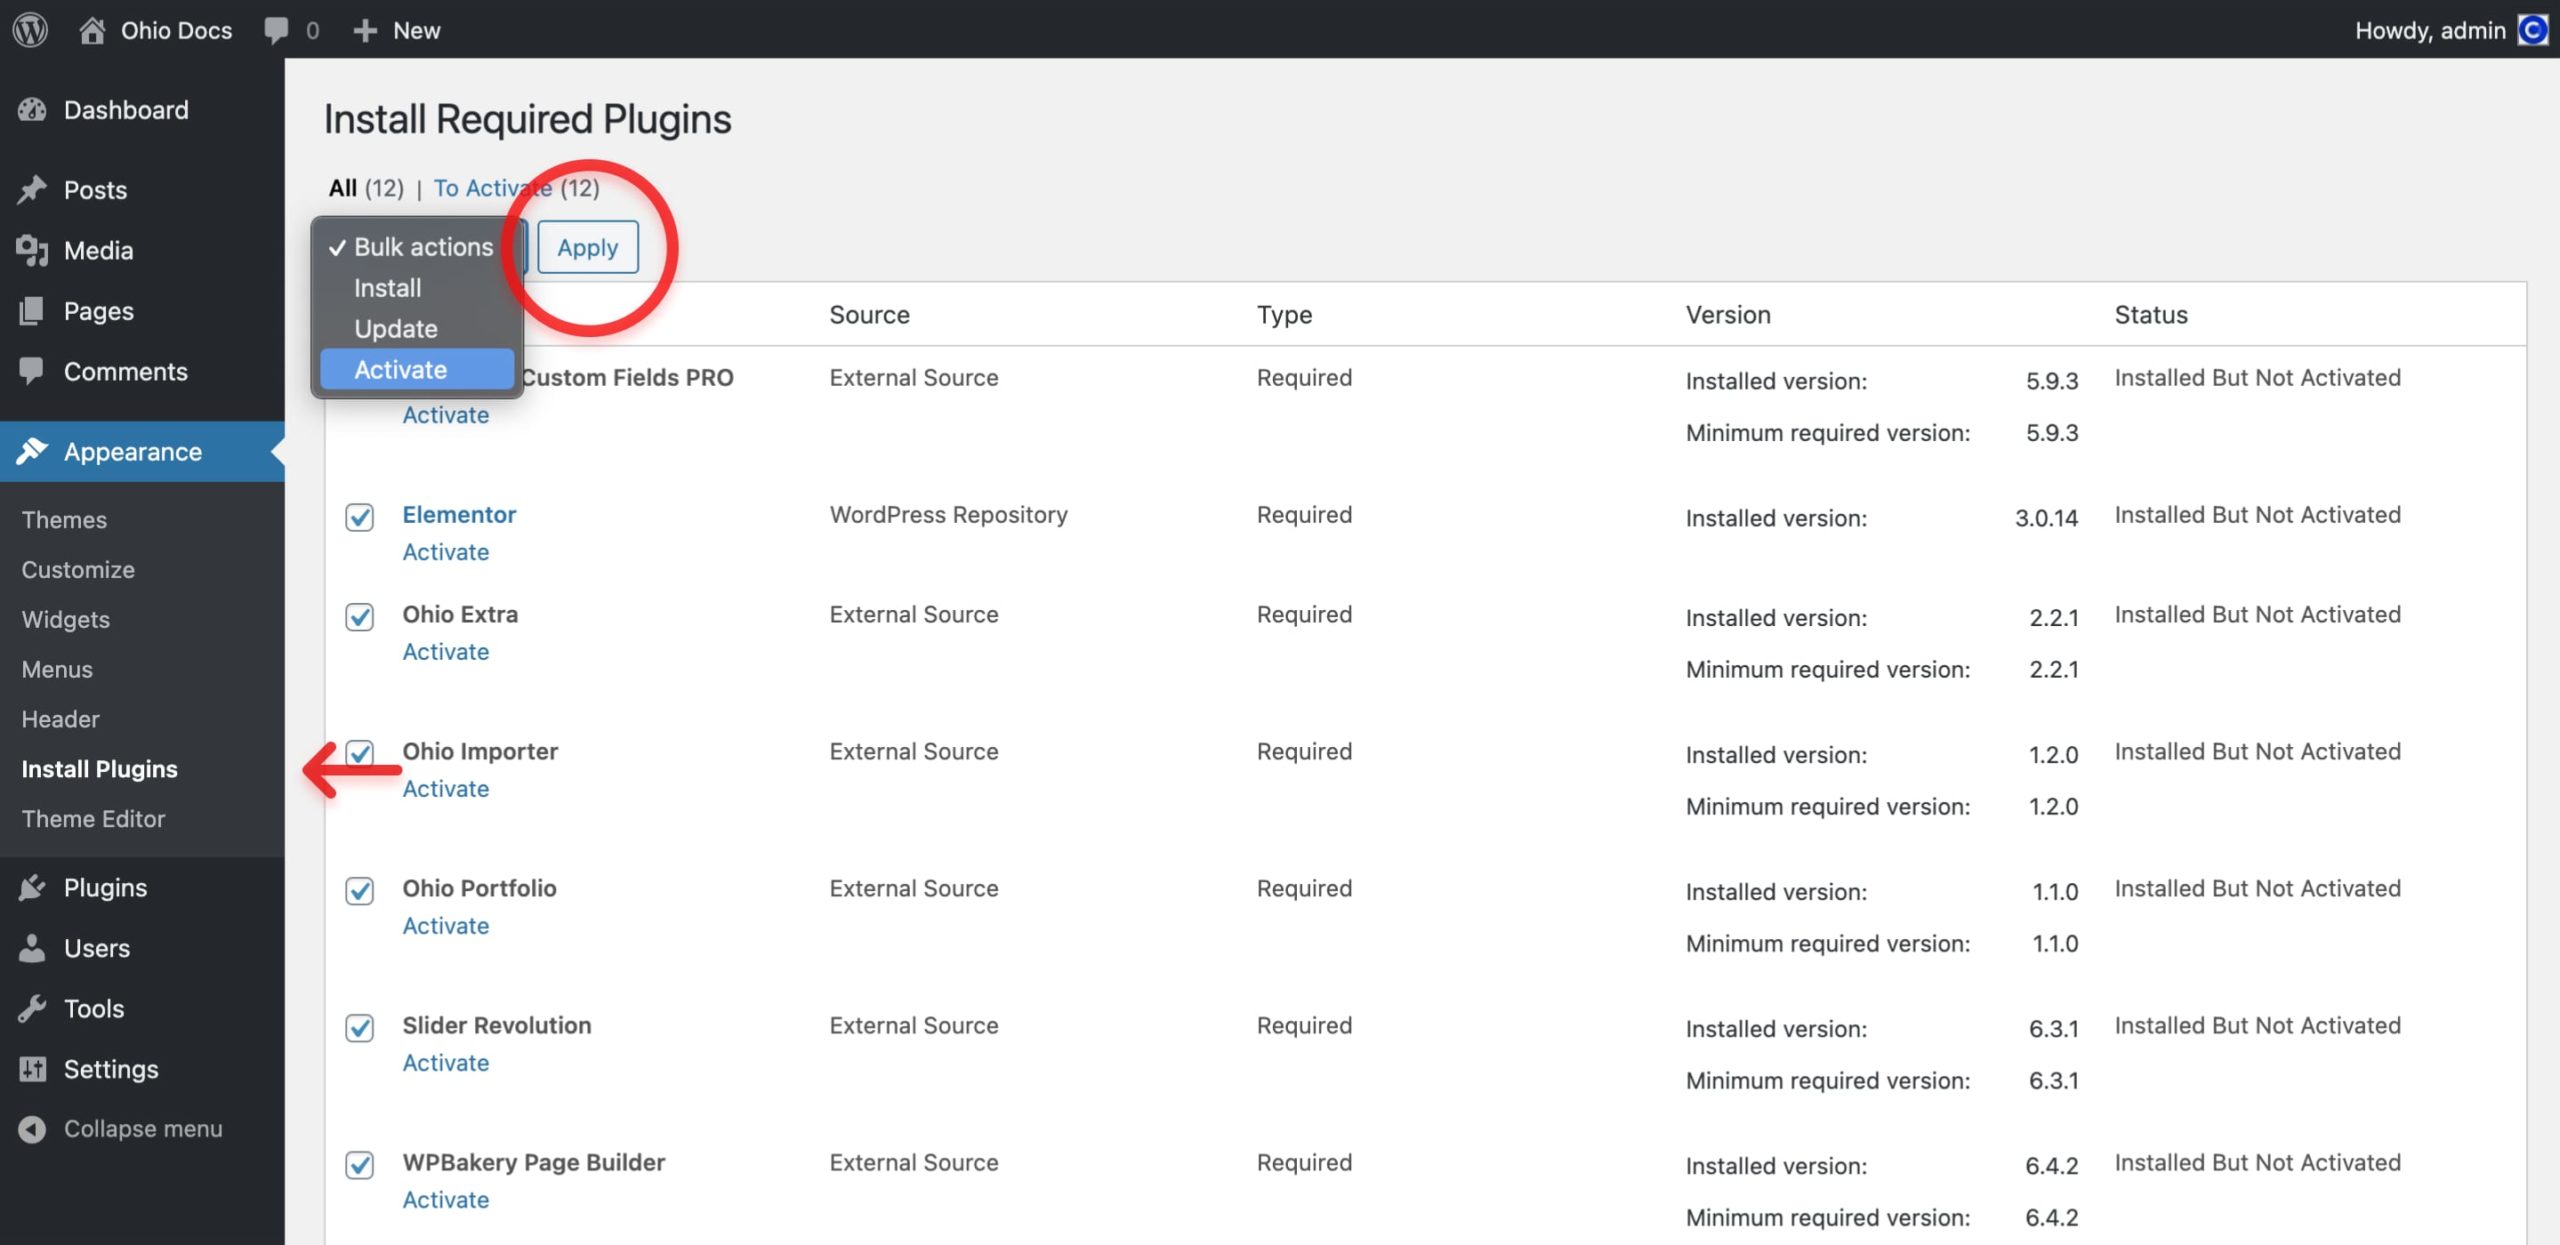
- From the WordPress dashboard go to Appearance → Install Plugins;
- Toggle all the required plugins and hint “Install”;
- The last step will be activating the plugins.
Ohio theme comes bundled with some premium plugins from CodeCanyon, such as WPBakery Bage Builder (formerly Visual Composer), Slider Revolution, and ACF Pro, that help to supercharge your website with features beyond a typical WordPress installation.
Bundled plugins offer the same core features and functionality as the standalone version of the item on CodeCanyon.
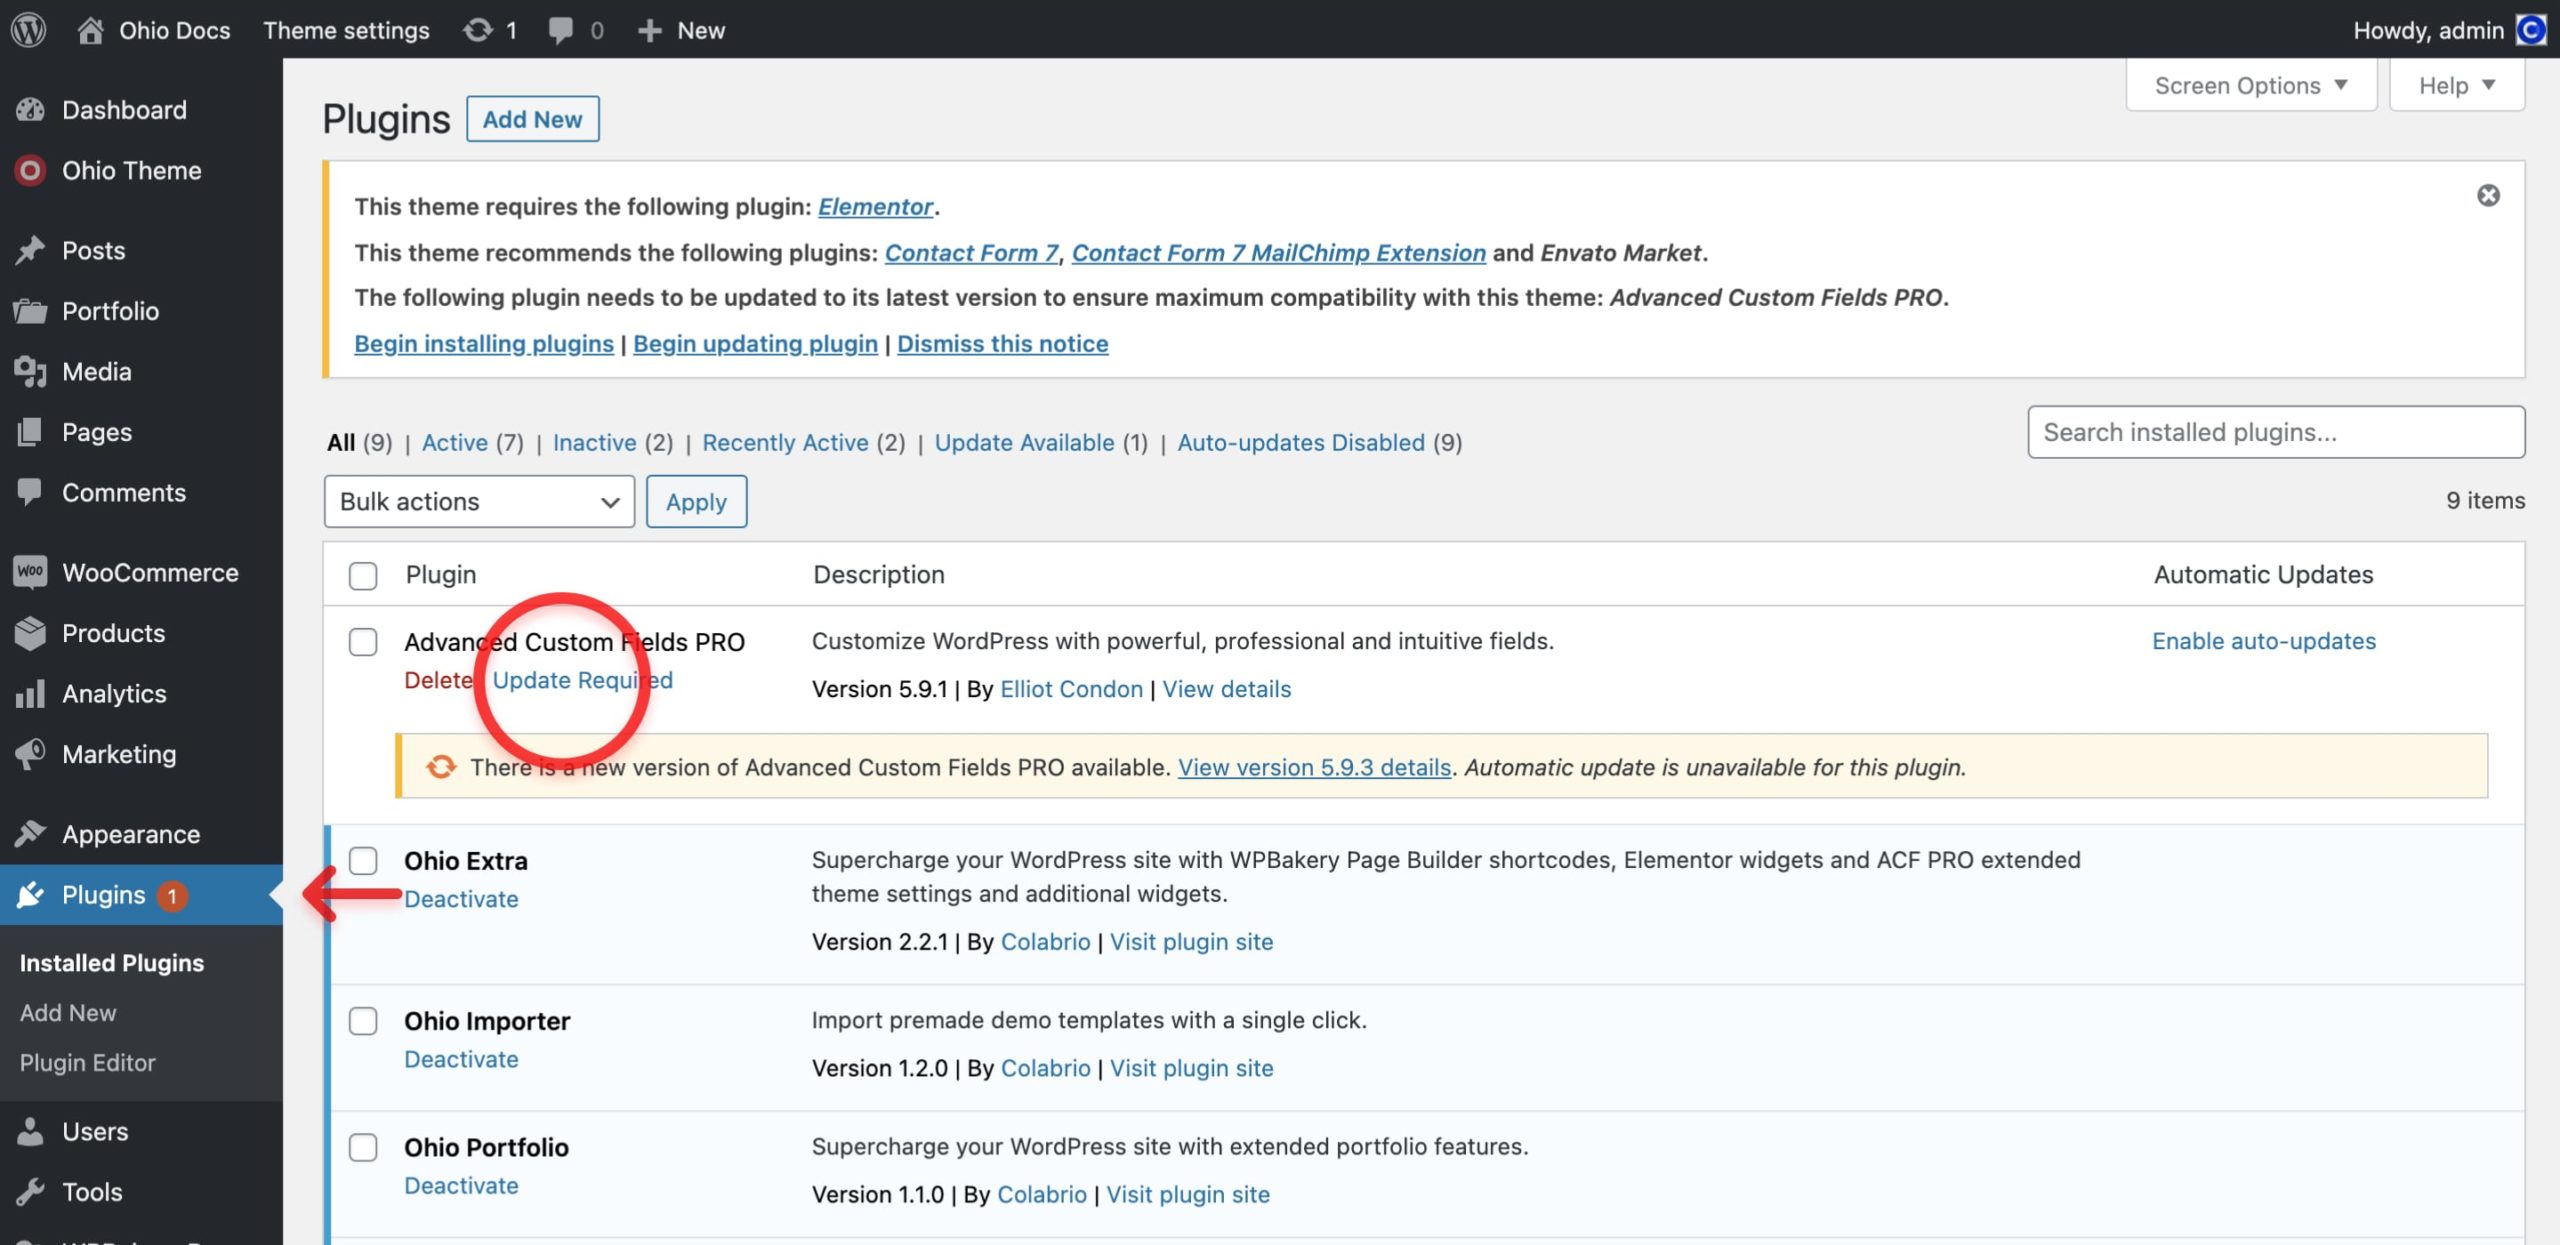
If you’ve received an alert about a plugin that needs to be updated, this could be because the new version of the plugin was recently released.
To get the latest version:
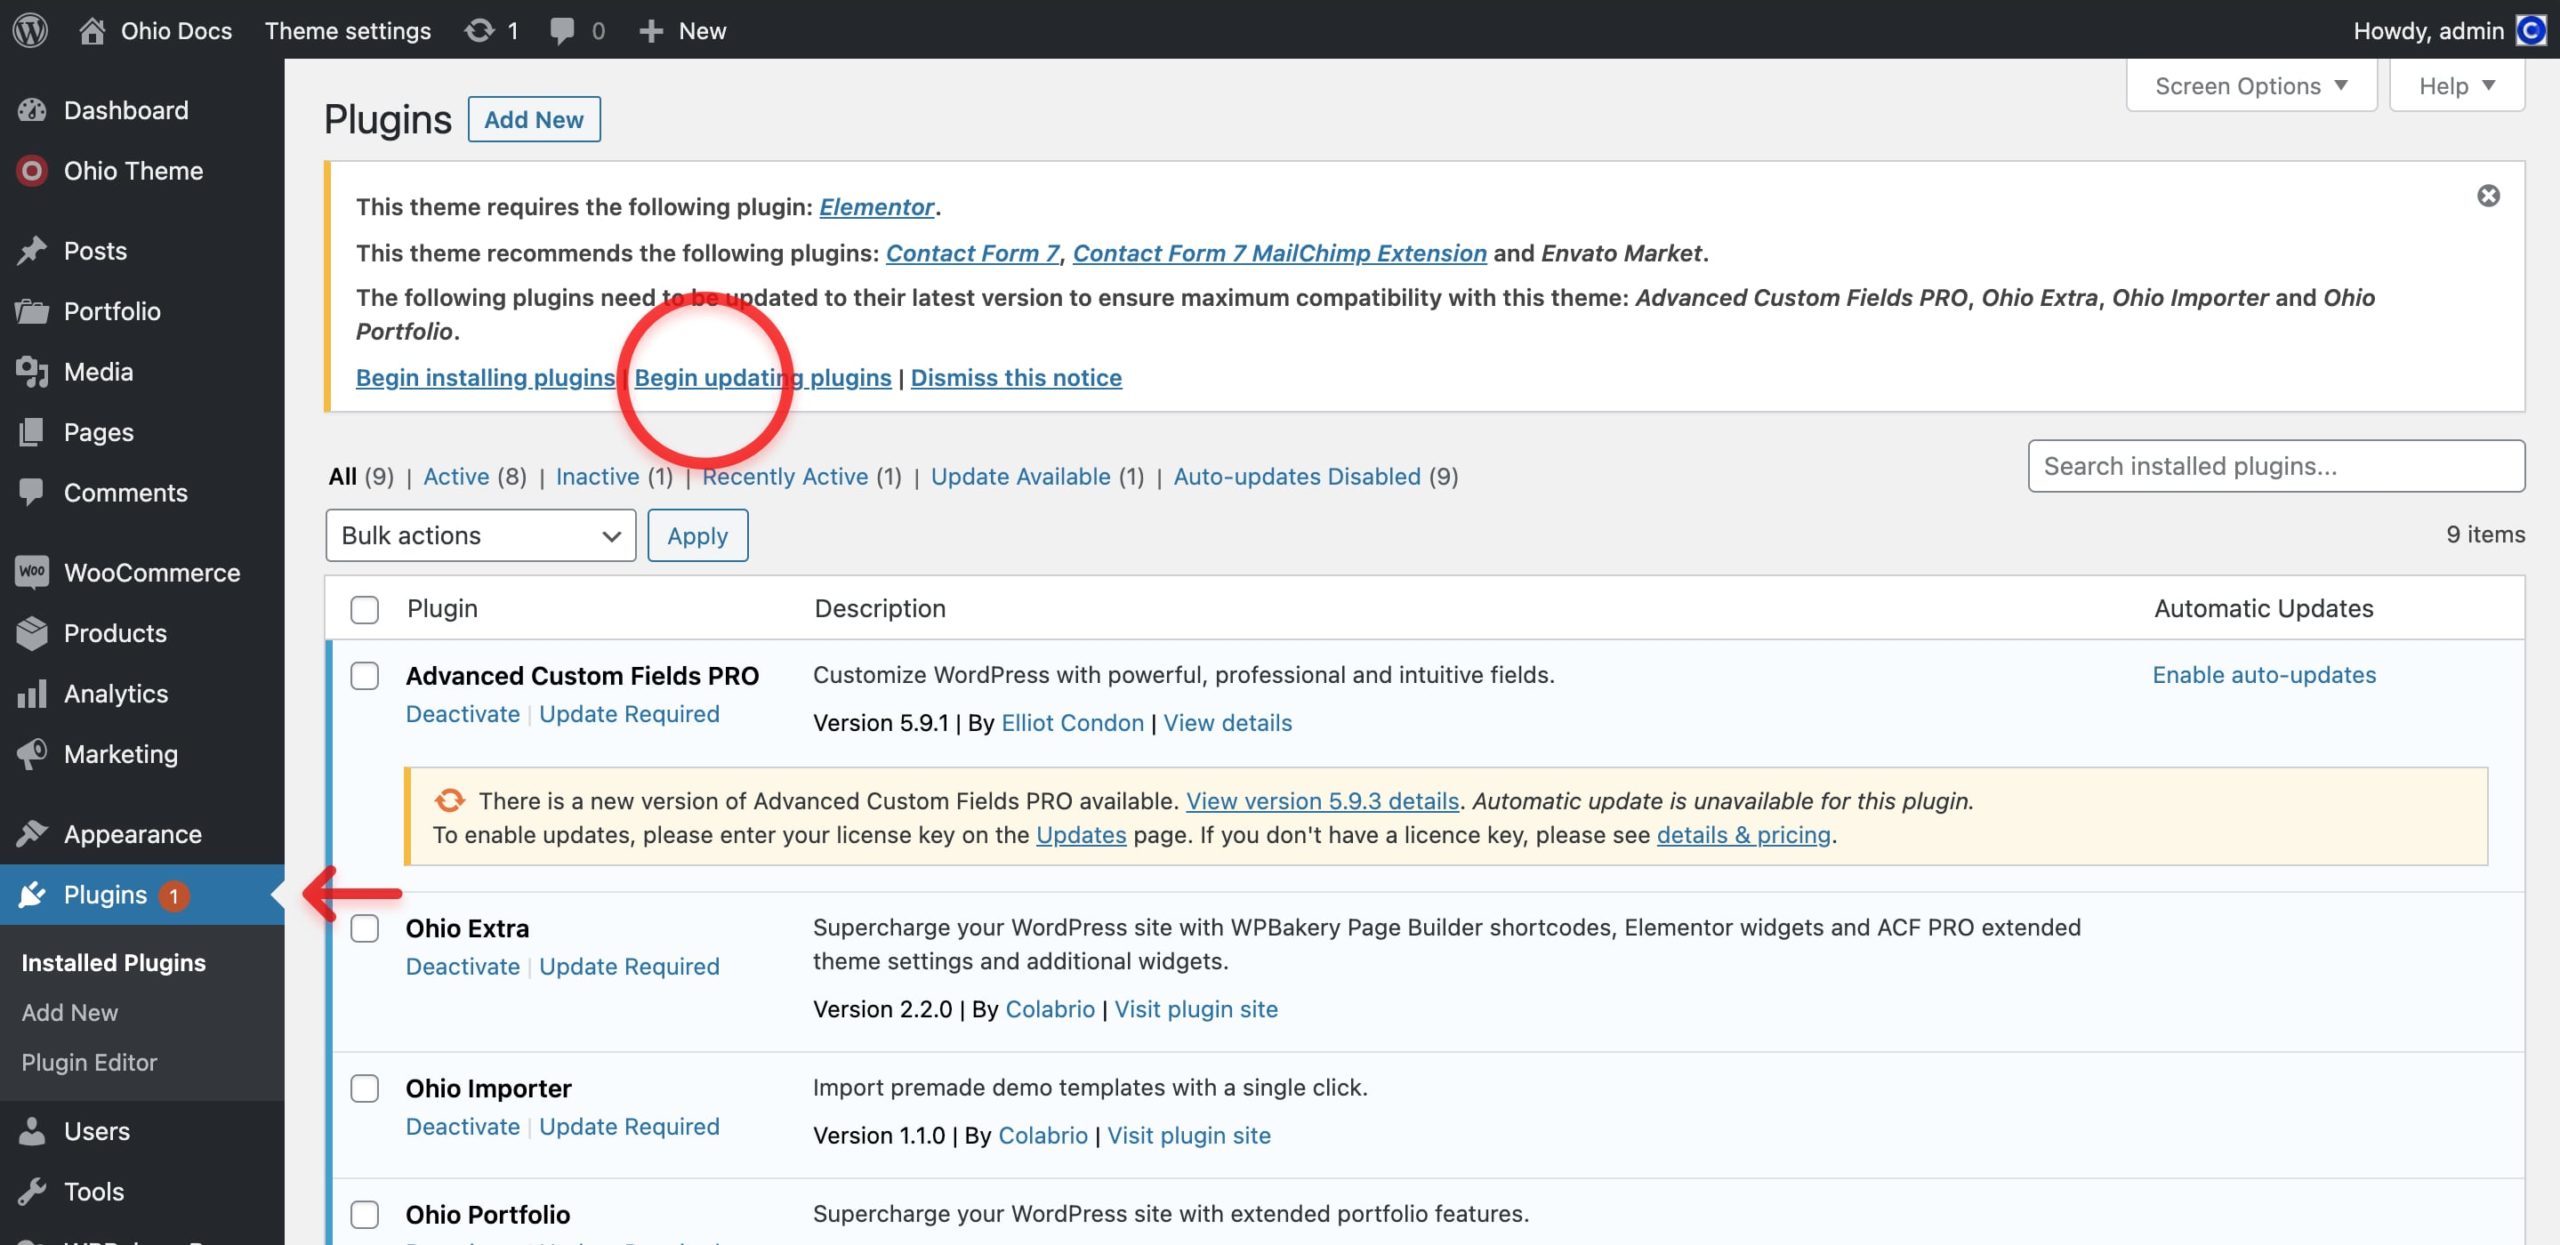
- From the WordPress dashboard go to Plugins → Installed Plugins;
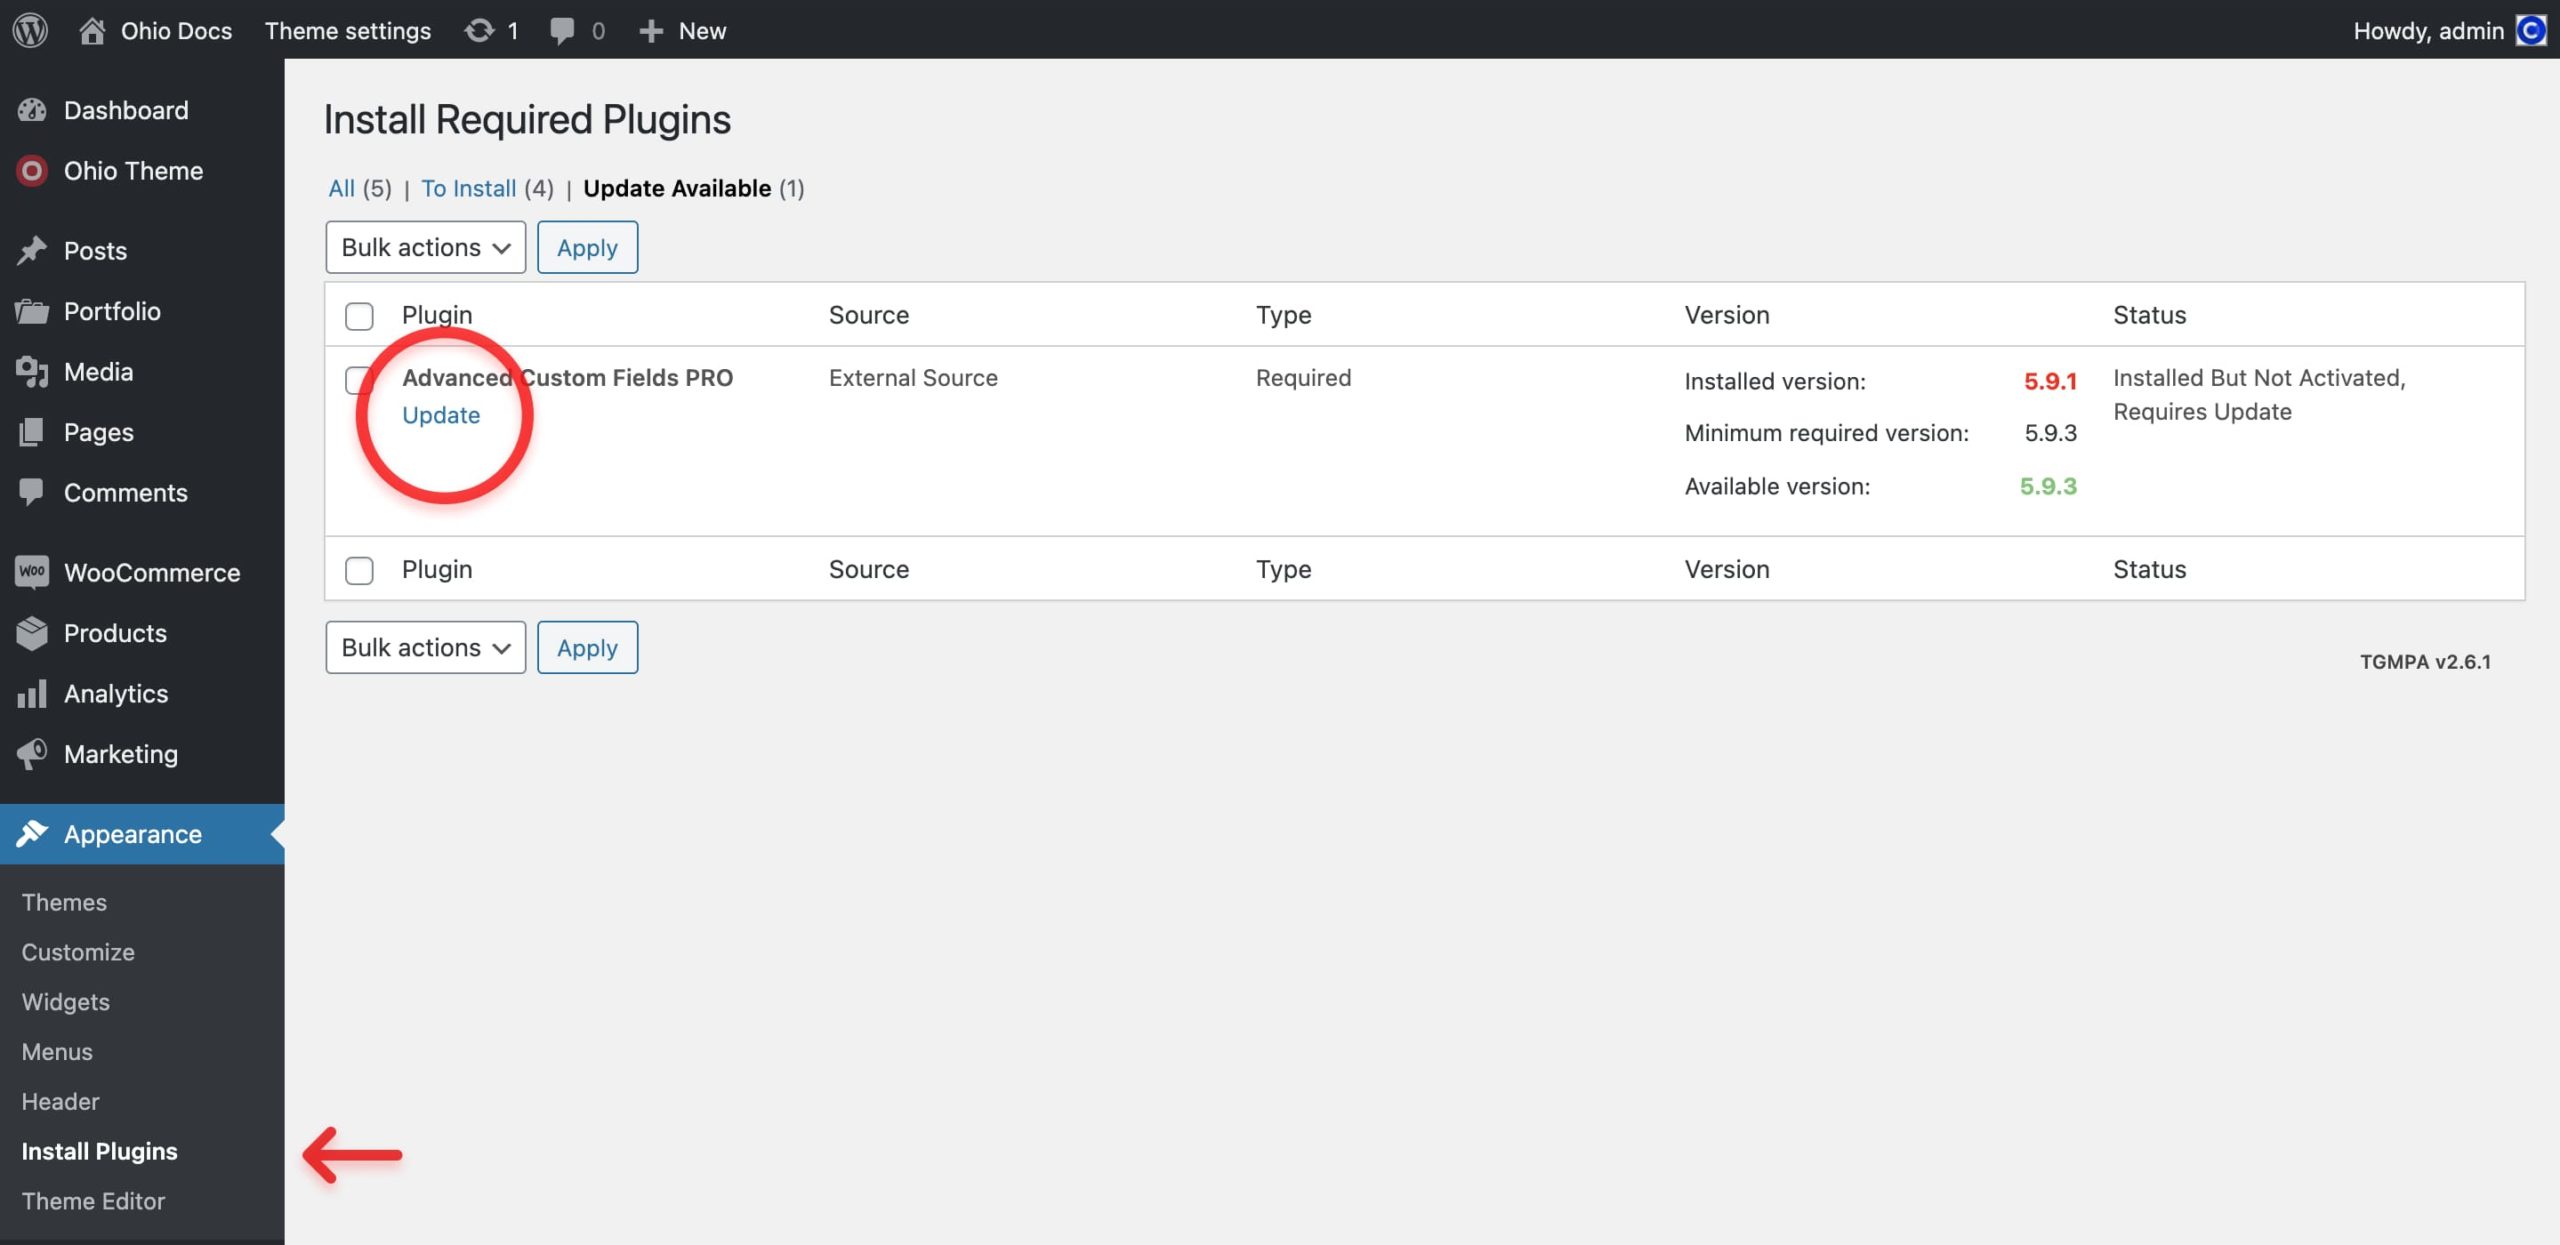
- Hint the Update Required link;
- Mark all the plugins that you want to update and hint the Apply button;
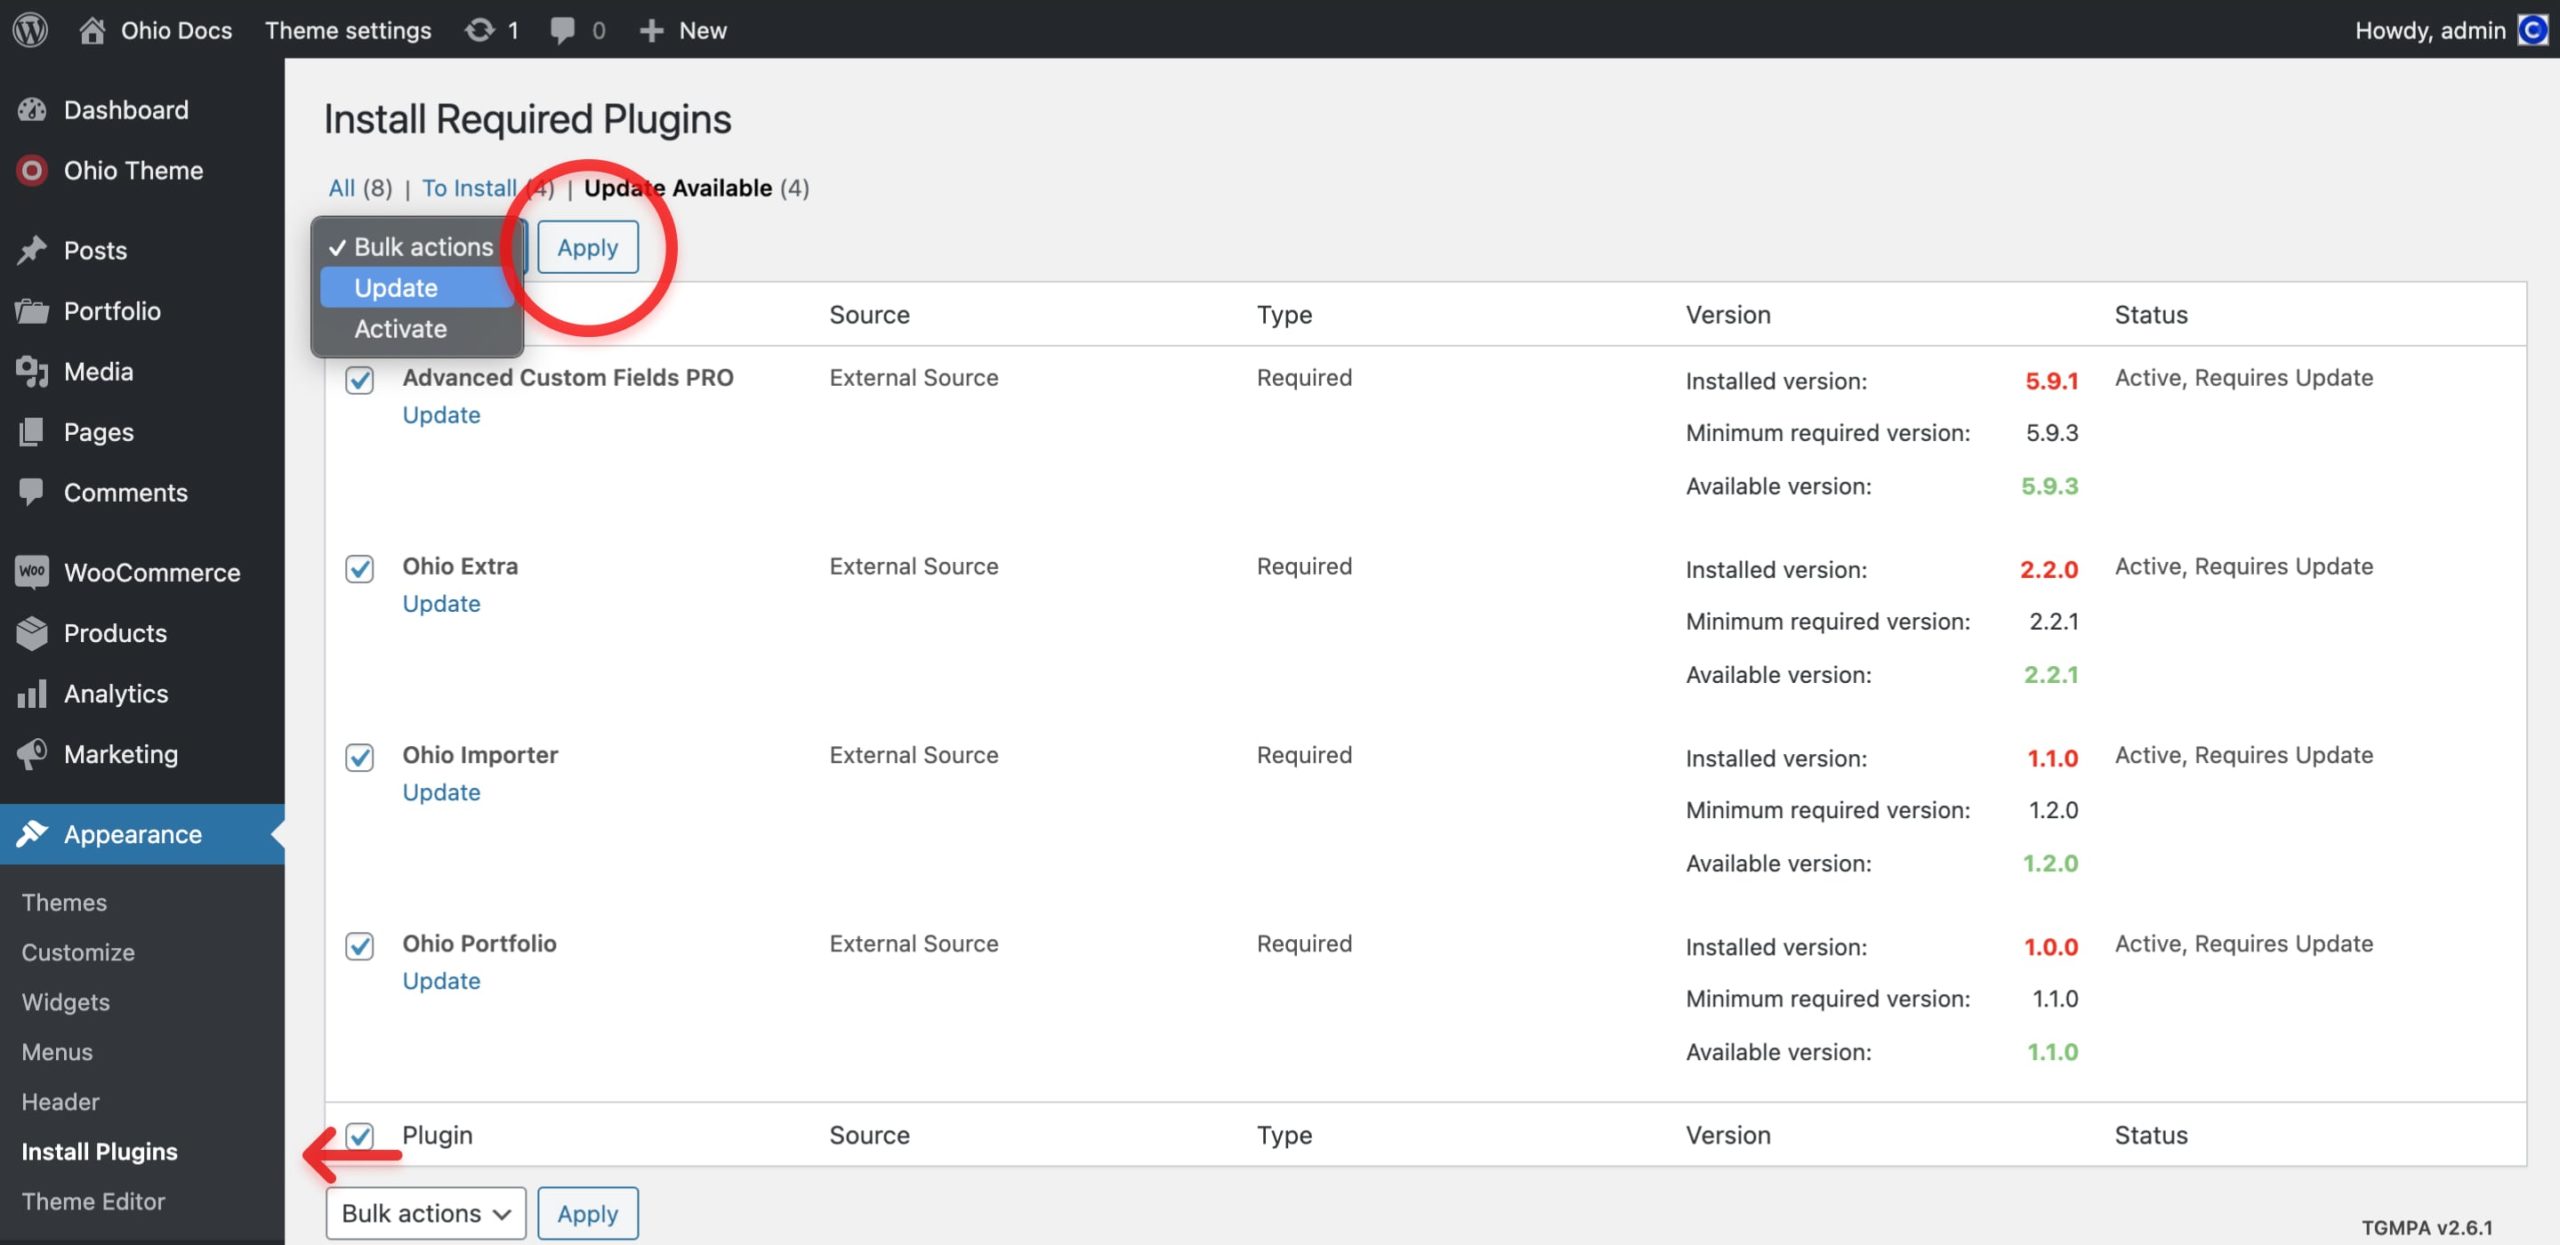
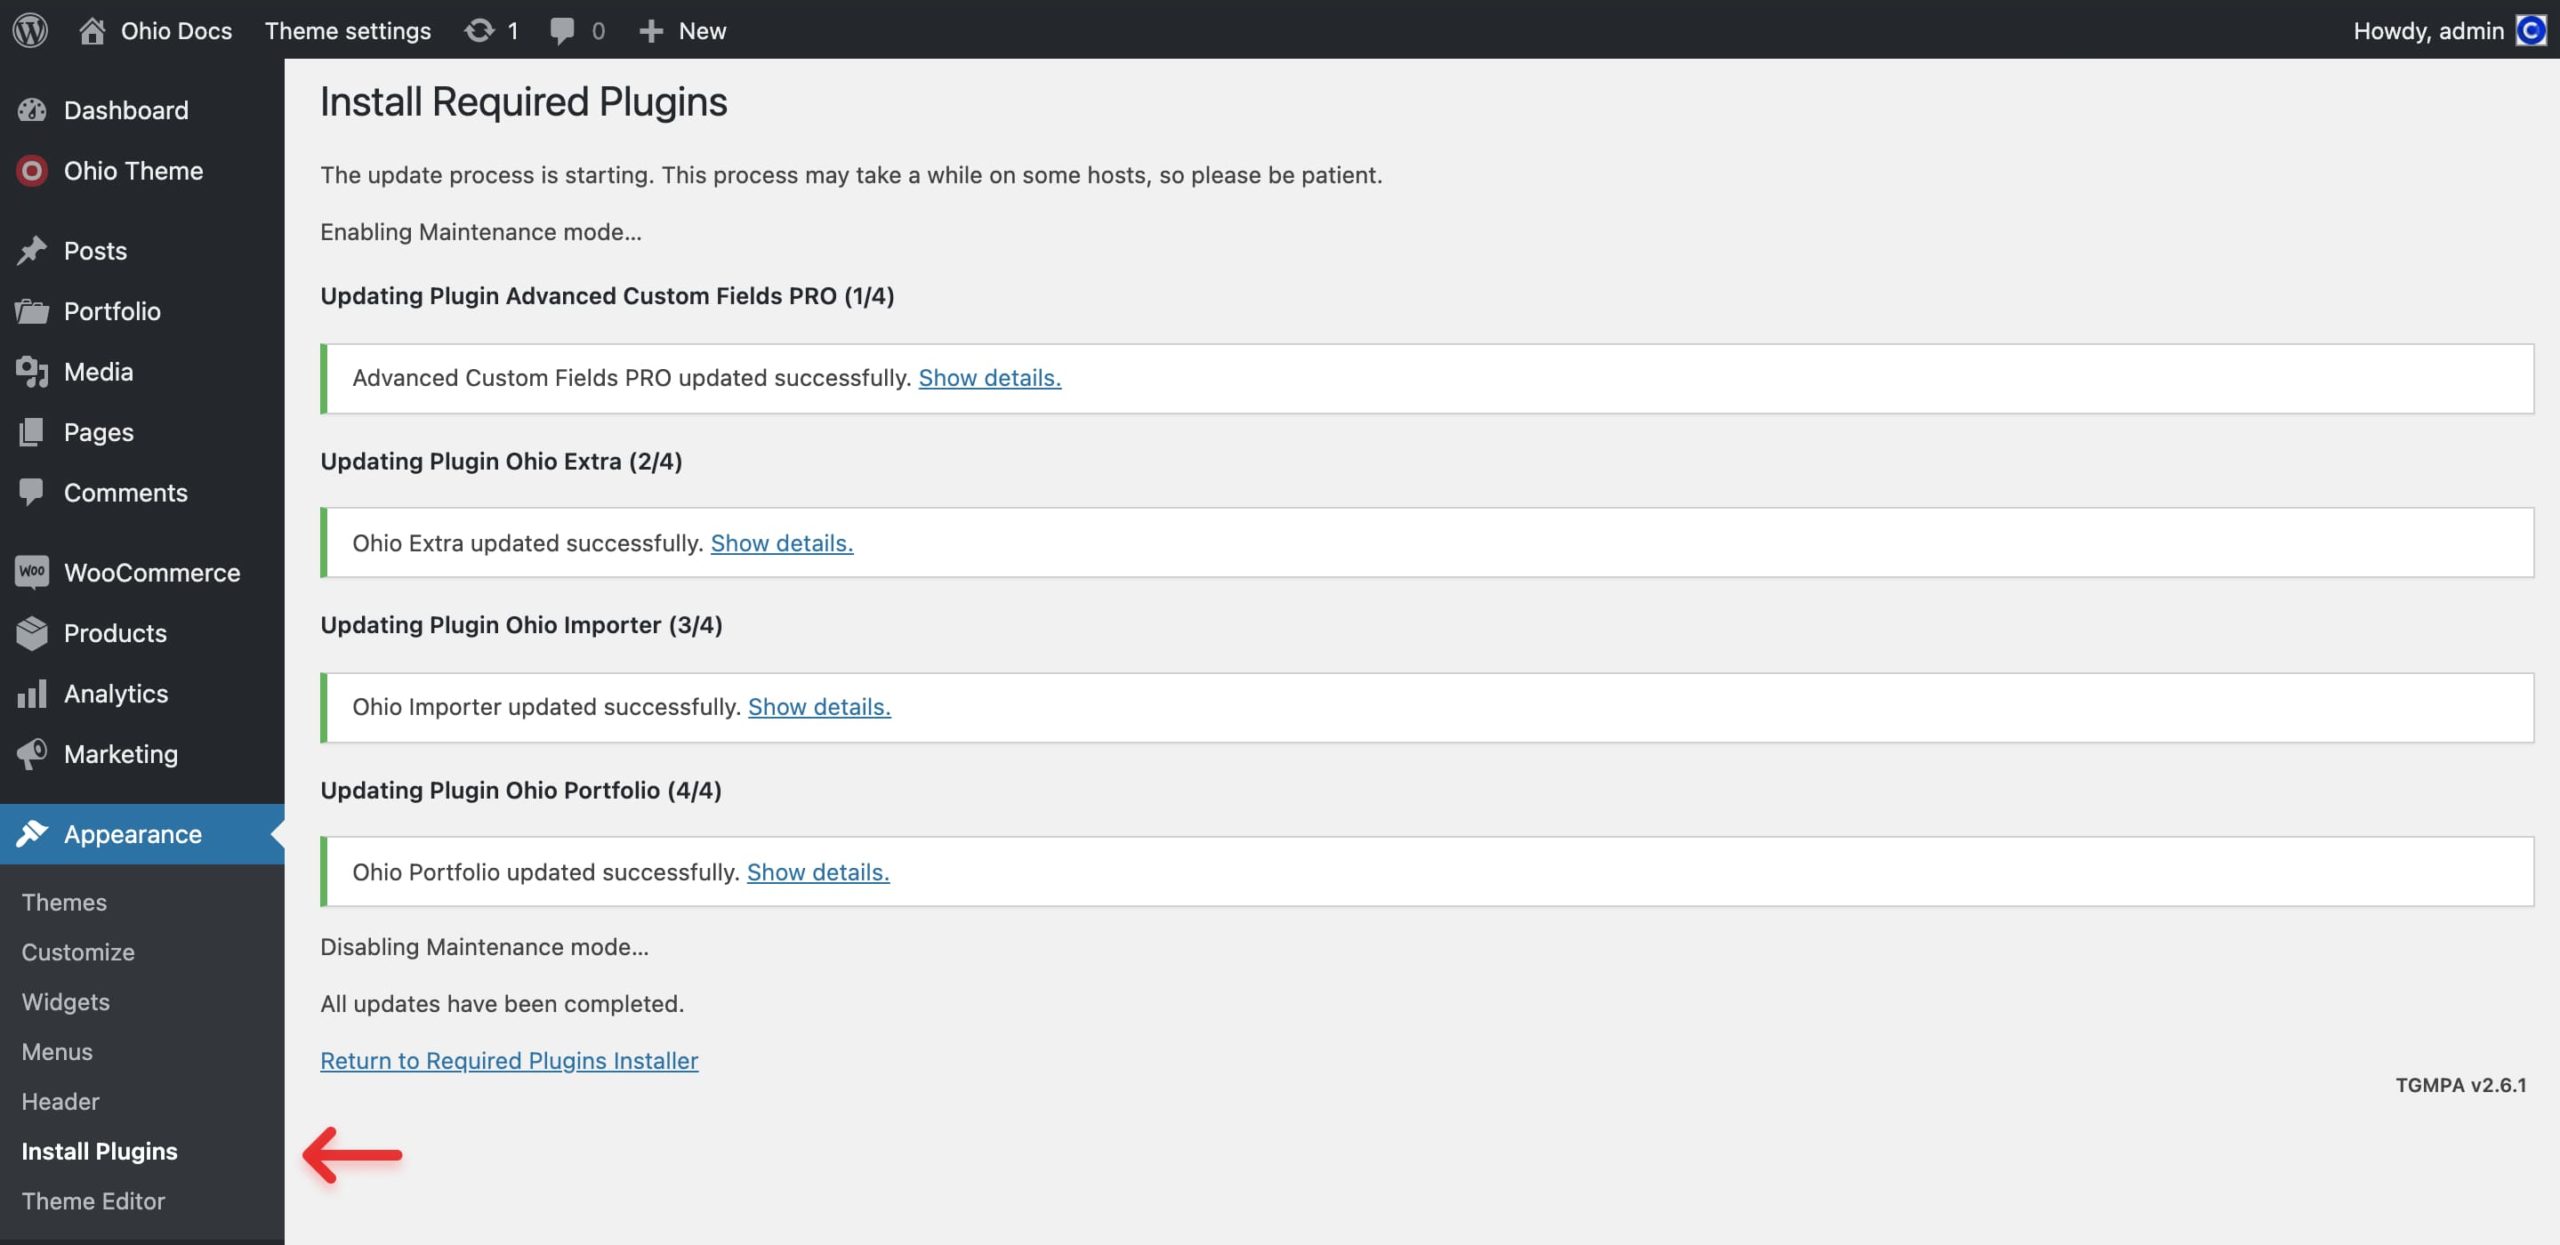
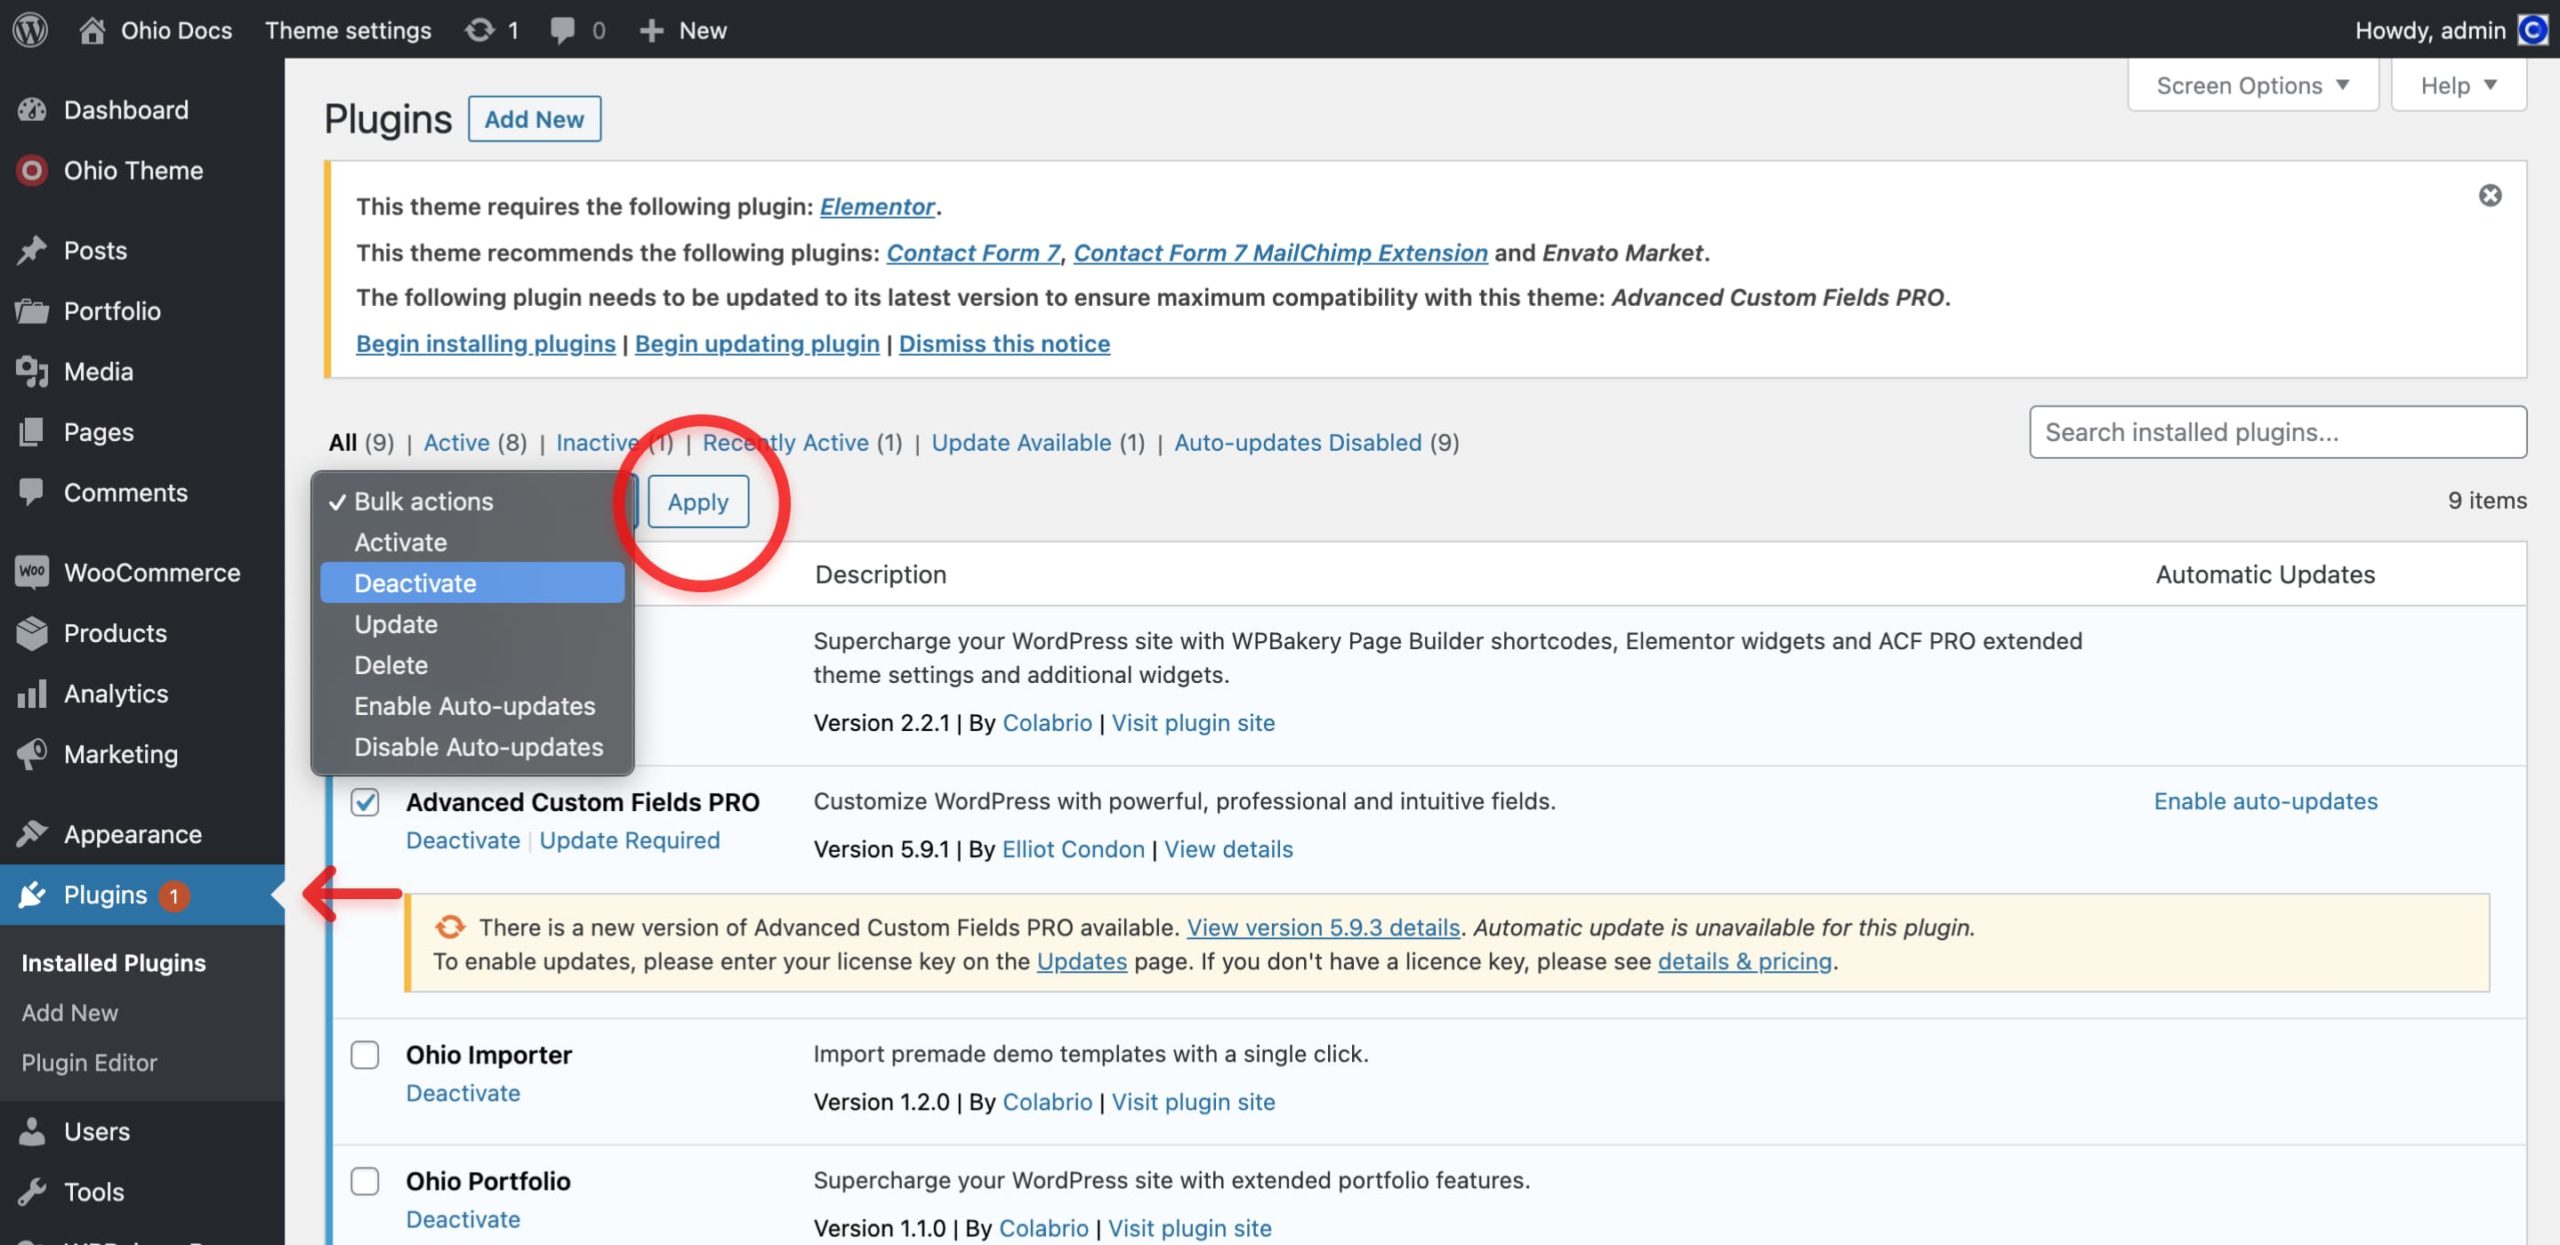
If you get an error while updating Bundled Plugins, alternatively, you can do the following:
- From the WordPress dashboard go to Plugins → Installed Plugins;
- Choose the specific plugin and deactivate it;
- Then hint the Update Required;
- Choose the specific plugin and hint the Update button;
- That’s it! Finally, activate the plugin again.
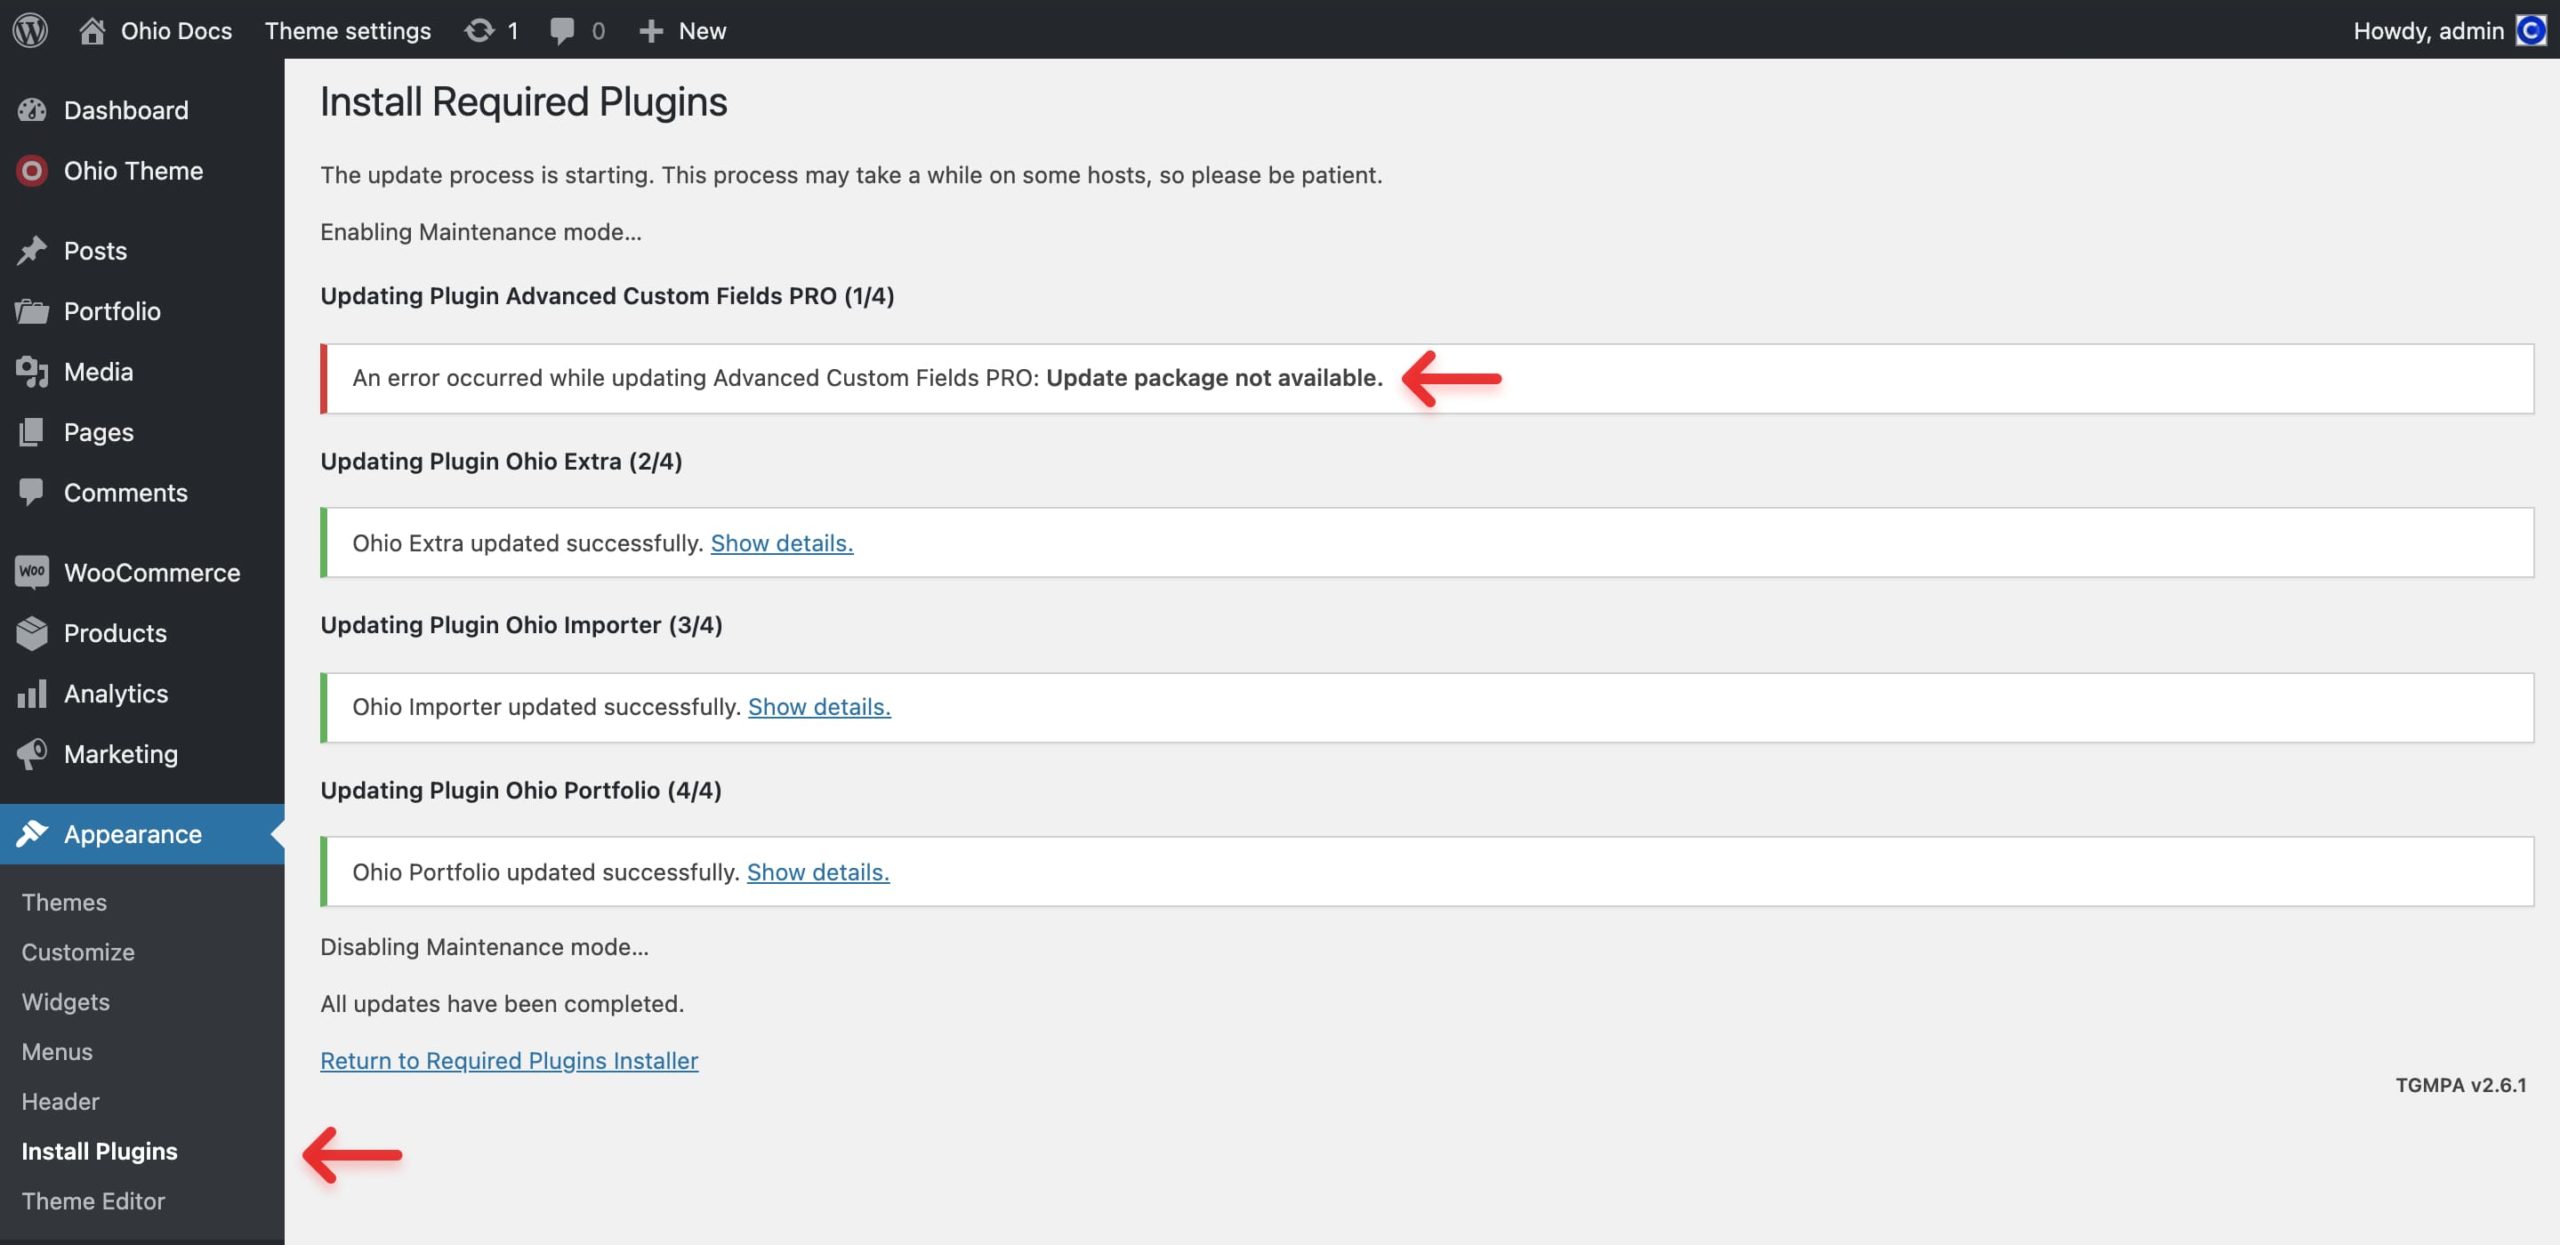
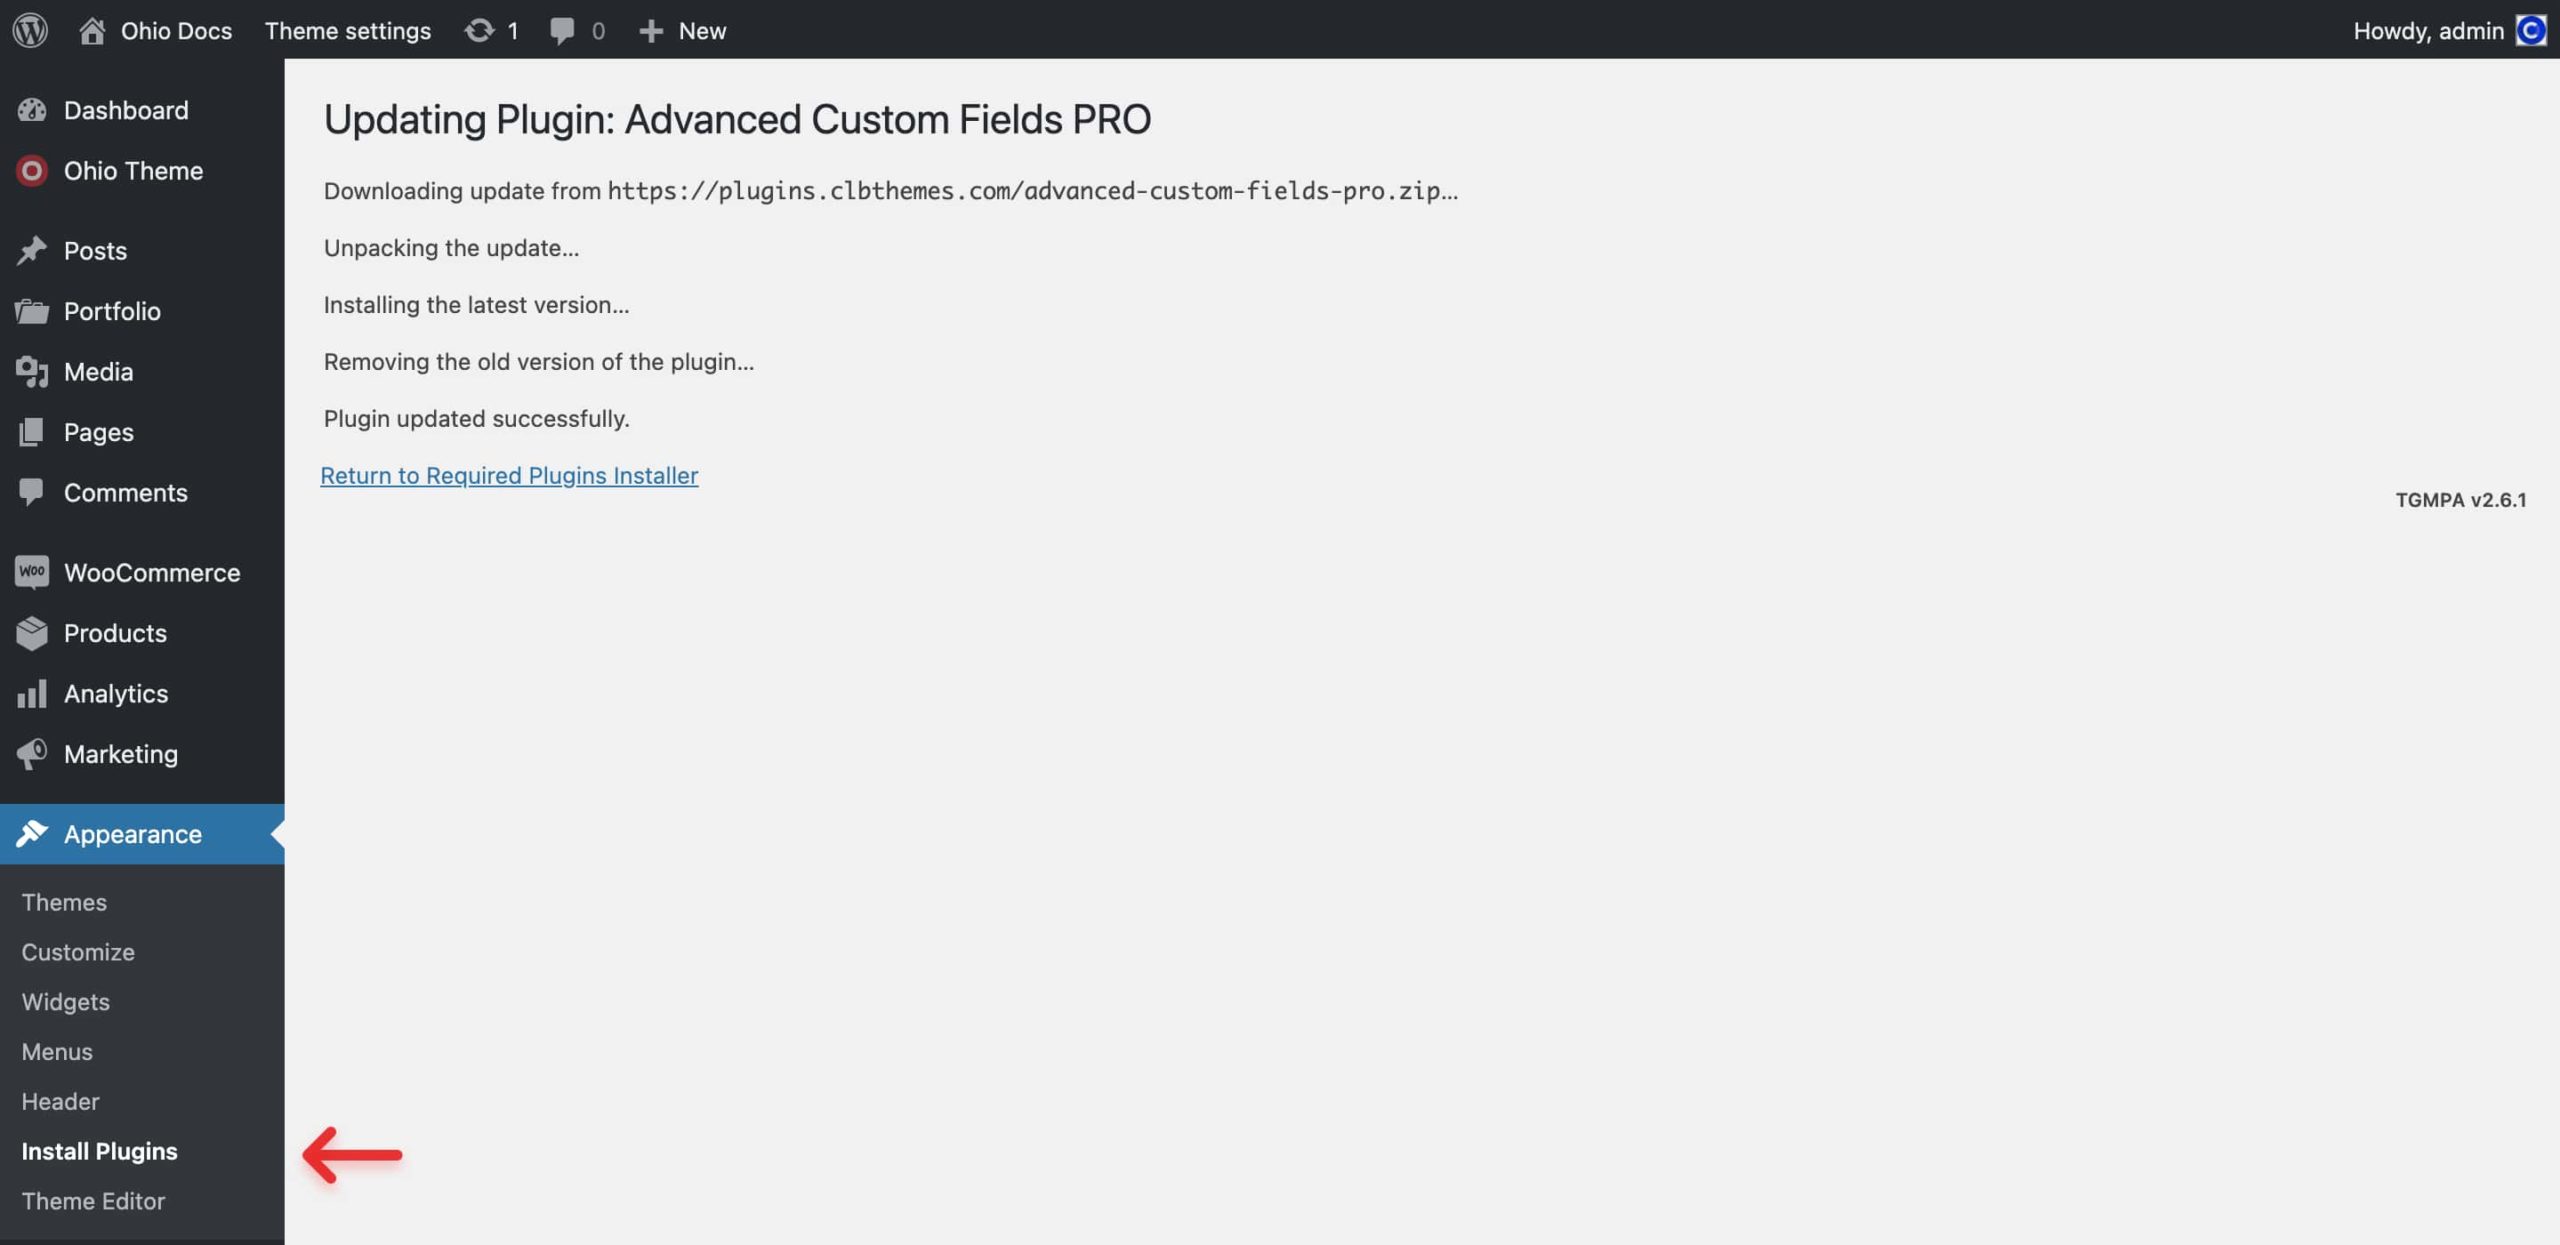
Now, you should have the latest version of the Bundled Plugin available on your server.
- Ensure, that the Ohio Importer plugin is installed and activated;
- From the WordPress dashboard go to Ohio Theme → Demo Import;
- Choose the demo you want to install and click on the Import button;
- If your theme isn’t activated yet, you will be prompted to make that before you get started with import;
- In the dialog window choose the import options and the builder (WPBakery/Elementor) you want to use.
WordPress will download all the demo content and then you will get a message saying that everything has been installed.


