Once you activate WooCommerce plugin for the first time, you are invited to set up your shop using the WooCommerce setup wizard. It is pretty intuitive and allows you to get your shop running in no time.
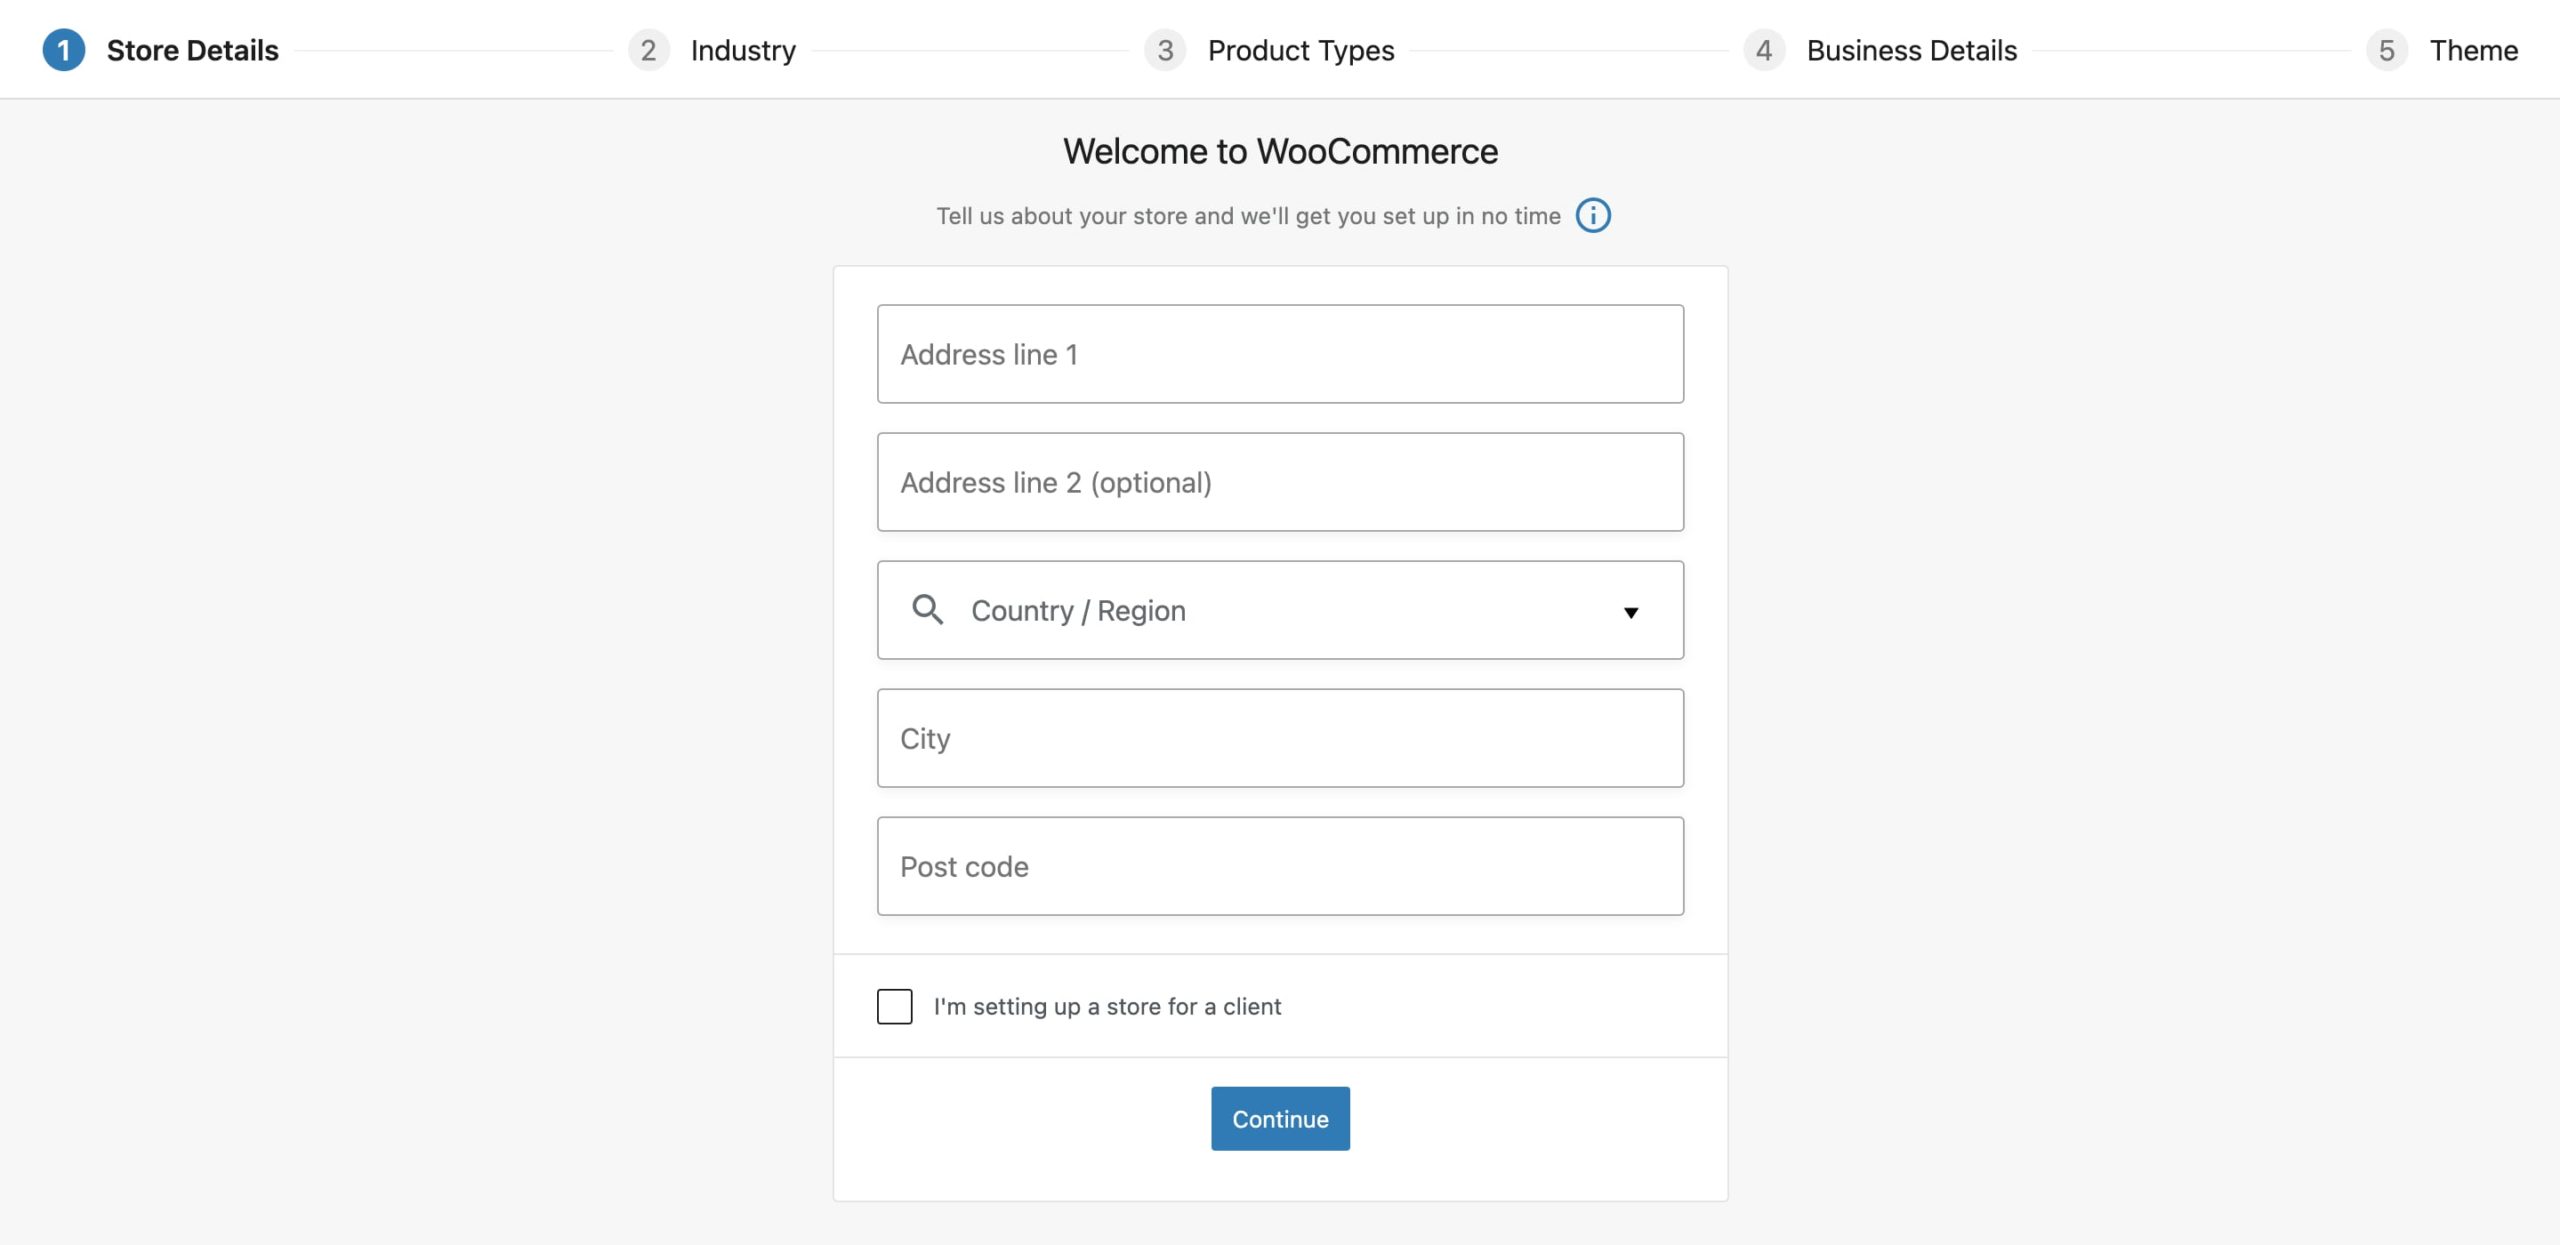
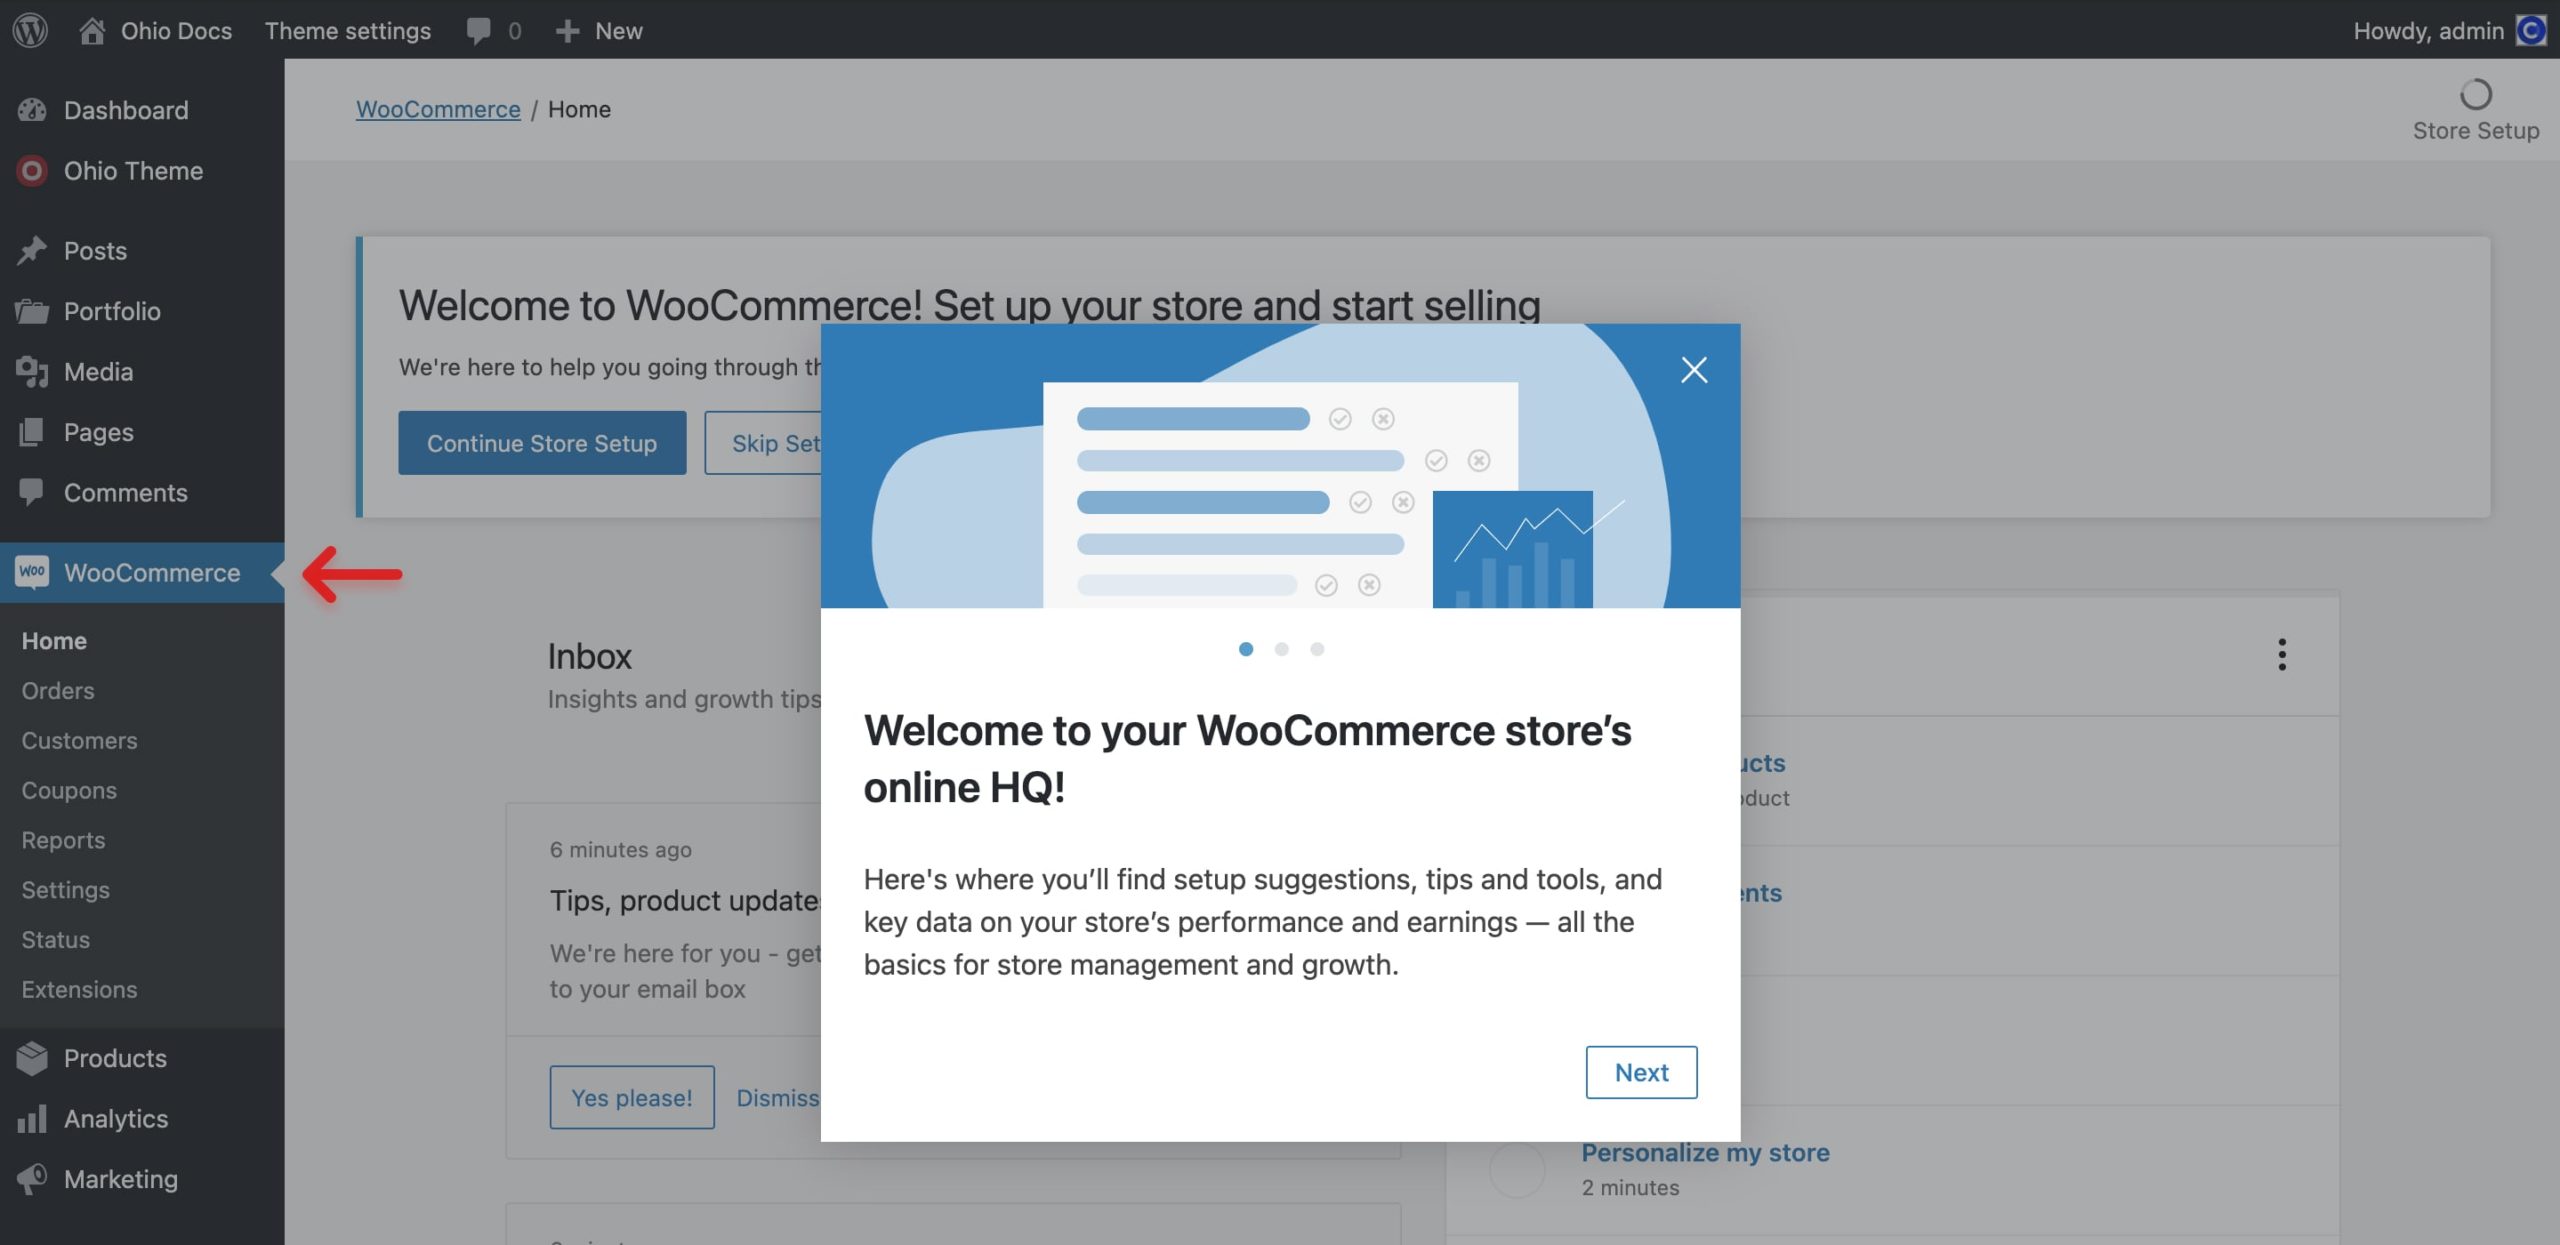
Nothing can describe getting started with WooCommerce better than its original documentation. Here are links to help you get started:
If you want to get started manually, or skipped the setup wizard, then you need to get a set of shop pages.
Here is what you need to do:
- From the WordPress dashboard go to WooCommerce → Status → Tools;
- Find the Create default WooCommerce pages option;
- Hint the Create pages button on the right.
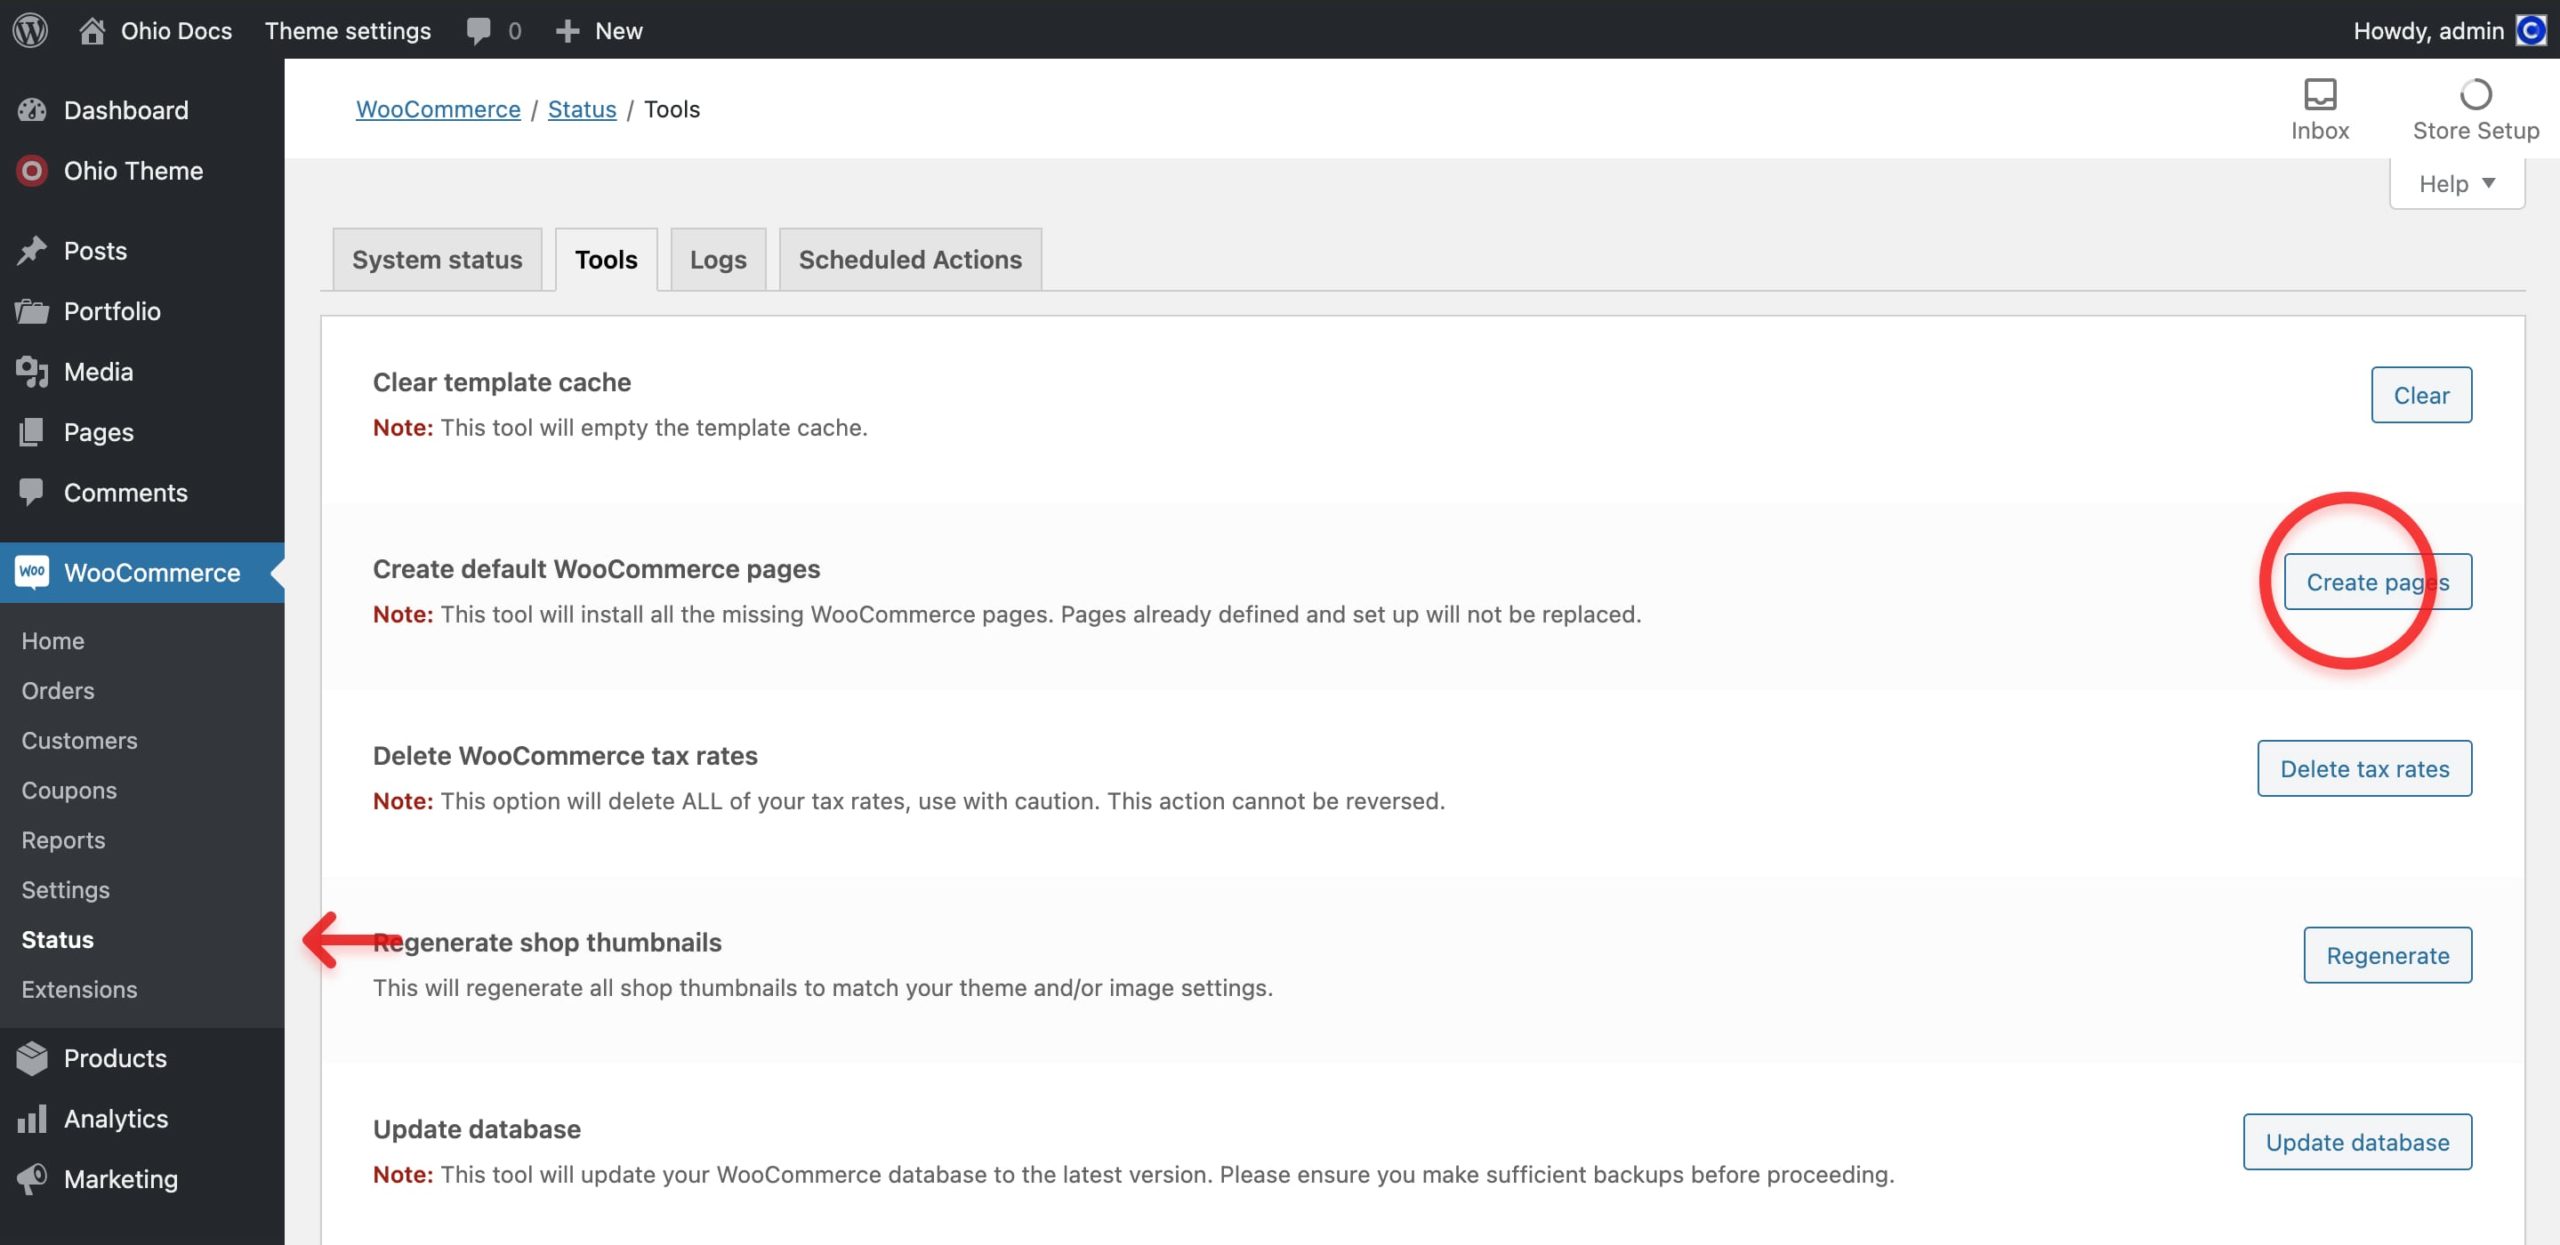
Now you should have a set of standard shop pages and are ready to work with WooCommerce.
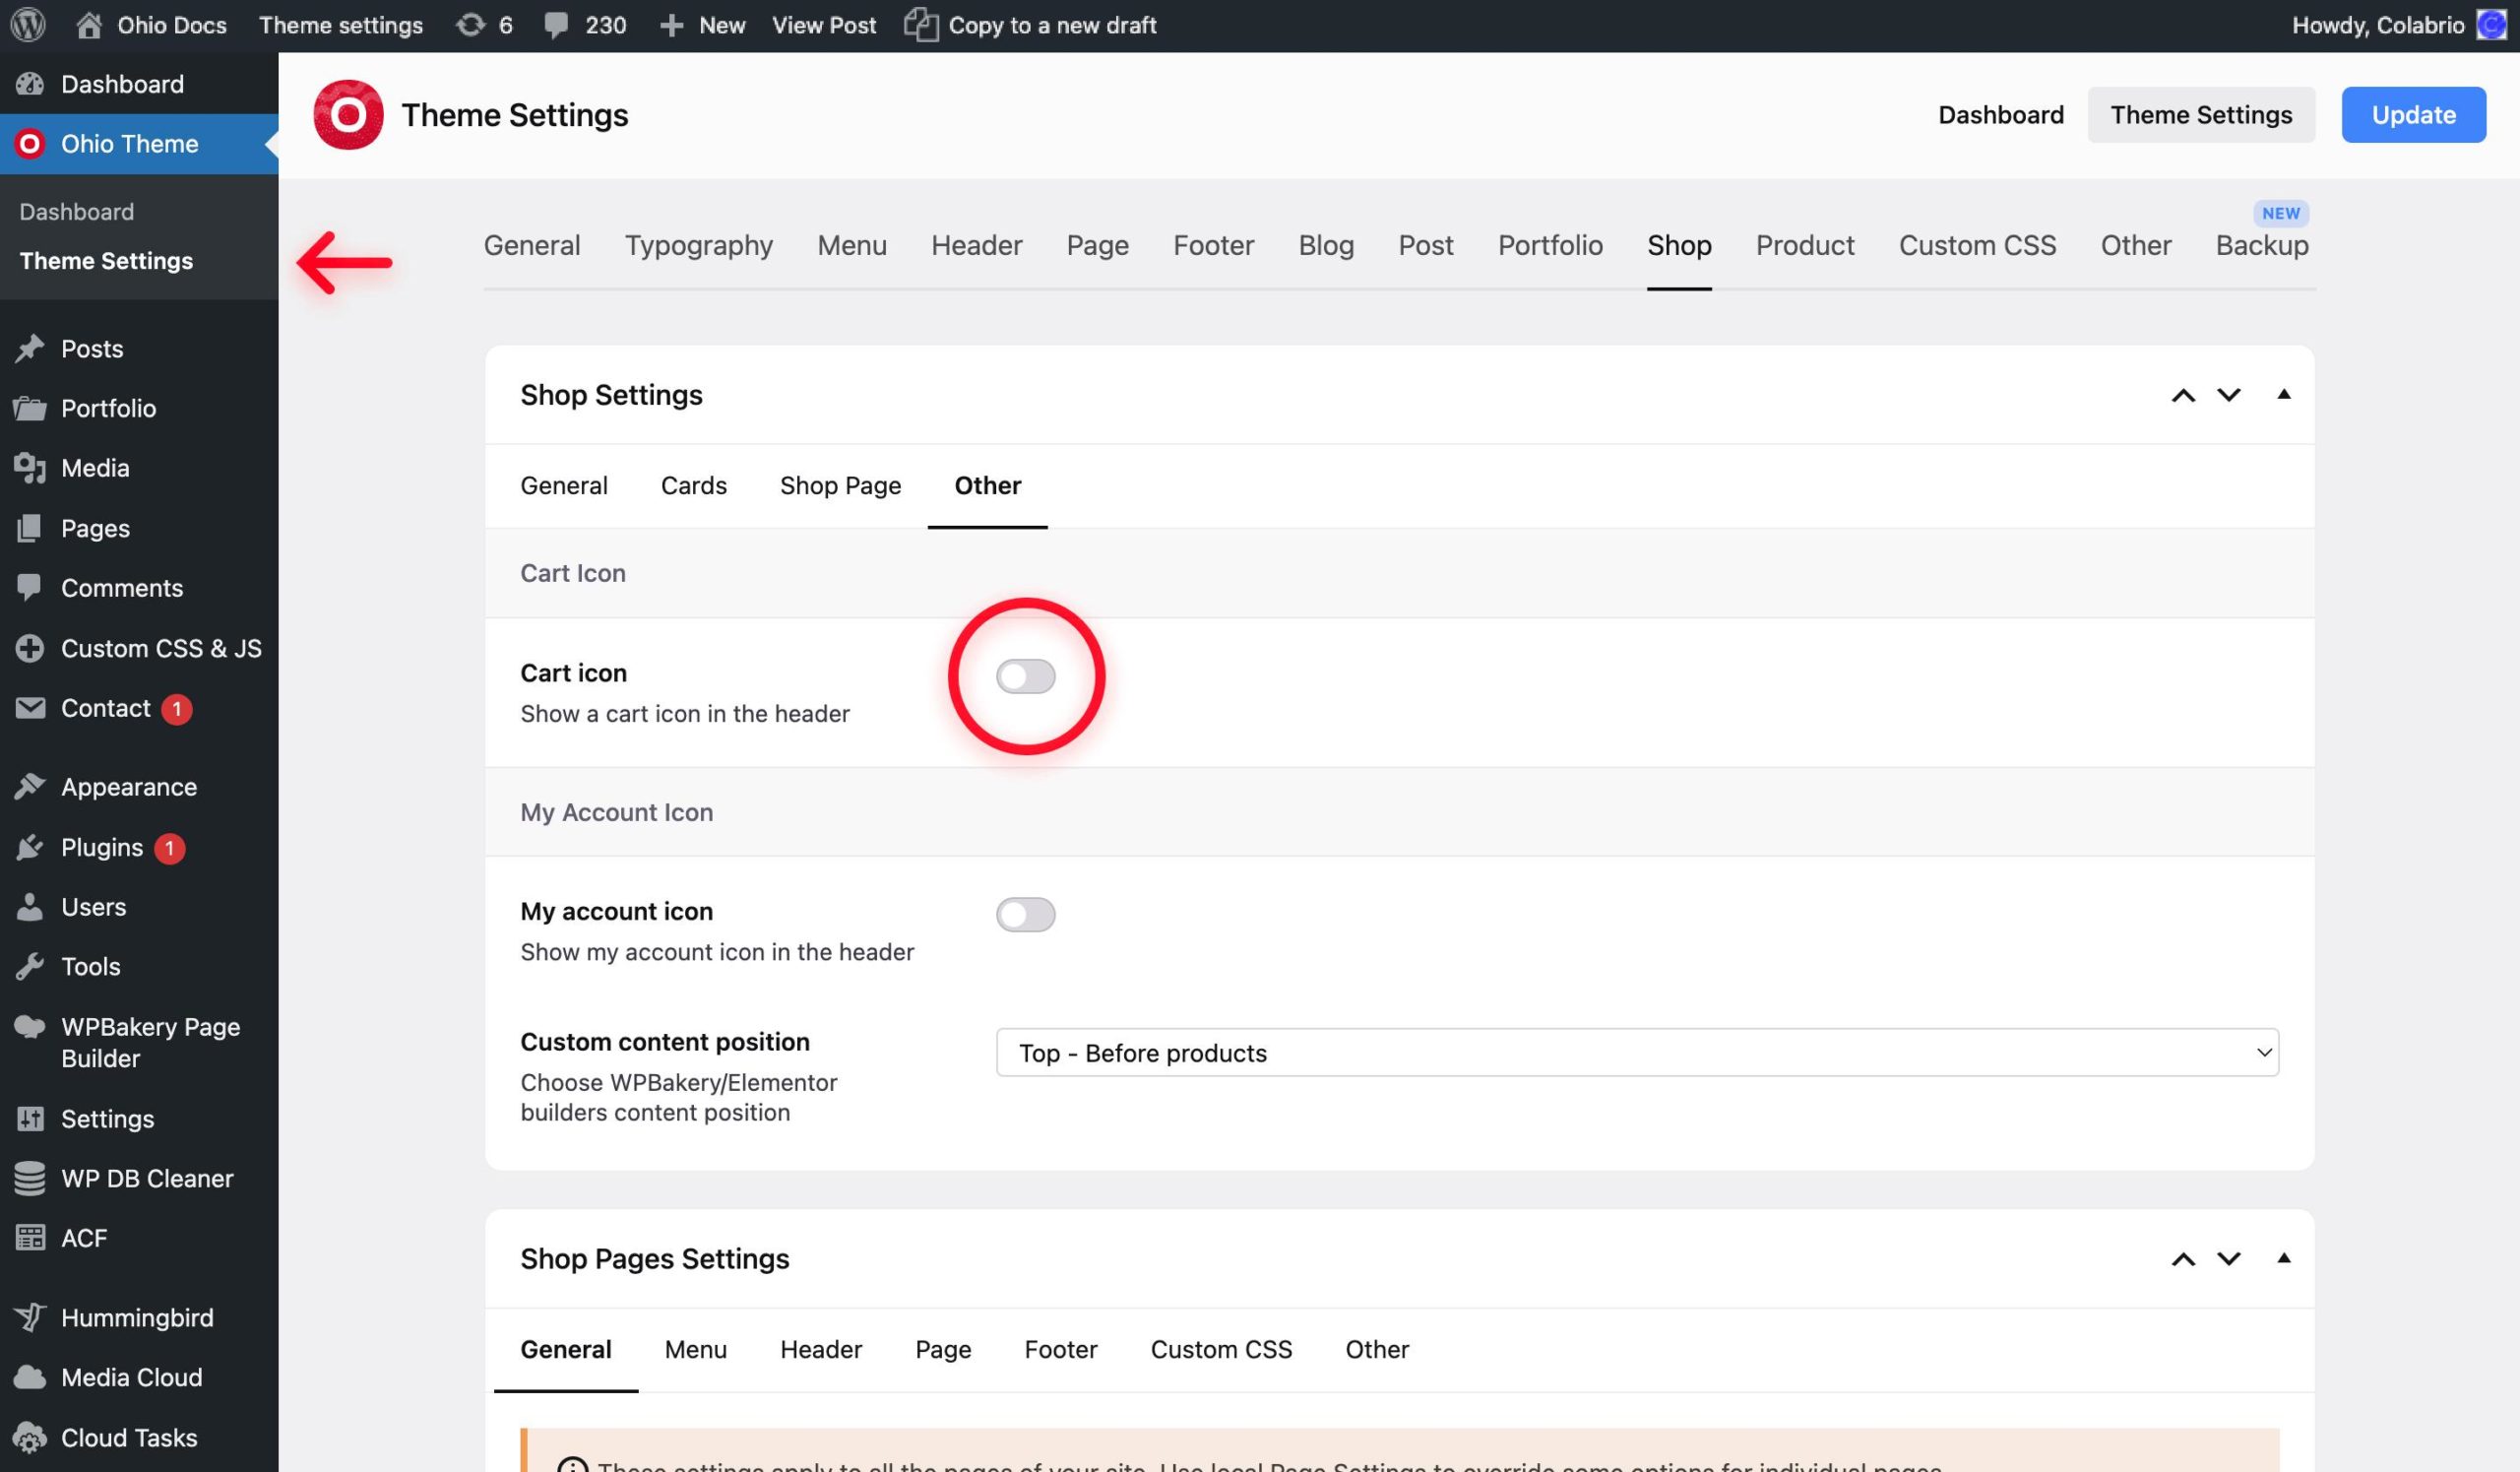
To enable/disable the cart icon on your website without disabling a WooCommerce functionality do the following:
- From the WordPress dashboard go to Ohio Theme → Theme Settings → Shop Settings → Other;
- Toggle the Cart Icon switcher to disable the cart icon;
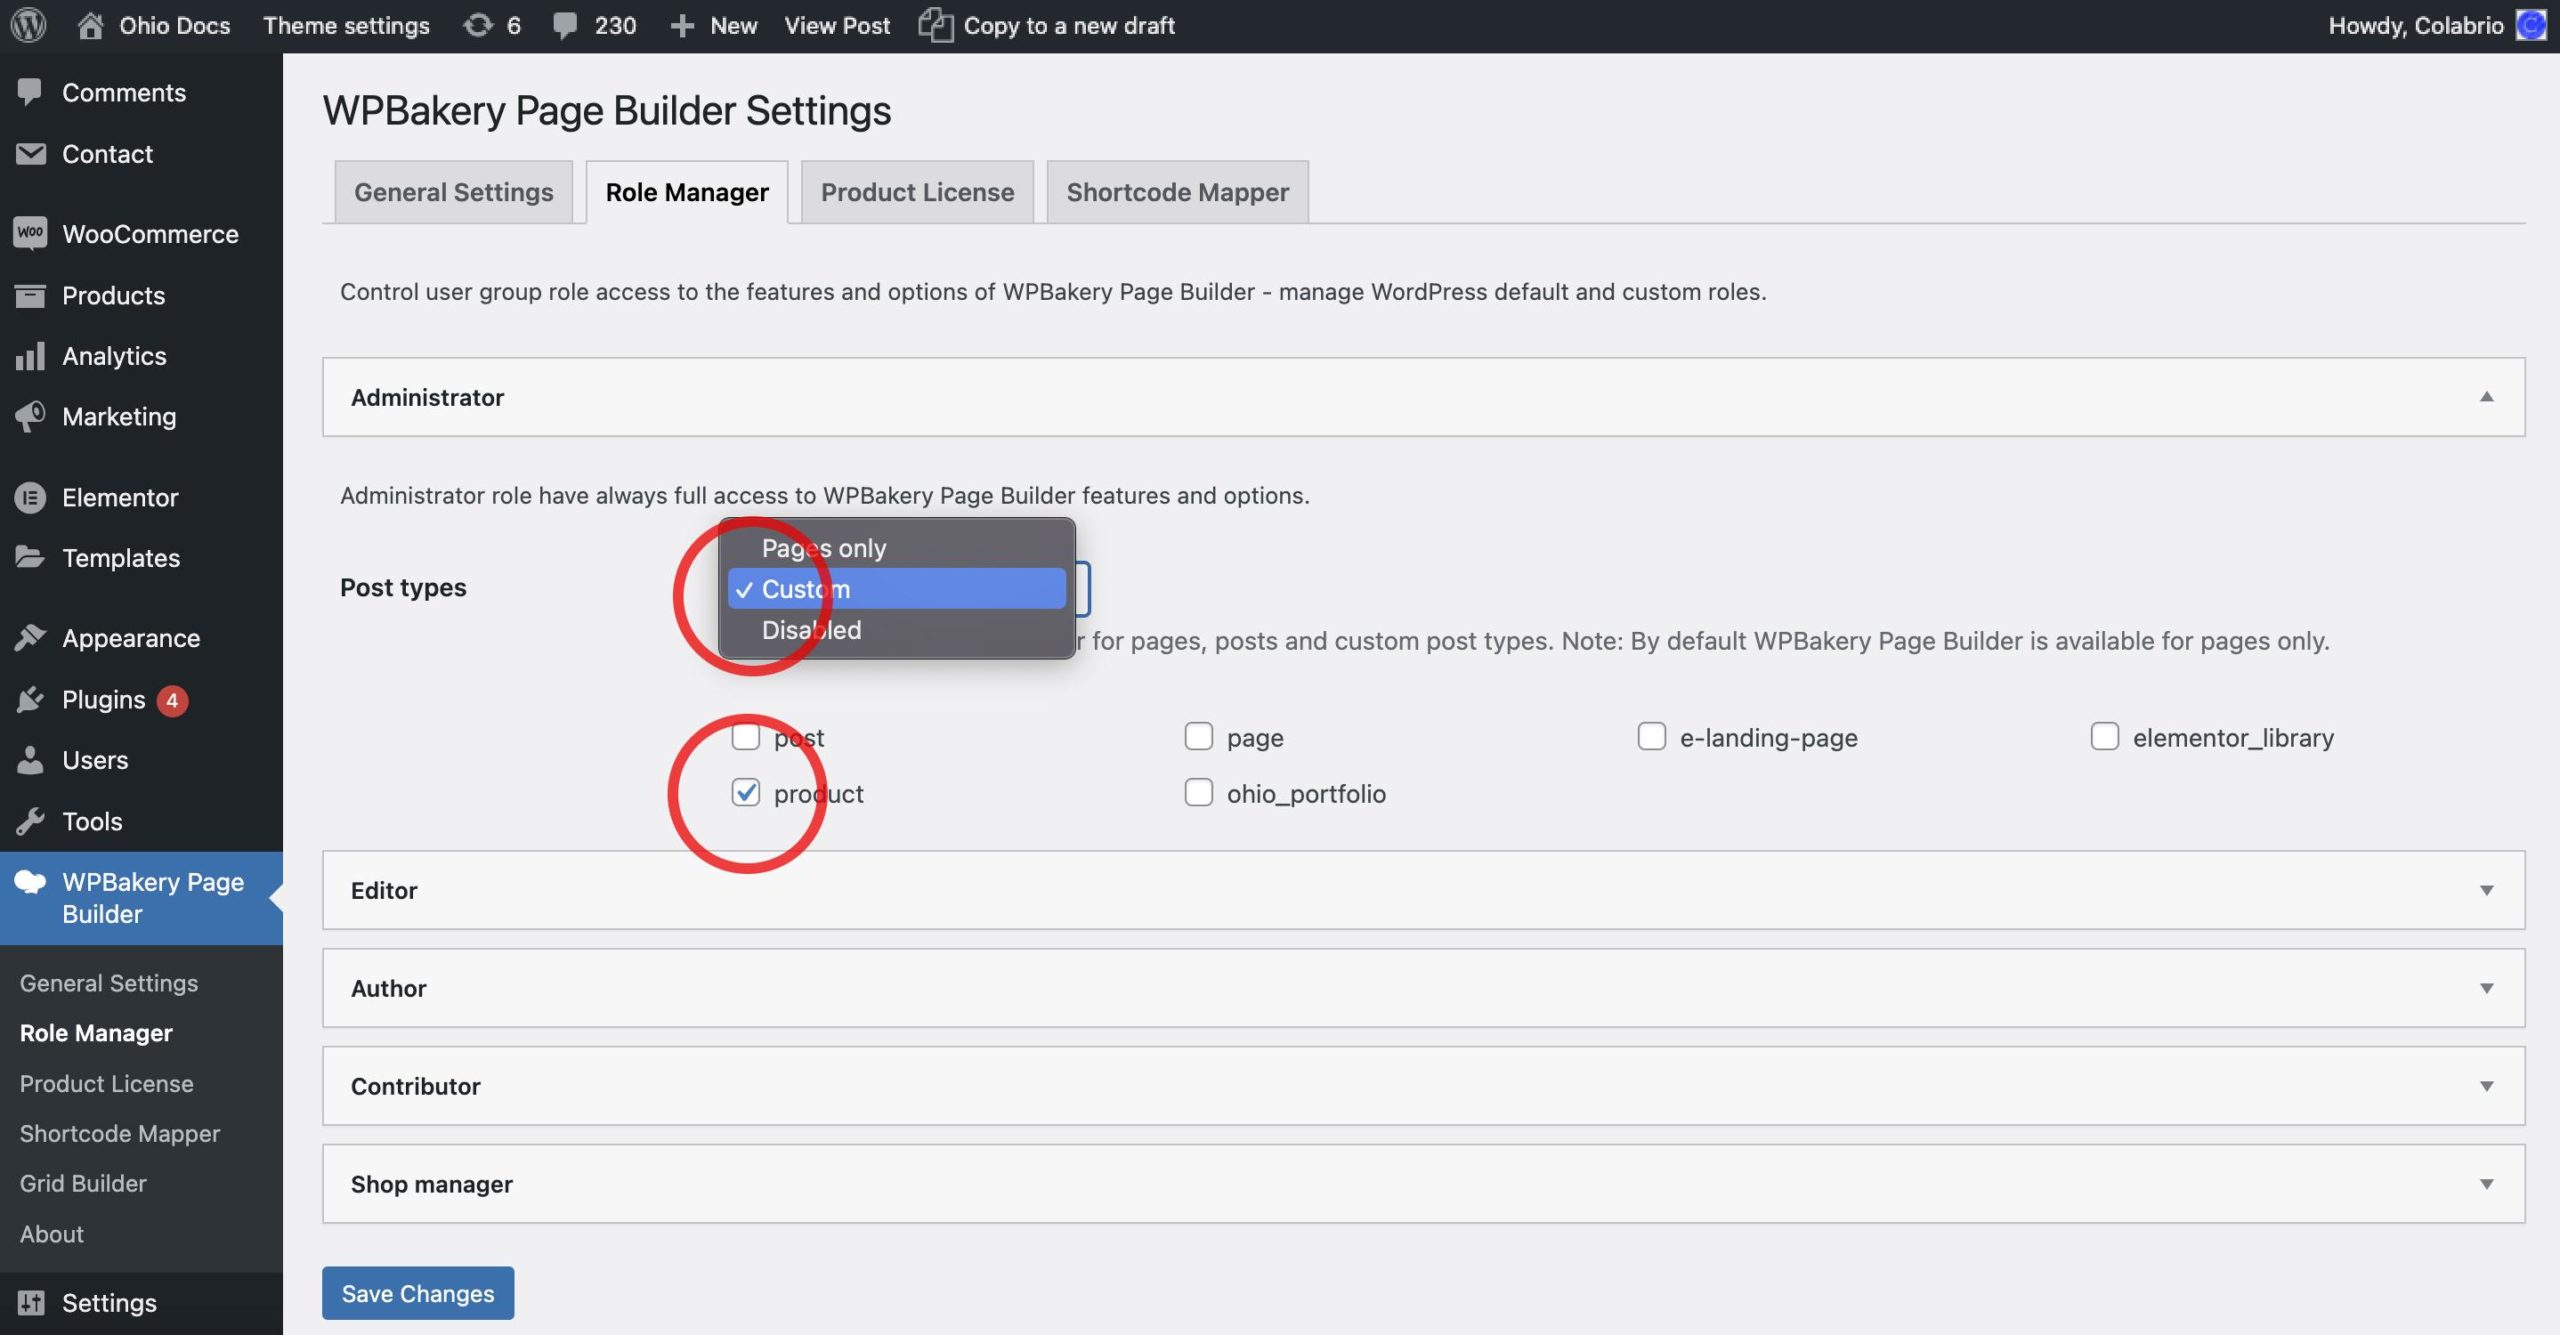
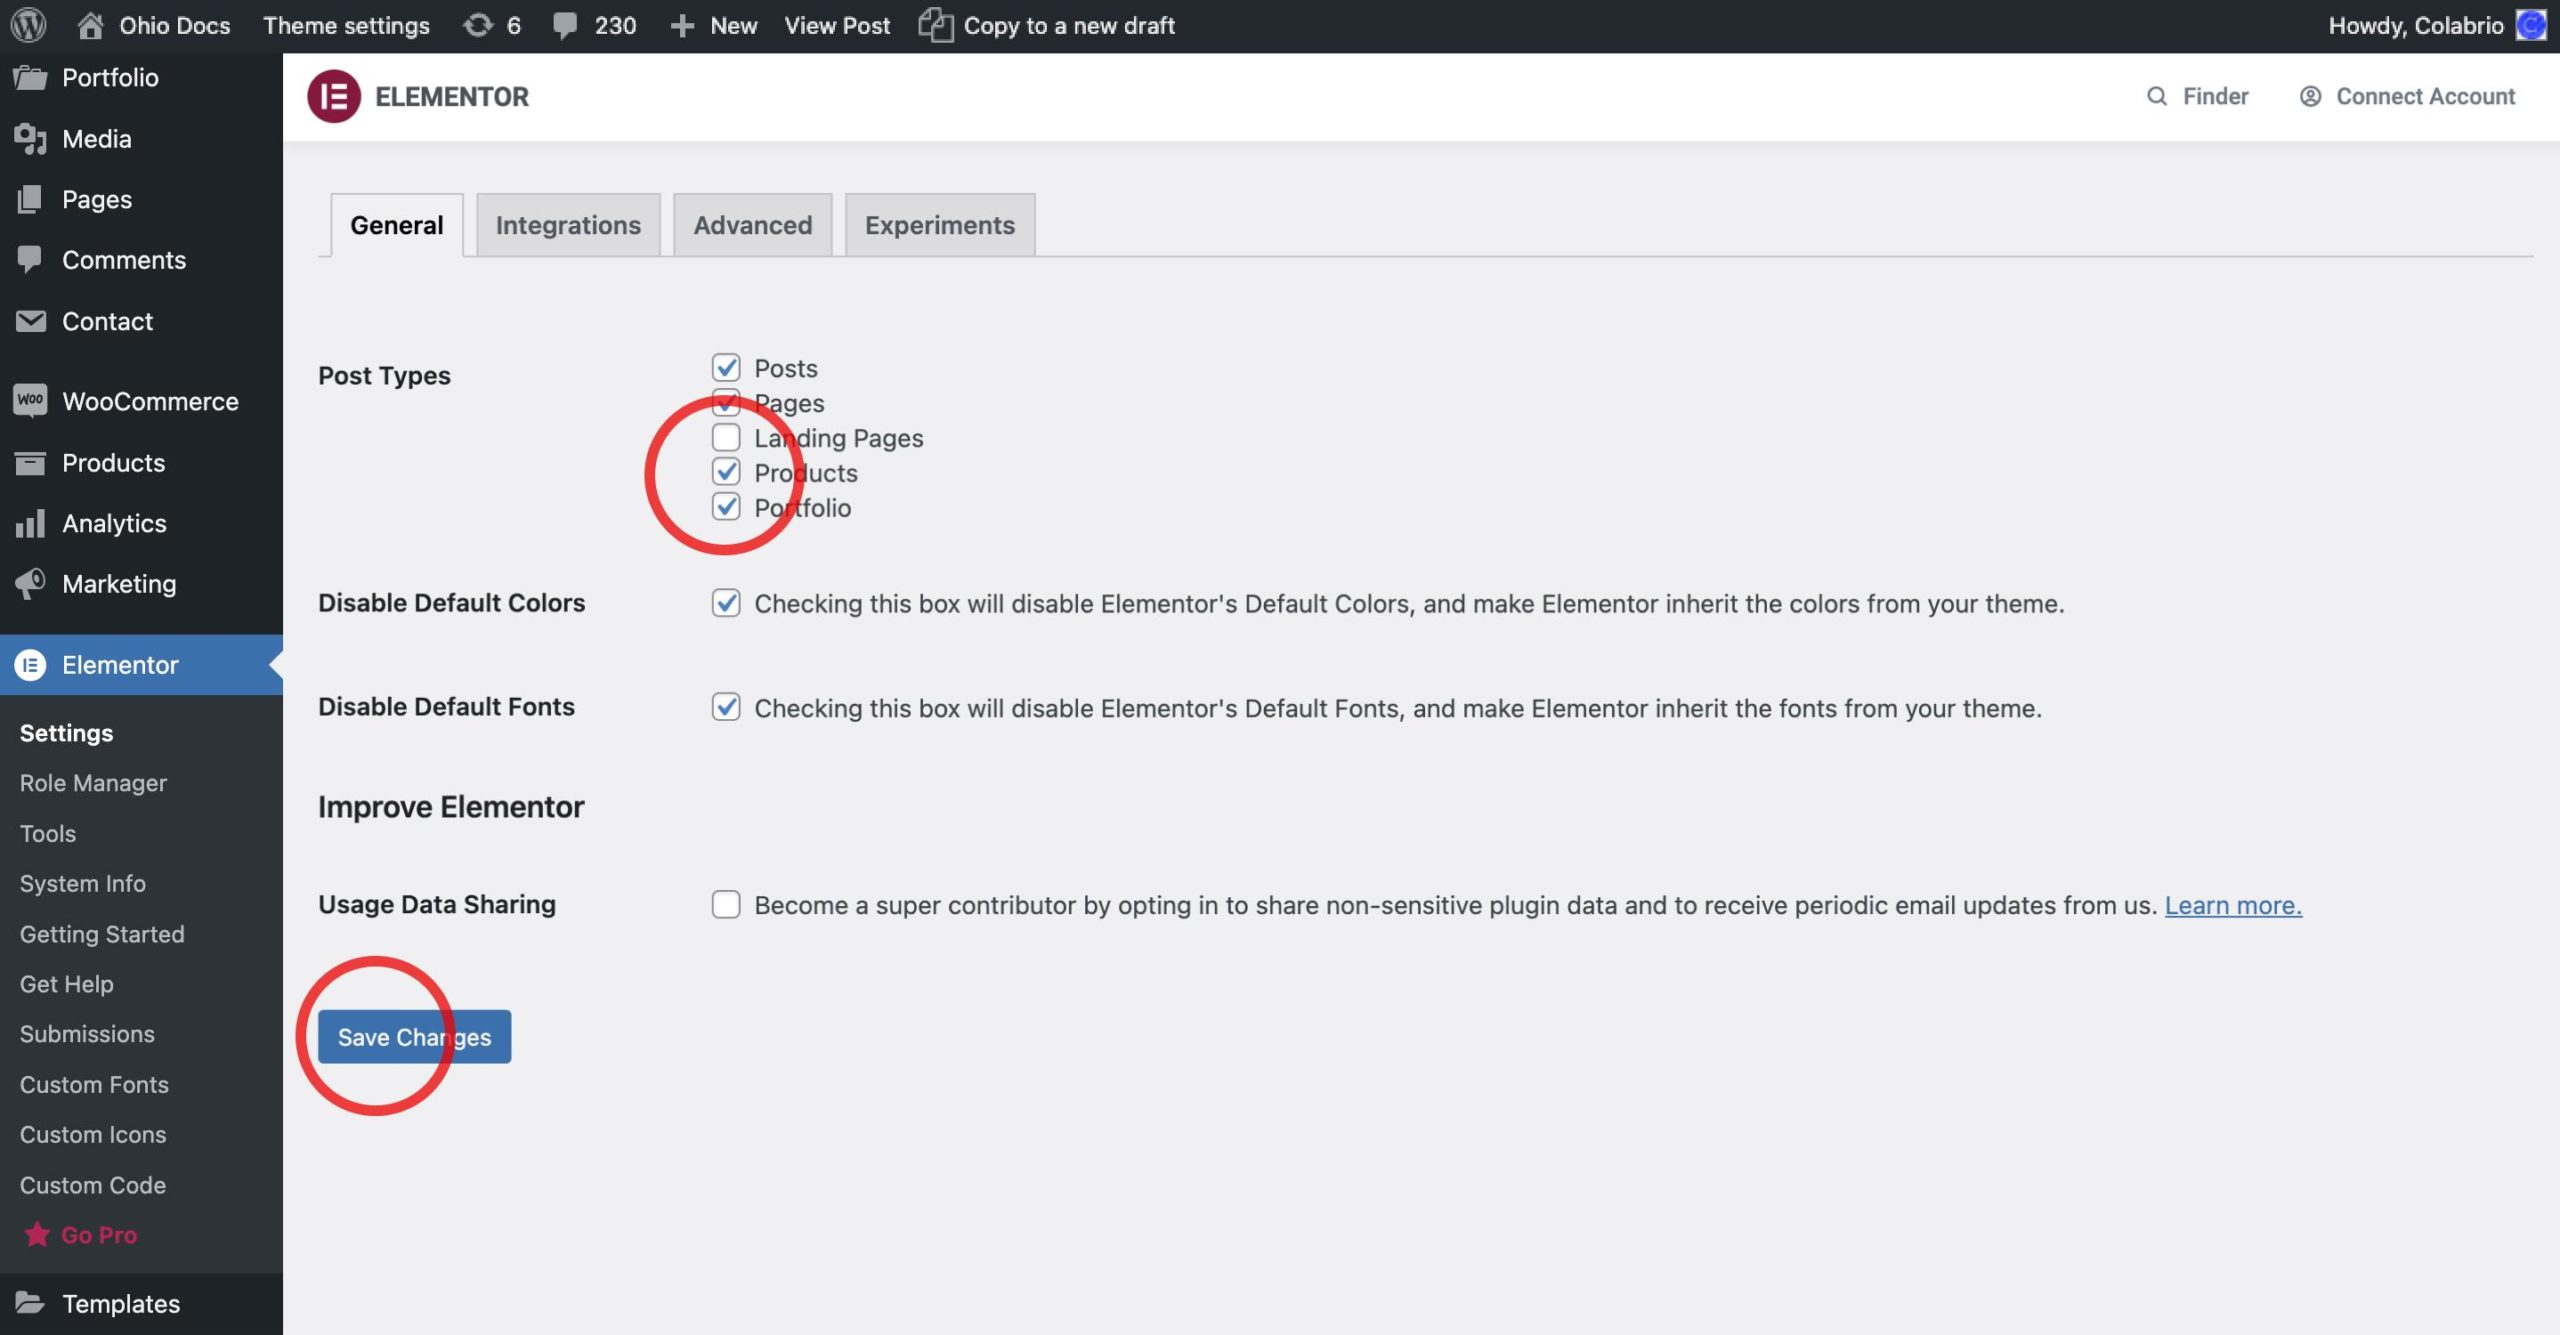
Ensure, that the required (WPBakery/Elementor) page builder is enabled for the product description area:
- From the WordPress dashboard go to WPBakery Page Builder → Role Manager → Post Types ;
- From the dropdown menu choose the Custom value and toggle the product checkbox;
- Hint the Save Changes button below.
- From the WordPress dashboard go to Elementor → Settings → General → Post Types and toggle the Product checkbox;
- Hint the Save Changes button below.
Now, you should have the WPBakery/Elementor editable description area in your products.

