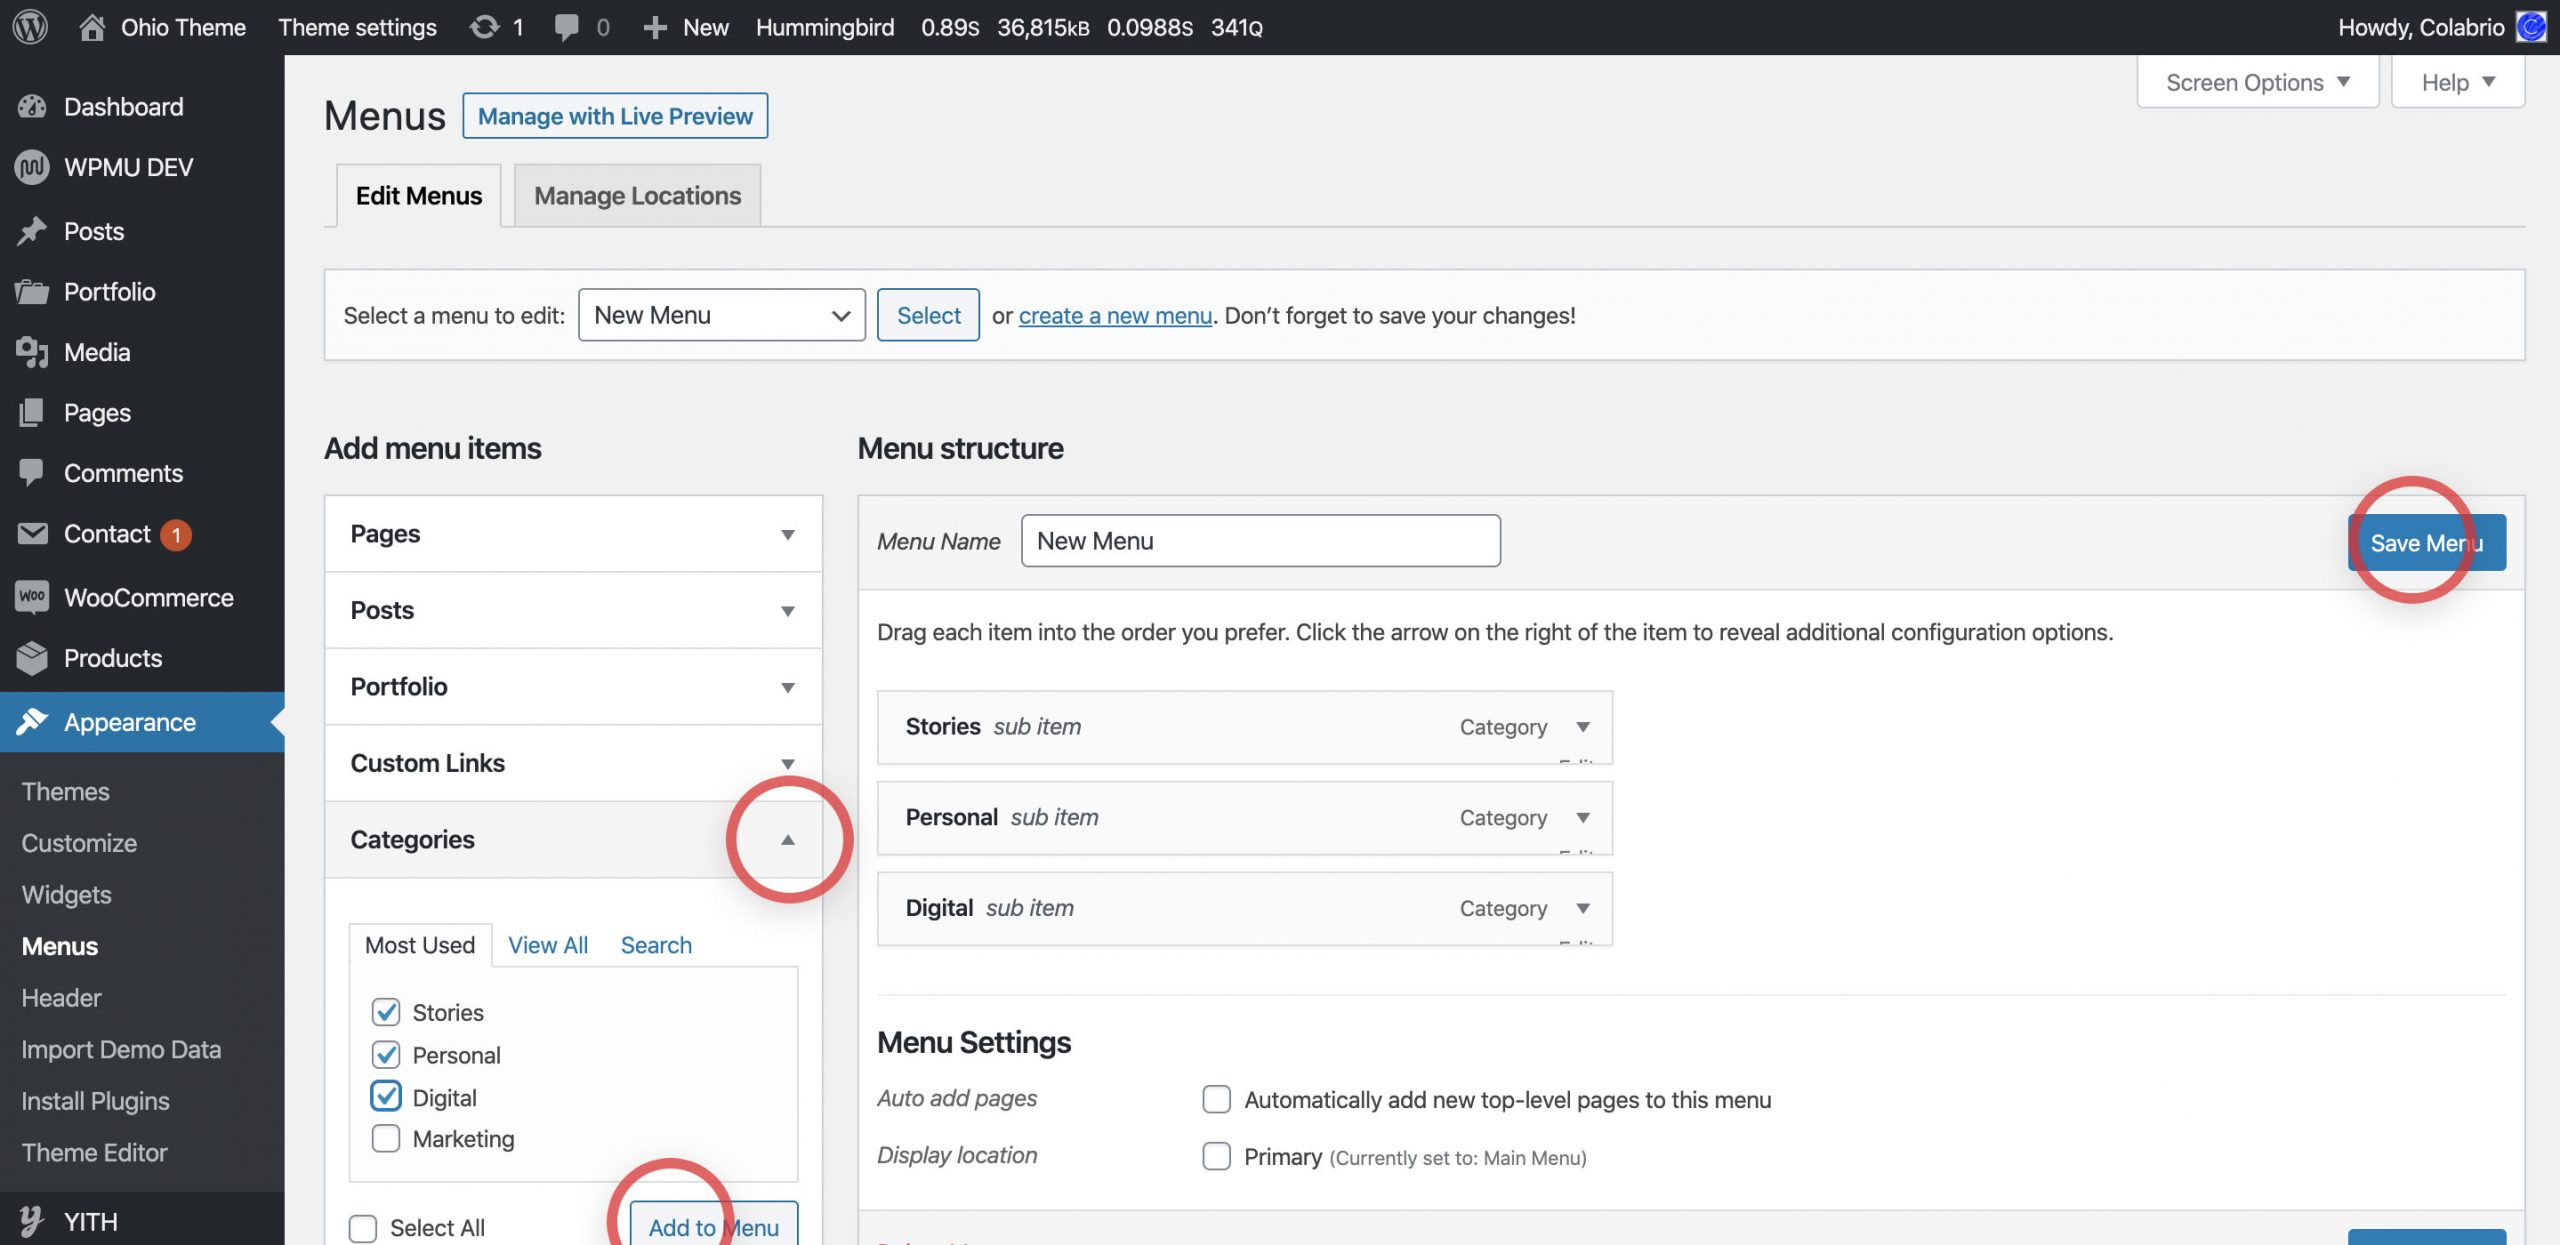
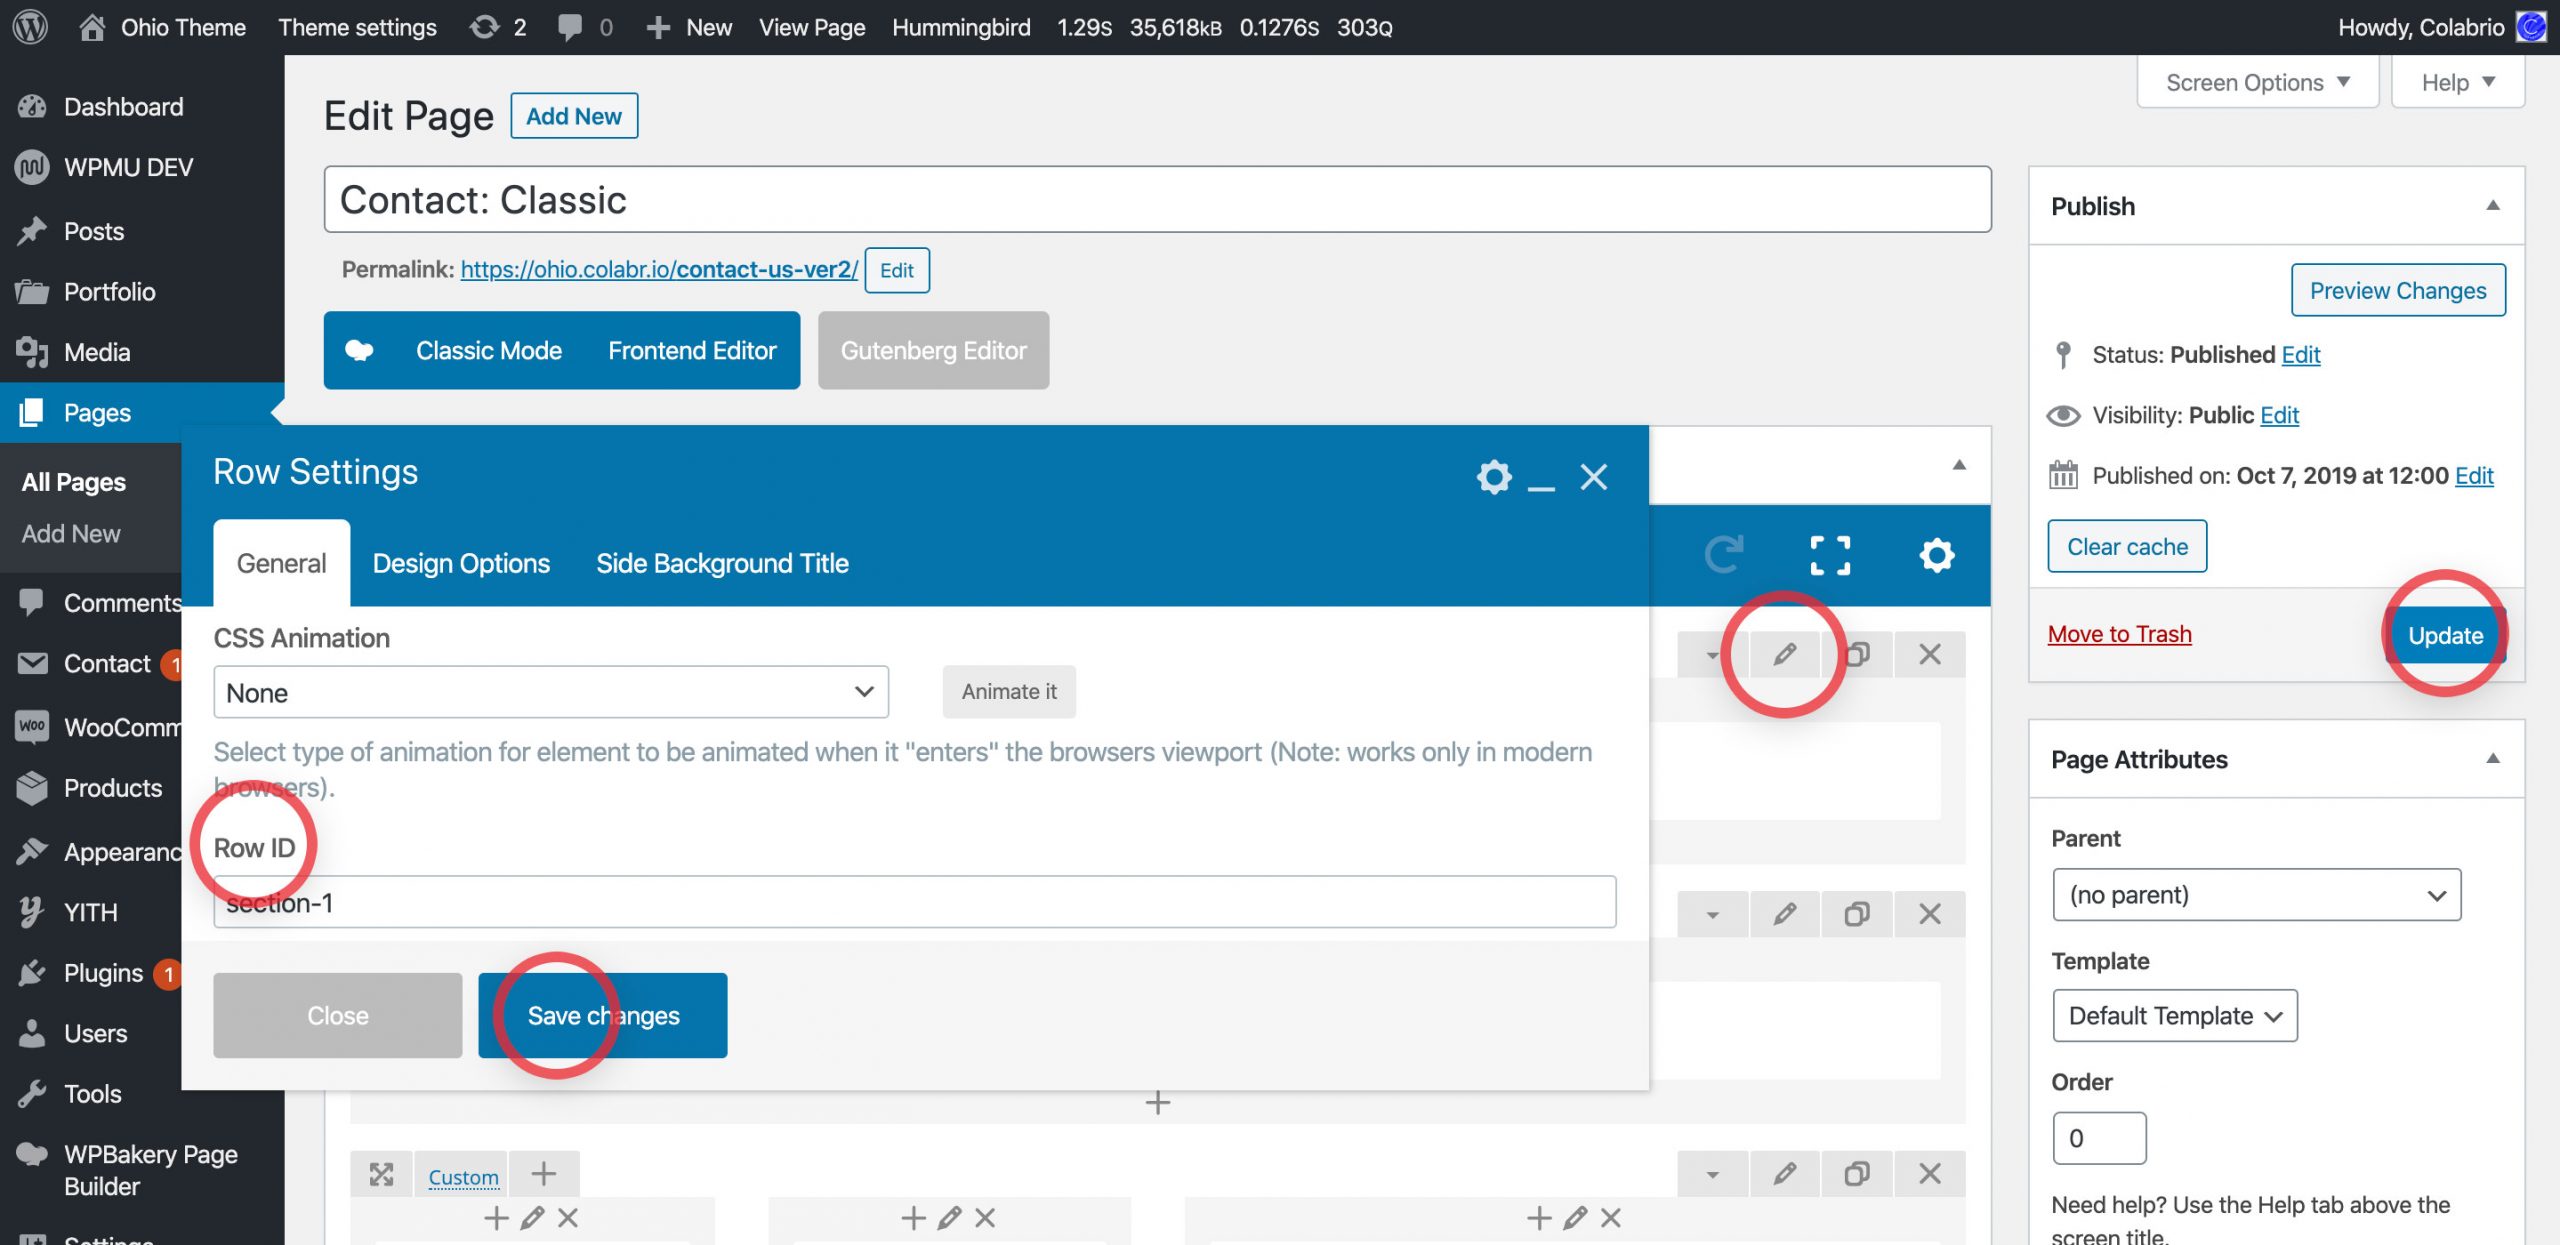
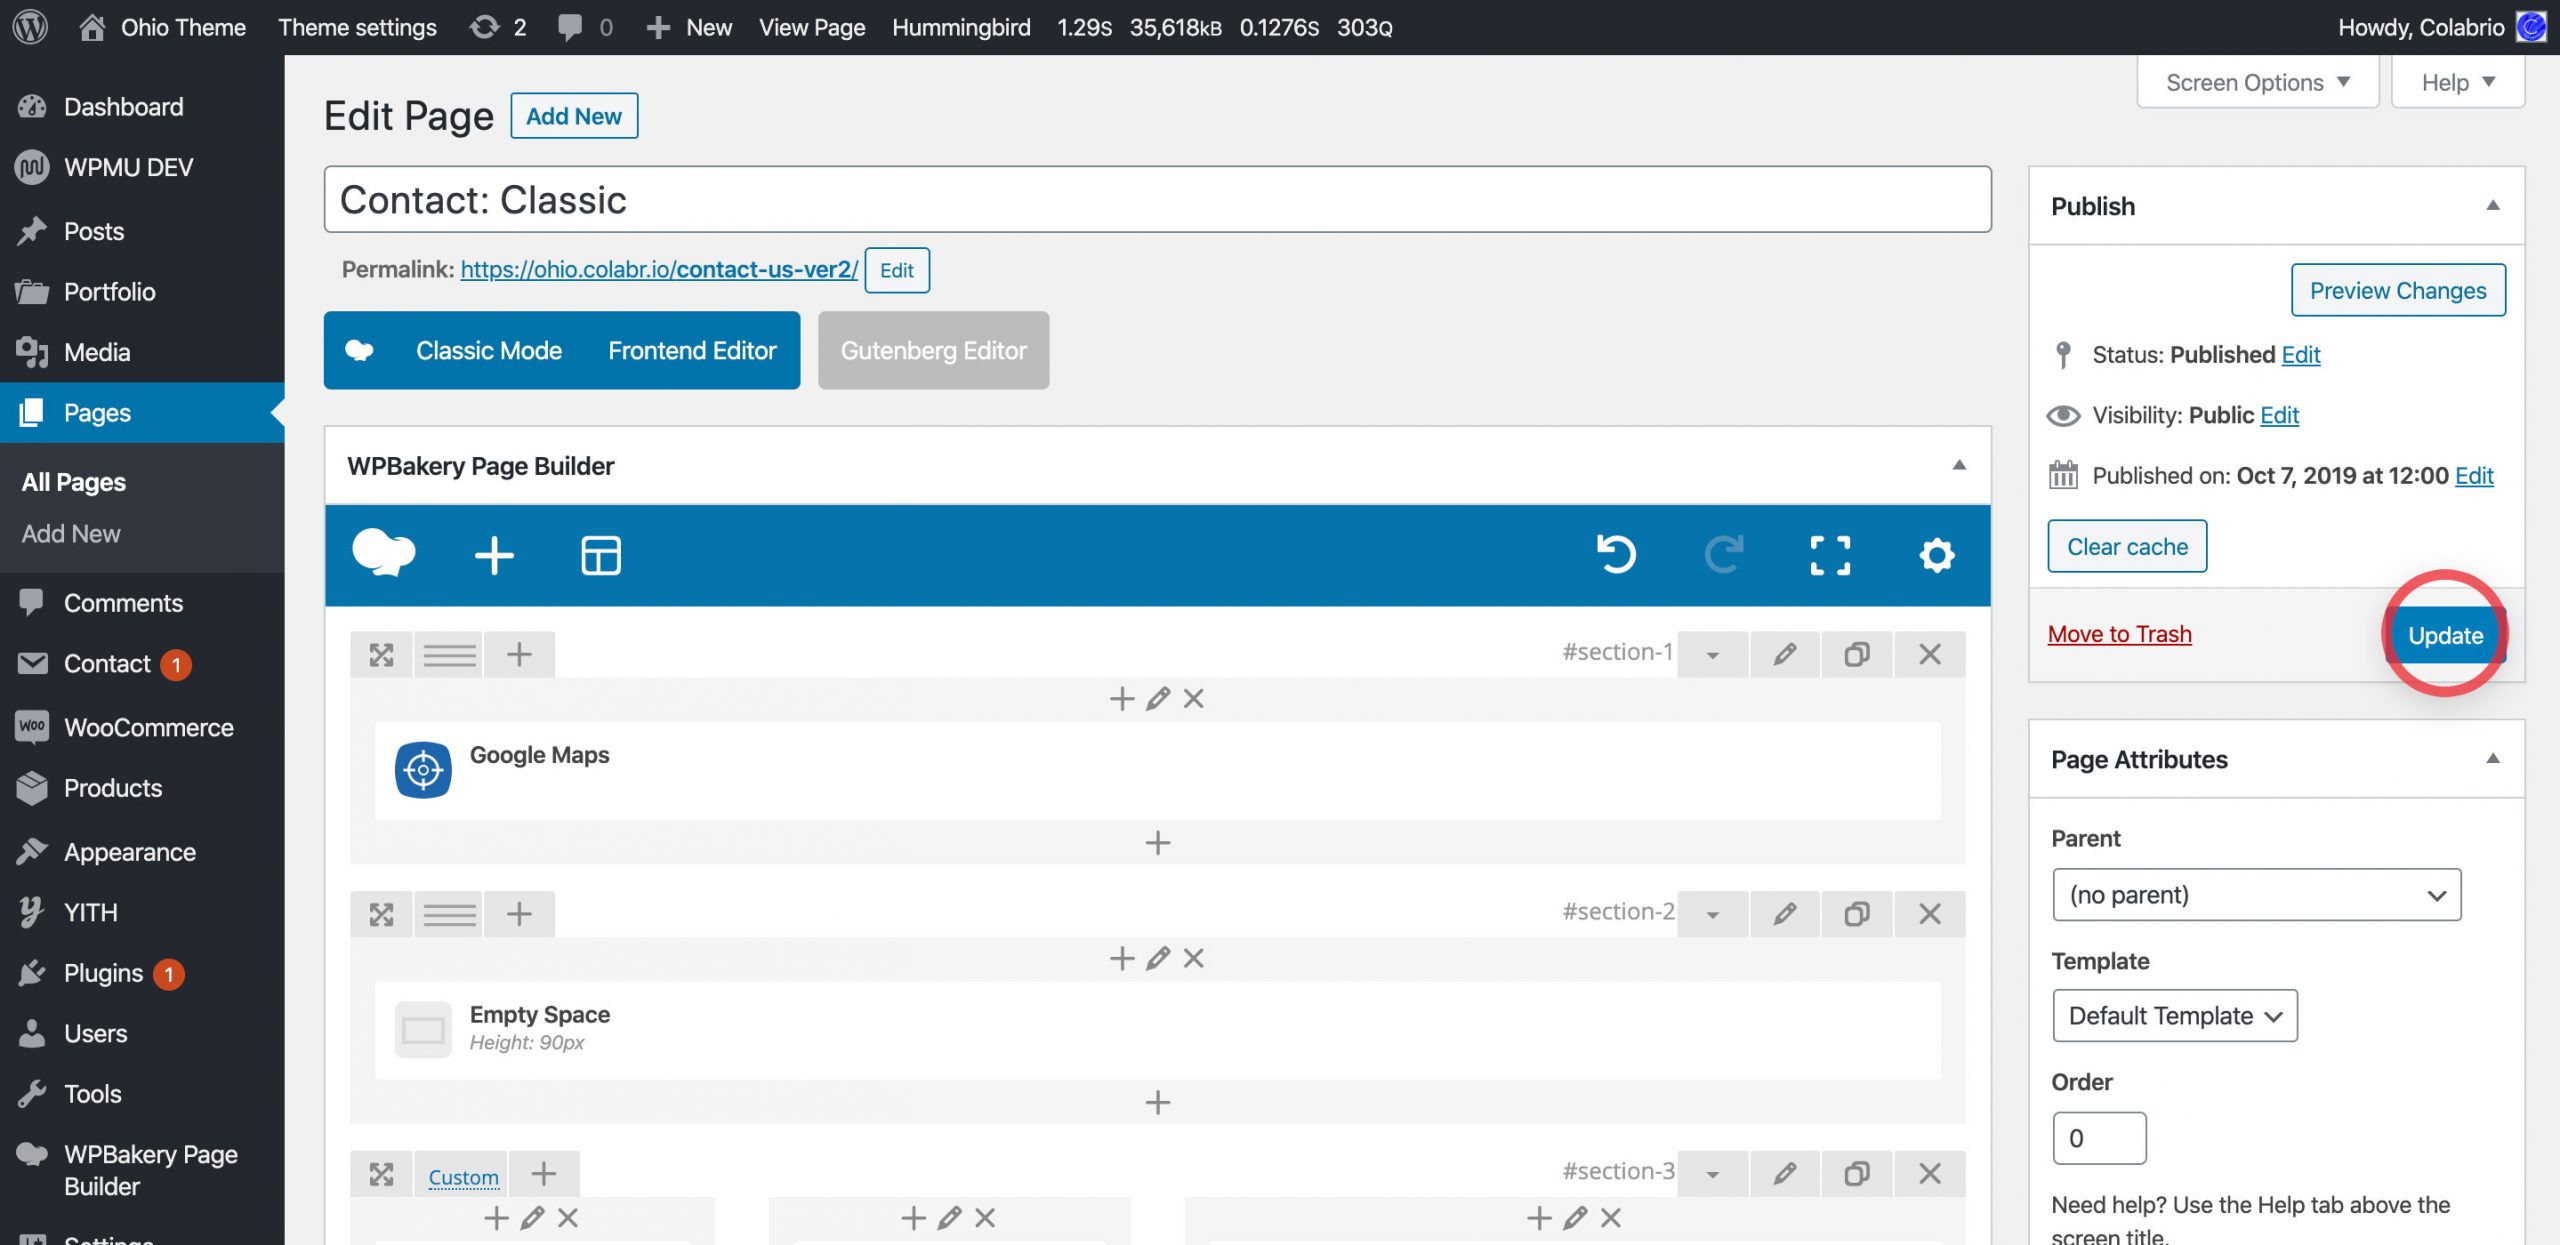
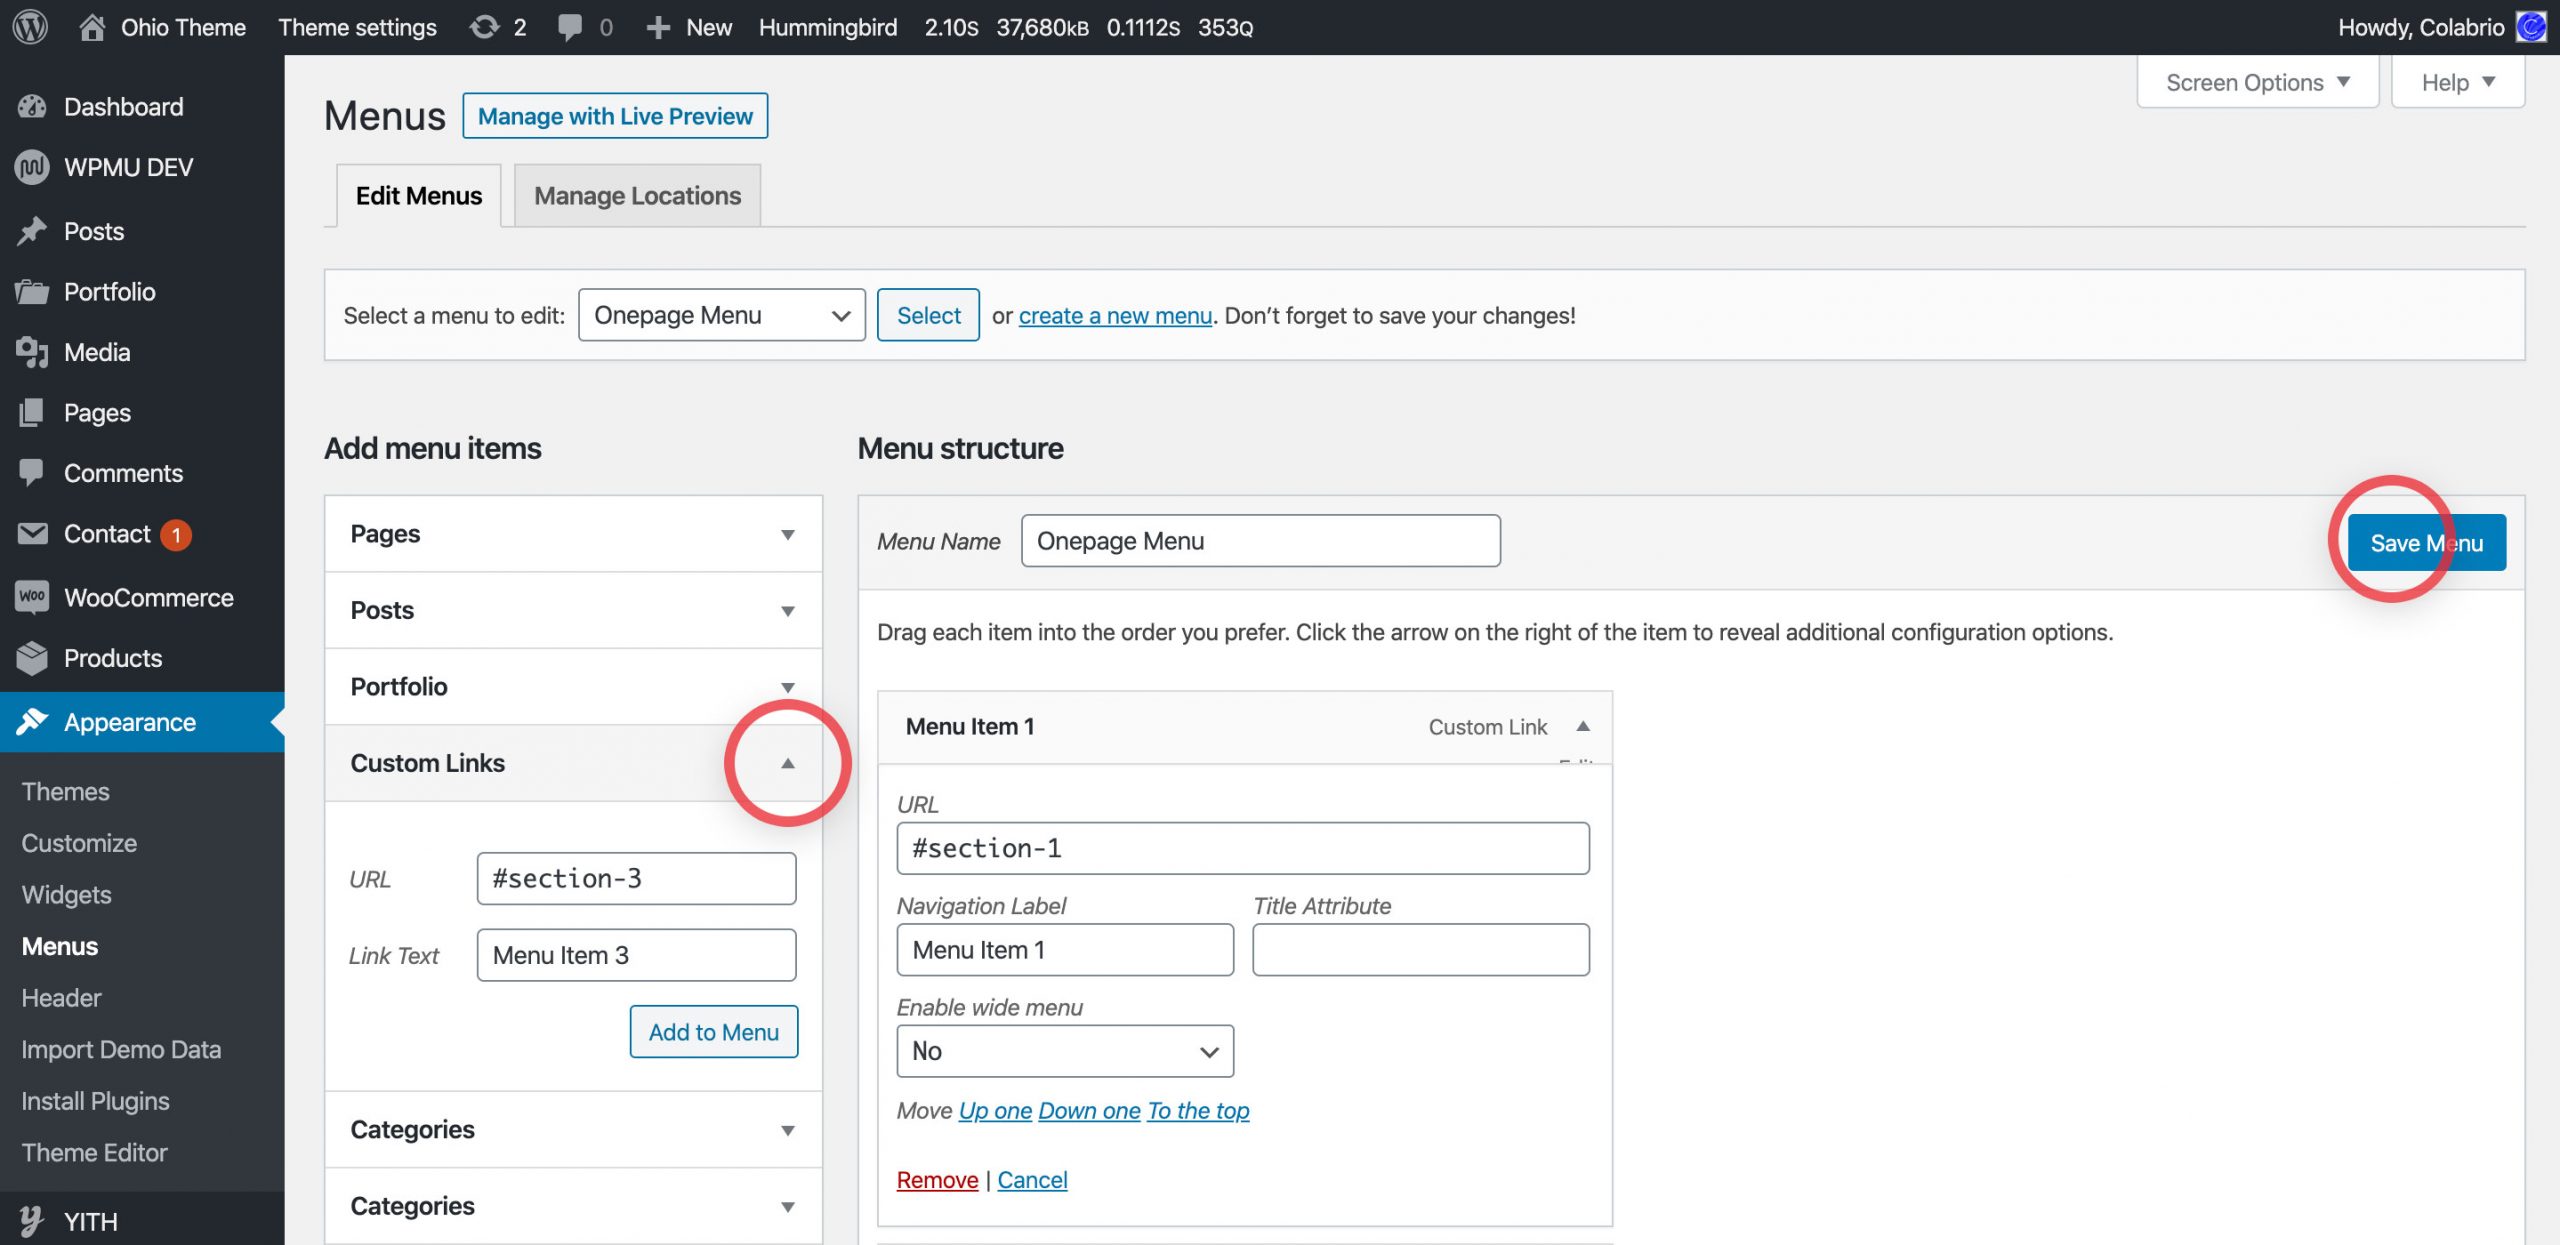
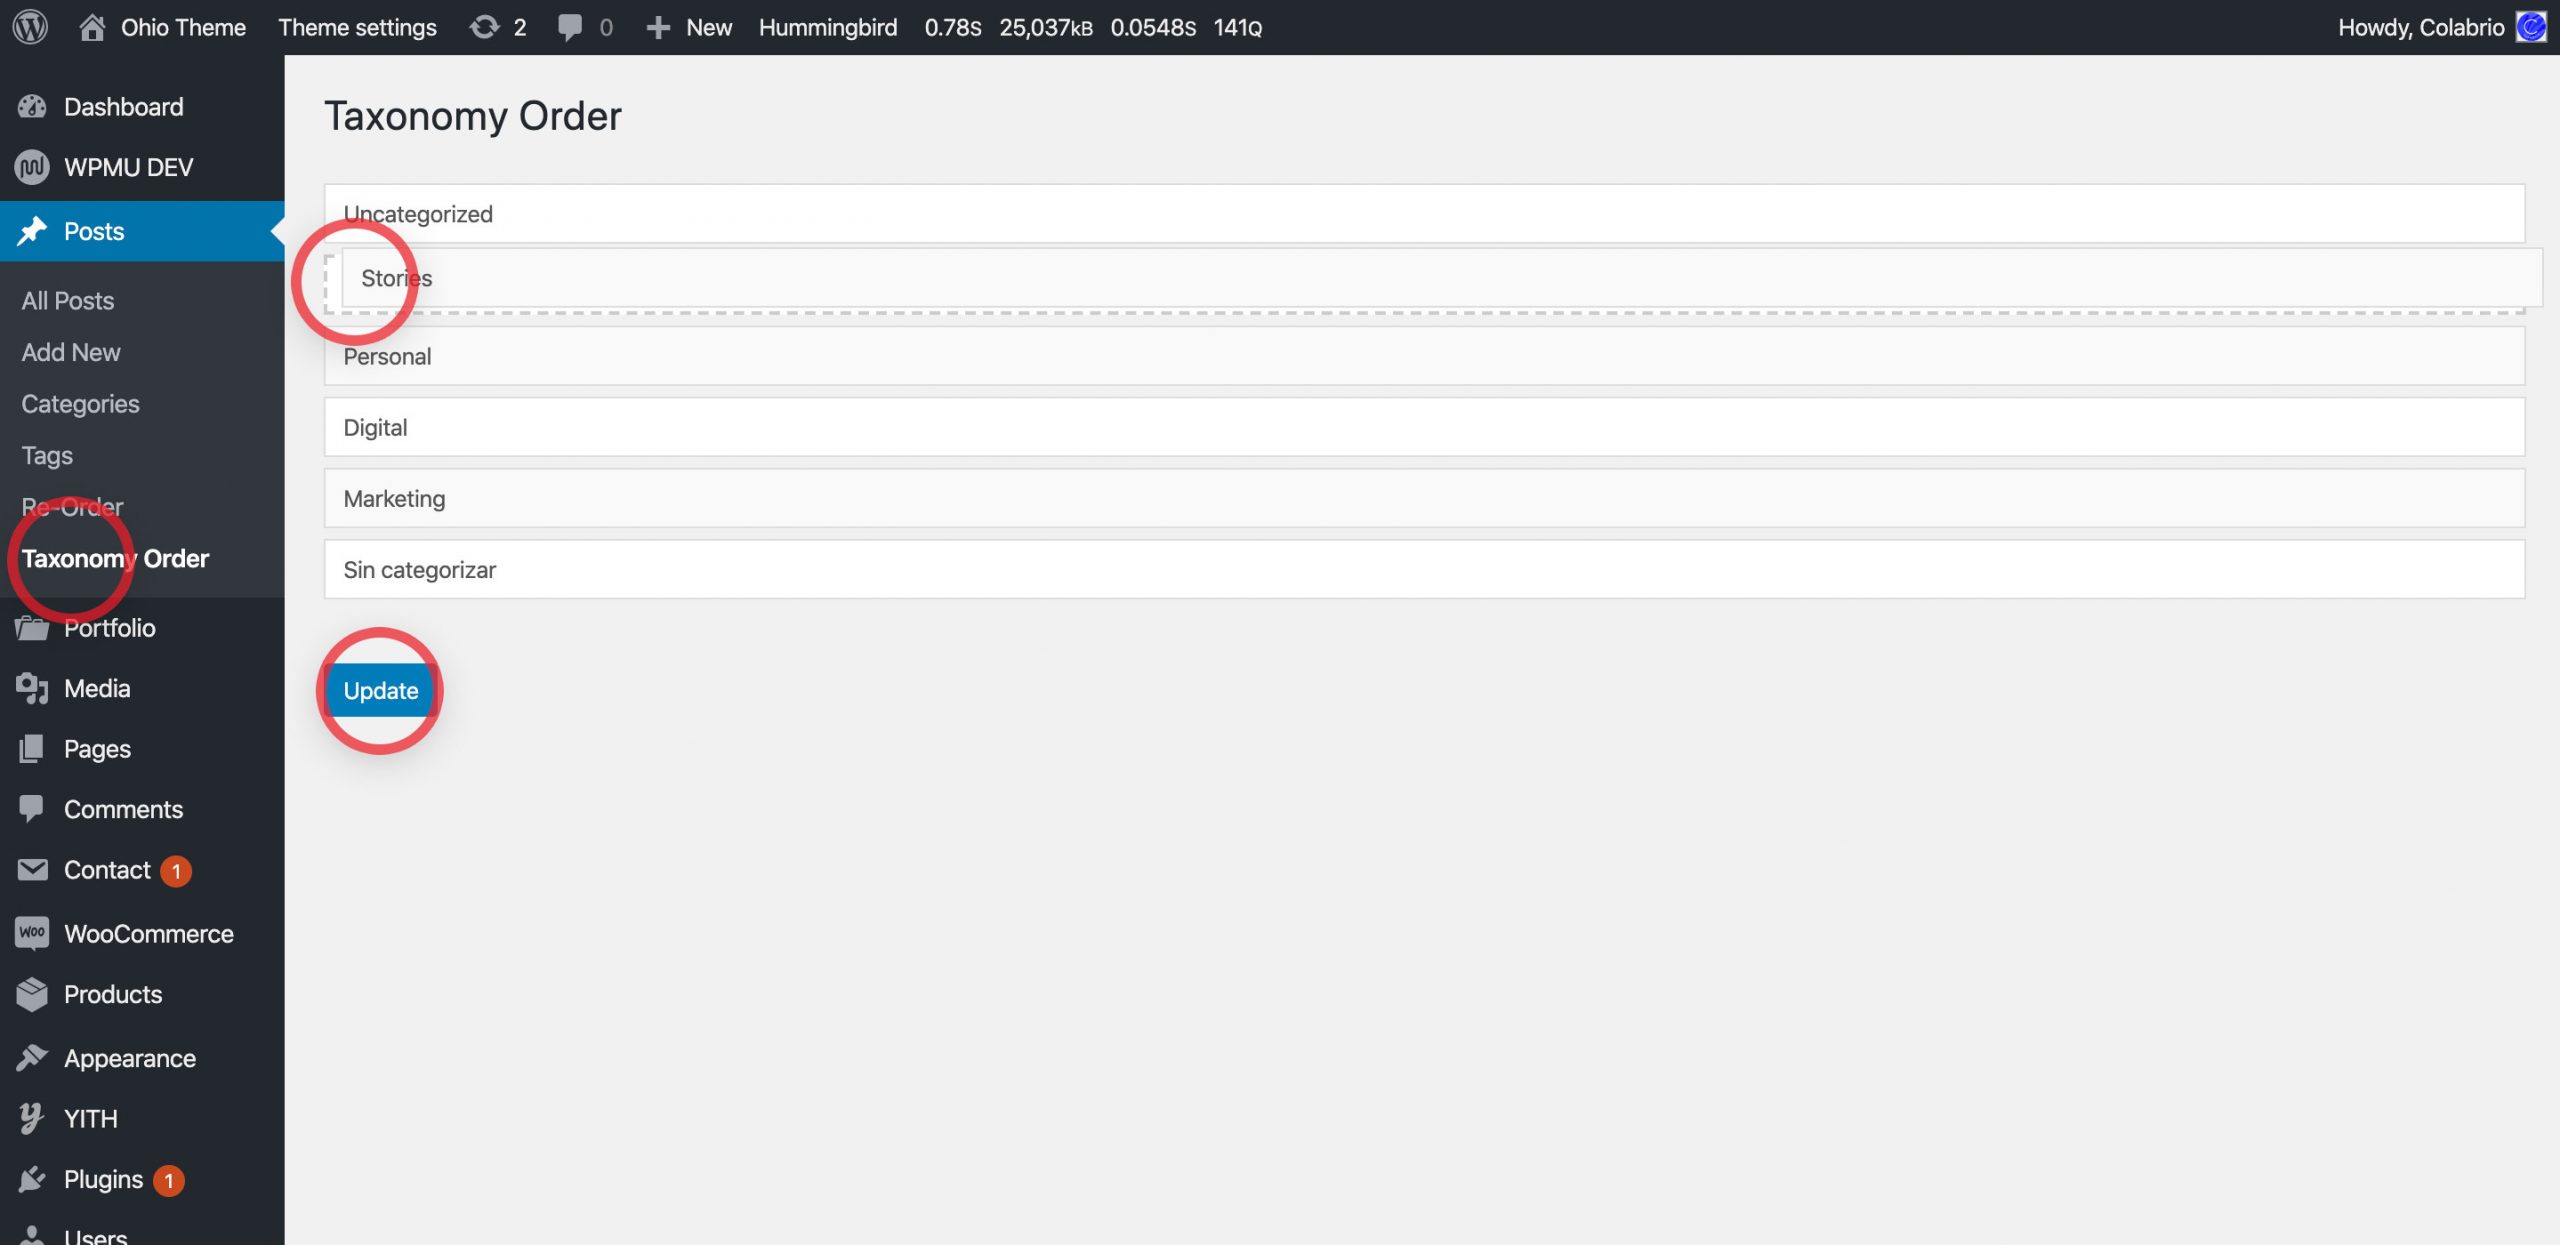
Ordering the categories (filters) of the blog posts, portfolio items or shop products can’t be done directly through WordPress or the Theme Options. But you can do it using a Category Order and Taxonomy Terms Order plugin.
Follow these steps to install and activate the plugin:
- From the WordPress dashboard go to Plugins → Add New;
- Search for Category Order and Taxonomy Terms Order in the search bar;
- Hint the Install Now button;
- When plugin is installed, click the Activate button and you’re done.
Ohio theme is translated ready and it means that you can use WordPress plugins to change/translate UI strings (e.g. Scroll to top, Next Project) for your web project. Let’s get started with choosing the right WordPress plugin for that purpose. We suggest you use LocoTranslate plugin, it’s free and quite intuitive to use.
This method works both for localization your website for any language or just changing the strings with your own ones.
- From the WordPress dashboard go to Plugins → Add New;
- Search for the Loco Translate plugin;
- And finally install and activate the plugin.
After installing the Loco Translate plugin its menu appears on your WordPress admin panel.
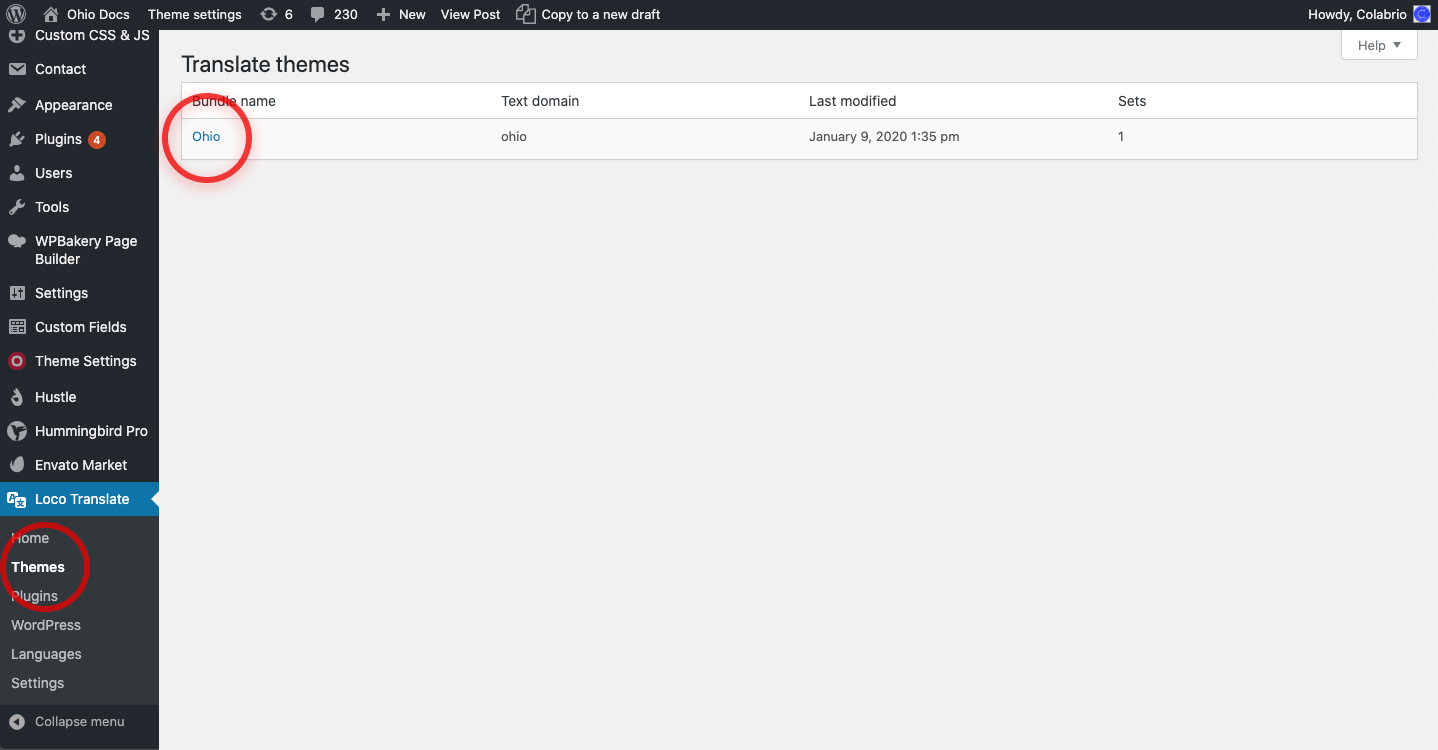
- From the WordPress dashboard go to Loco Translate → Themes/Plugins;
- Choose the Ohio theme or a plugin you want to edit;
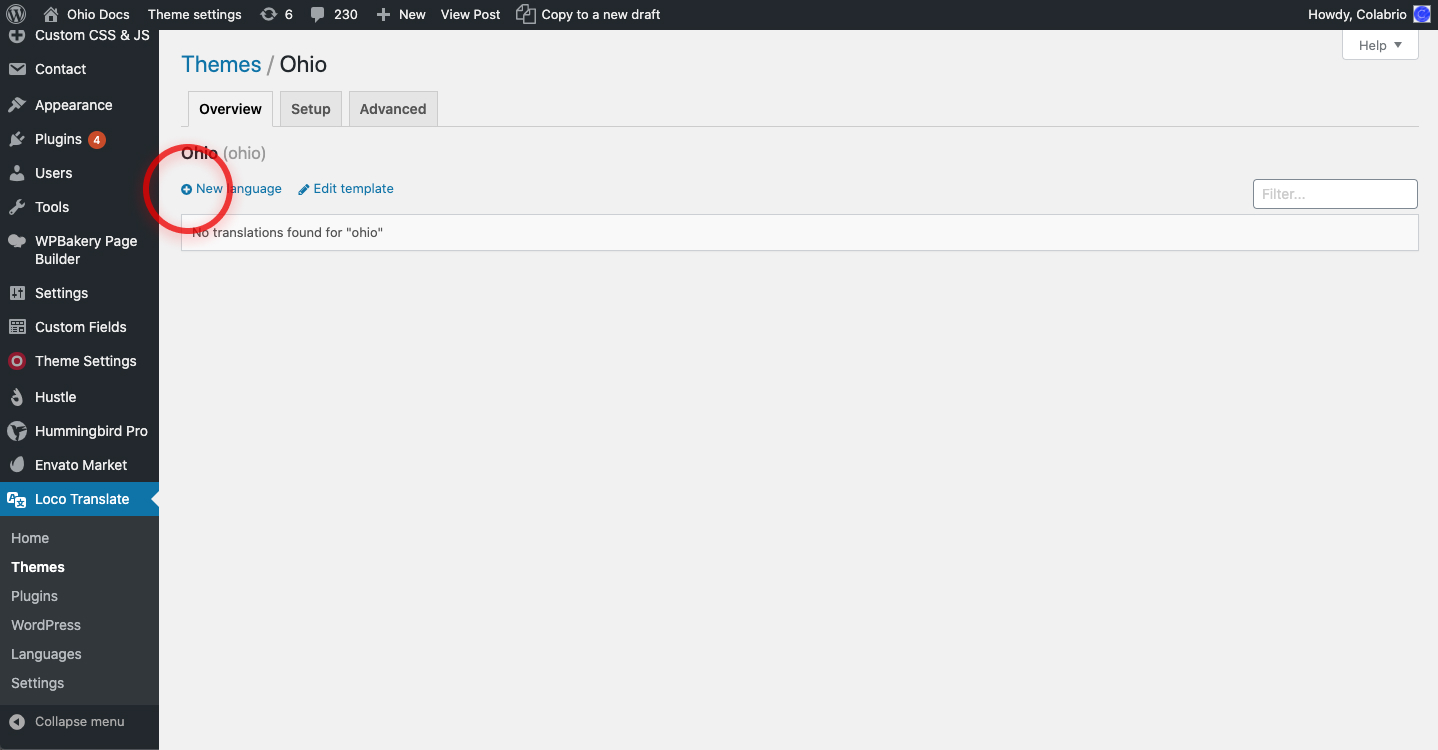
- And hint the New language link.
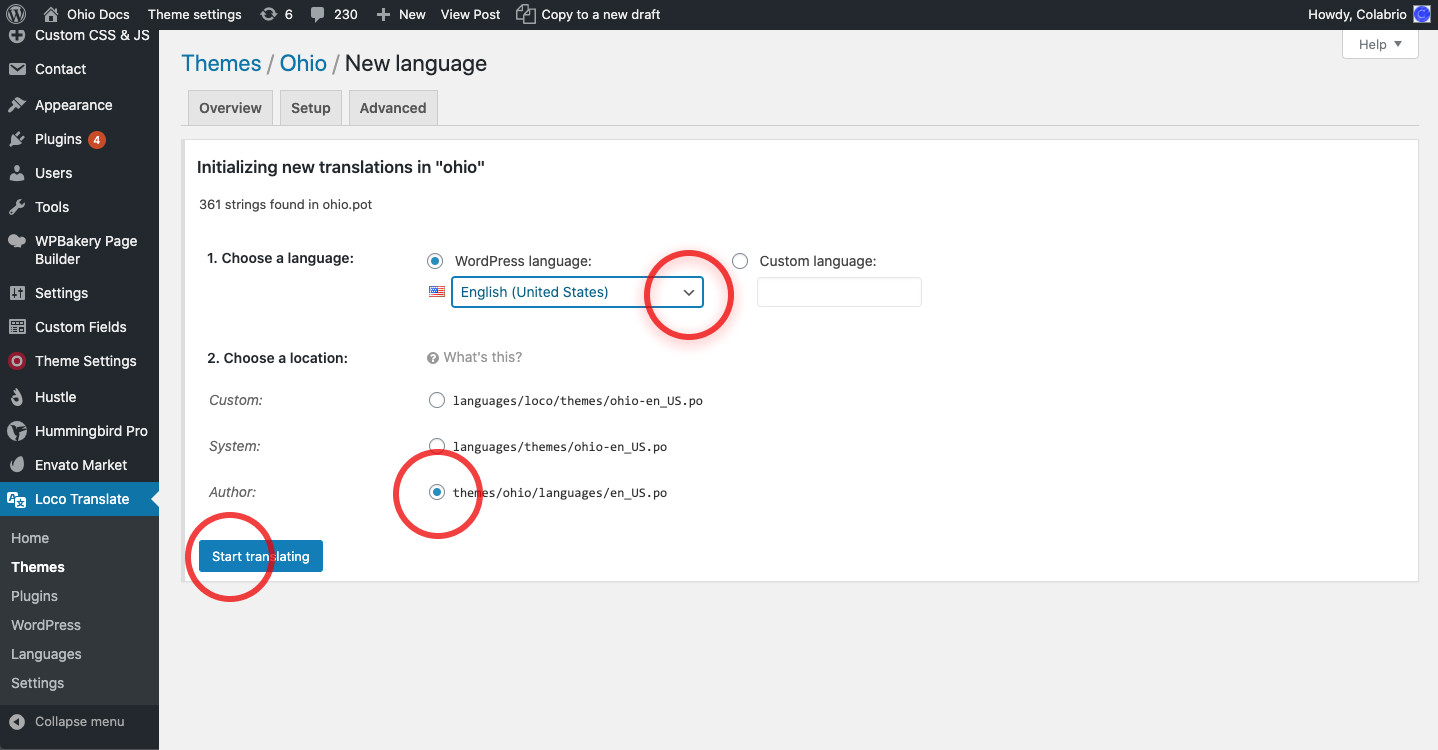
Now you have to choose the language and the file location from the dropdown menus. As was mentioned previously, this action is required both for localization of your website for any language or just changing the strings with your own ones.
Finally, you should see a list with all the theme’s/plugins’ strings and you can start to change/translate strings:
- Search for the string that you want to change;
- Add your own value for the string;
- And hint the Save button.
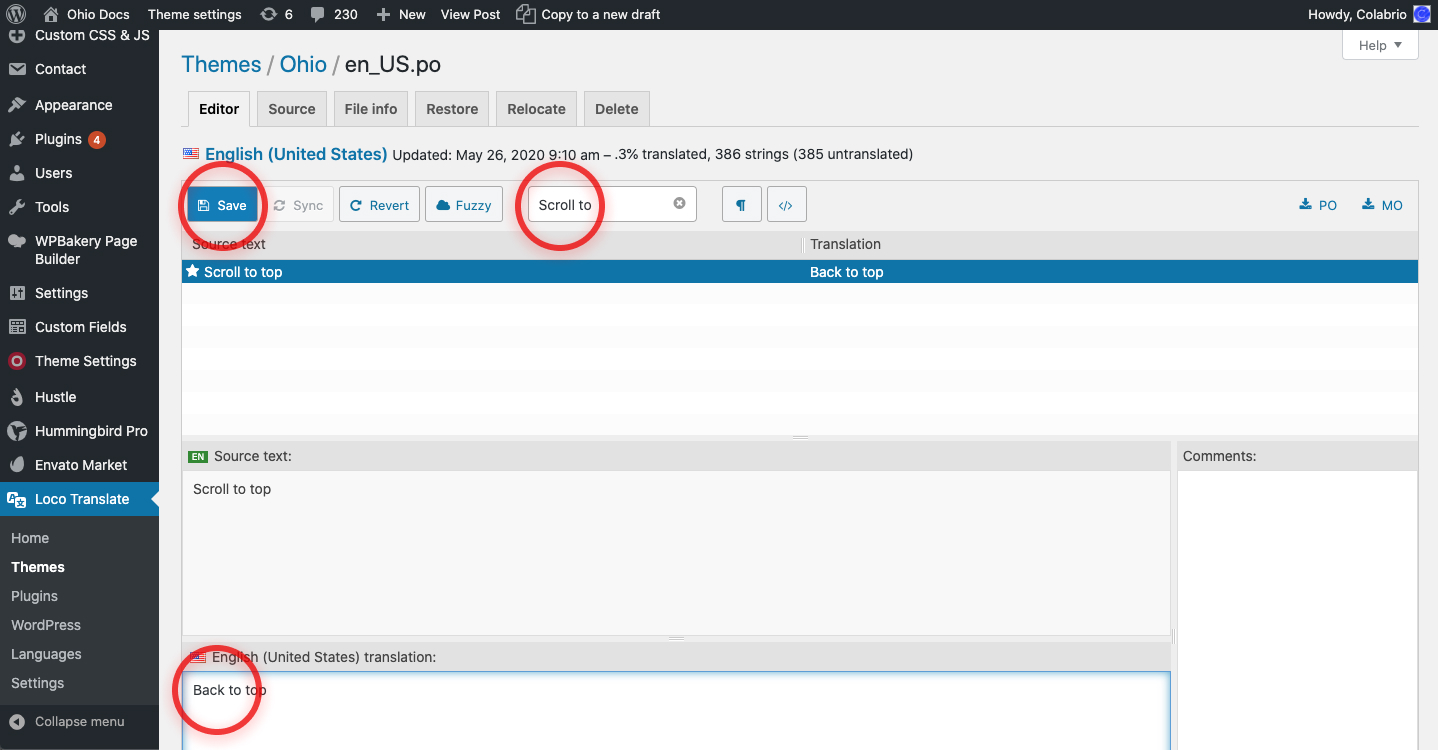
Now you should have your strings changed/translated.
To rename the main theme follow these easy steps:
- Go to /wp-content/themes/ohio and rename it to whatever you want (e.g. new);
- Go to the theme folder /wp-content/themes/new and open the style.css file. In the top part of the style.css file you will see the theme name. Rename it and save changes;
- Finally, navigate to Appearance → Themes from your WordPress admin panel and activate your theme under the new name.
If you want to use both parent and child themes with a new name you should make an additional step:
- Go to the child theme folder /wp-content/themes/new-child and open the style.css file;
- Change the parent theme path in the style.css file and save changes.
Ohio theme is well coded and optimized to give you the best performance results. But poor server/hosting, non-optimized images, and additional plugins might dramatically decrease the speed of your website. That’s why we suggest our users follow our optimization guide to speeding up their websites.
Picking a hosting provider is a matter of choice based on its location, pricing, and services. This is an important decision at the start and we strongly suggest you choose a WordPress friendly hosting provider for using our theme.
Often asked by our clients, we try to determine the most appropriate hosting providers for them but it is always your choice based on your goals. A good WordPress hosting provider like Bluehost takes the extra measures to speed up your website.
Large and non-optimized images can dramaticaly increase the time of page loading, which may affect you conversion rates. There are to ways of compressing images, using online services:
And using WordPress plugins, to compress your images while uploading them to your media library (allows to optimized images while and after uploading).
The location of your web hosting server can have an impact on your website speed when users from different countries visit your website. Let’s say your web server is located in Germany. Visitors from Europe will generally see faster loading times than visitors from the United States.
Using a Content Delivery Network (CDN) Media Cloud plugin can help to speed up loading times for all of your visitors and radically transform the way that you work with media in WordPress. Media Cloud works by moving your images, media, and other files from your WordPress server to CDN storages, such as:
The Media Cloud Getting Started tutorial will help you to set up cloud storage for your website and improve the performance of your website.
WordPress pages are dynamic and they’re building each time when someone visits your website. This process includes many steps, and it can really slow down the performance of your website when multiple people are visiting it at once.
That’s why we recommend using caching plugins. Caching can dramatically increase the performance of your website (3x – 6x faster) in terms of loading time. We recommend using free WordPress plugins like W3 Total Cache, Hummingbird, etc. They have an intuitive interface and many options to adjust your website performance.
Check out the official step-by-step guide on how to install and set up Hummingbird on your WordPress website.
After that you have to:
- From the WordPress dashboard go to Ohio Theme → Theme Settings → Other Settings → Plugins;
- Paste it in the Google Maps API key field;
- Hint the Update button on the right to save changes.
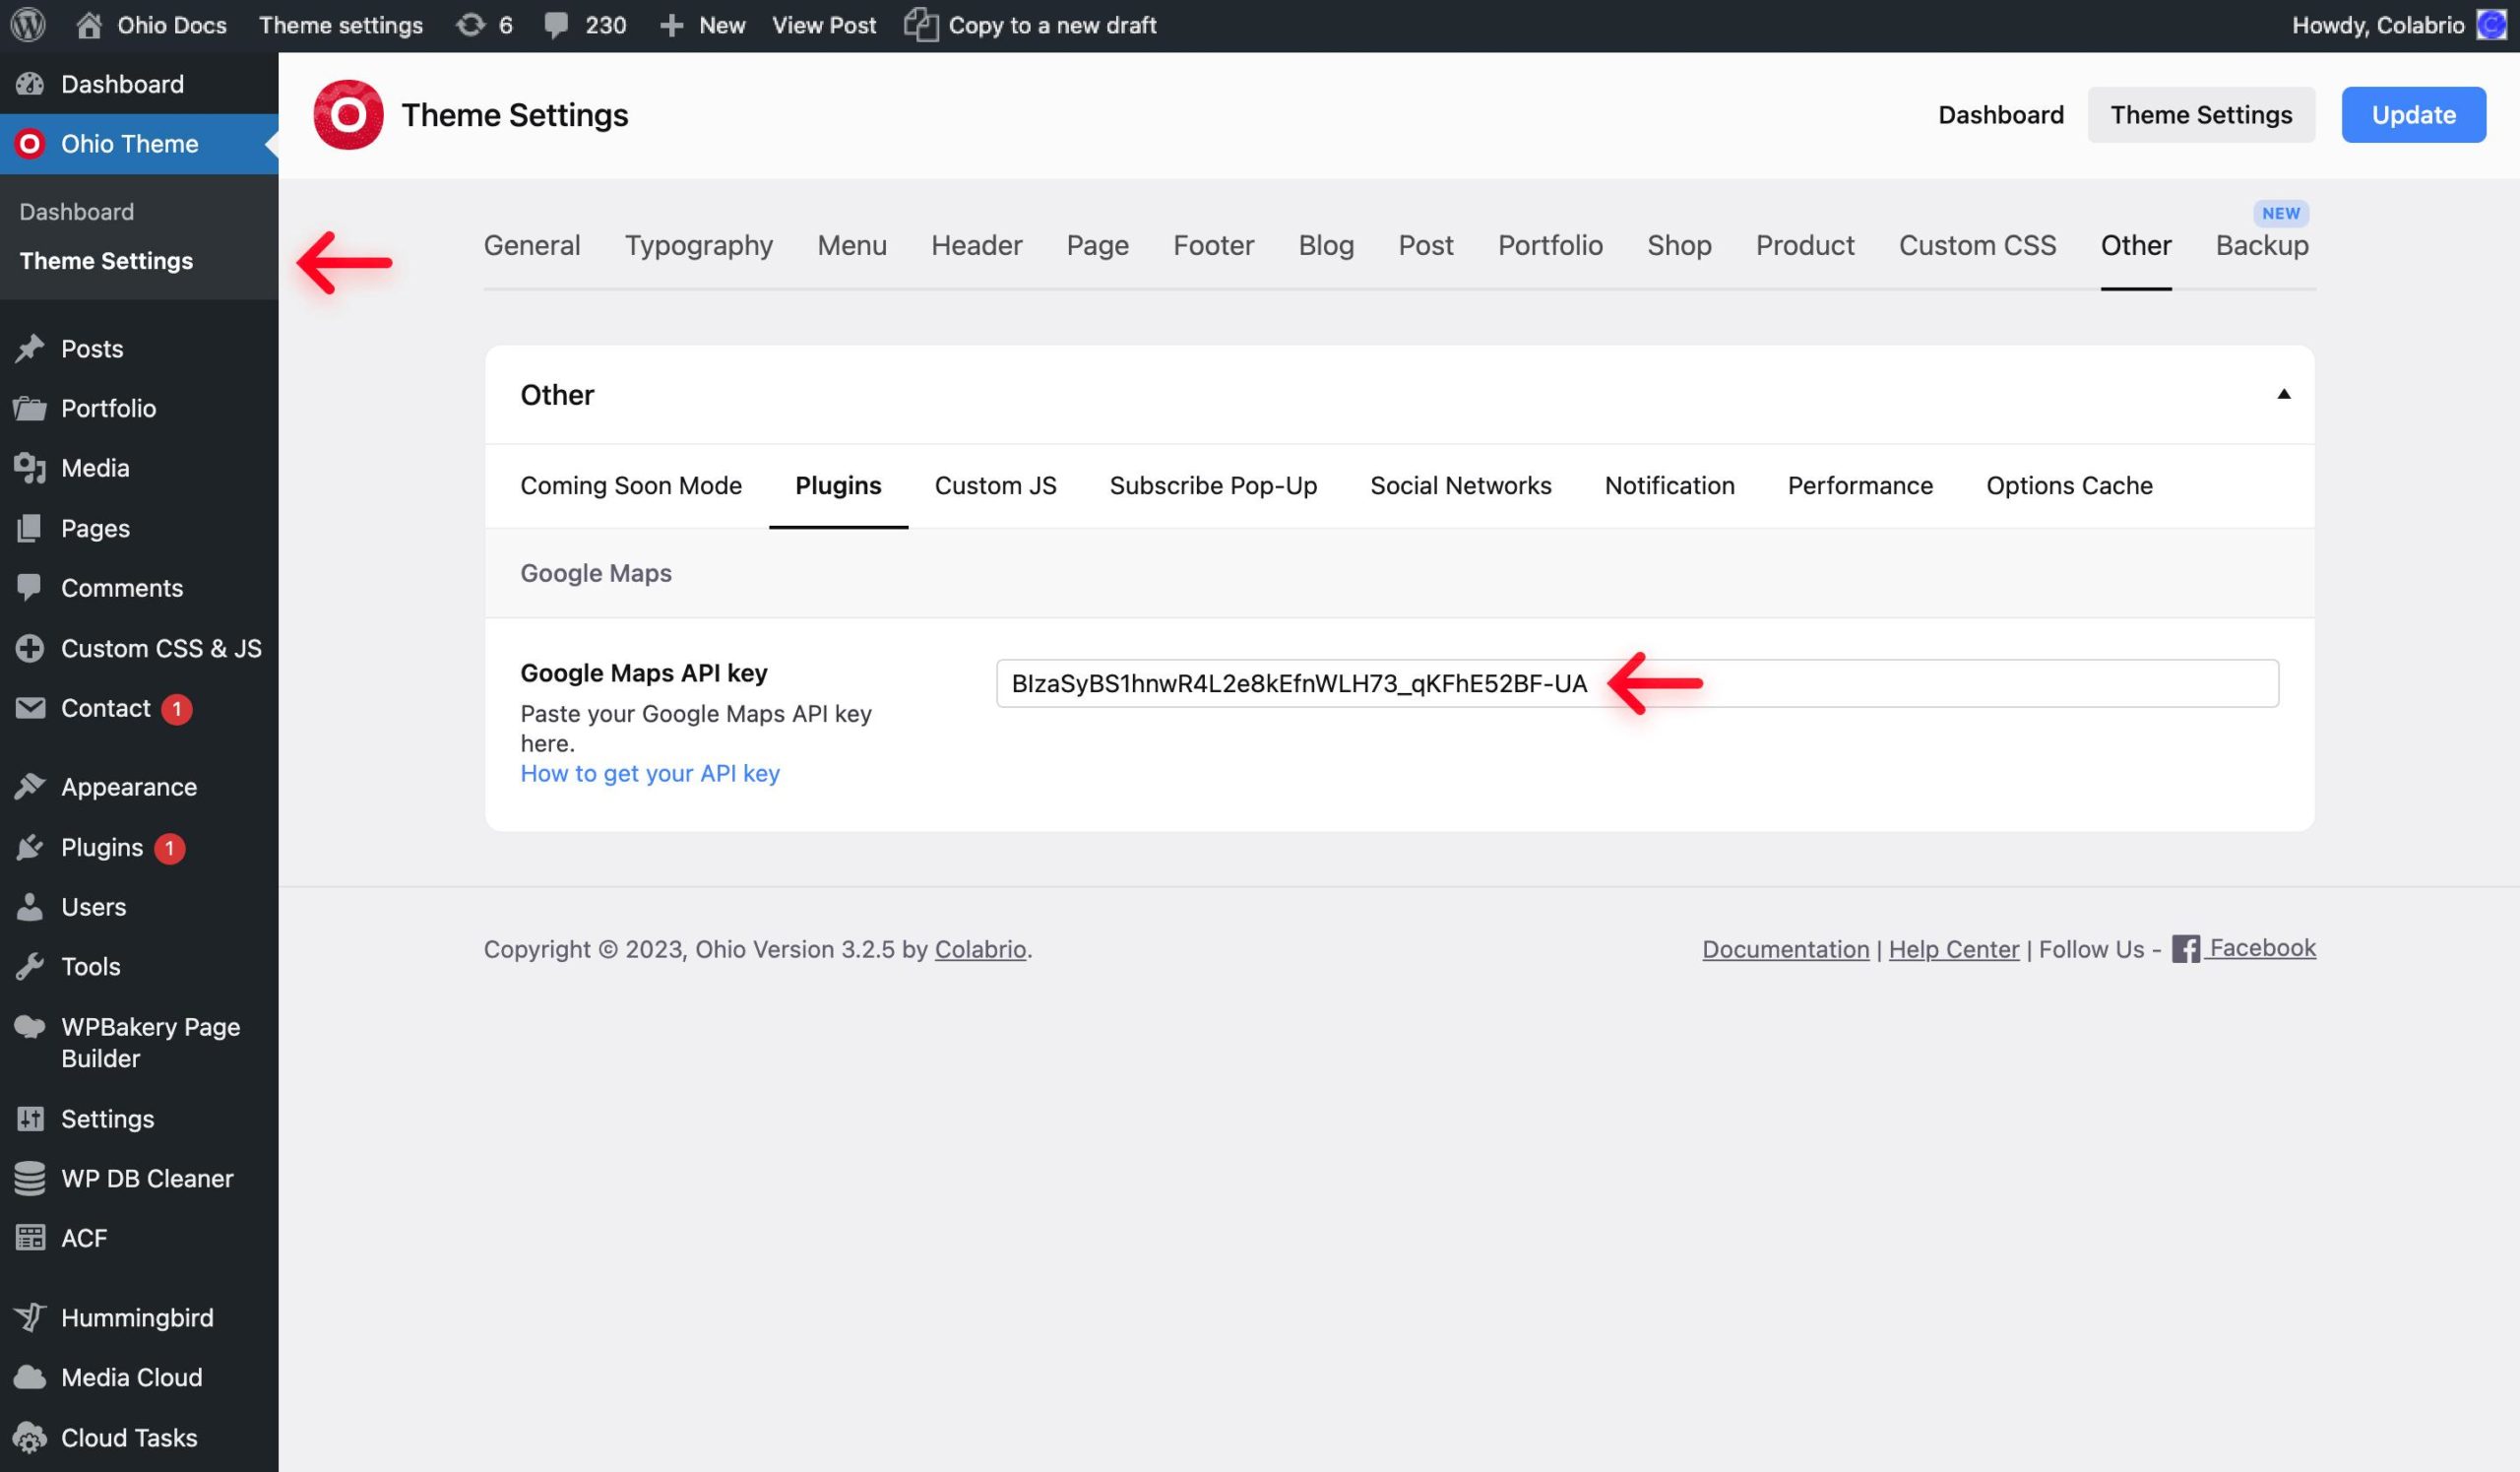
If it doesn’t work after that:
- Go to Google Developer Console → Library;
- Ensure that the Geocoding API and Maps JavaScript API services are enabled and you have enough credentials.
Now your Google Maps API should work and you can use Google Map element on your website.
With Ohio, you can use 1K+ free Google Fonts, 12K+ free/premium Adobe Fonts, and an unlimited number of your own web fonts from different resources.
To set up custom fonts for your website make the following:
- From the WordPress dashboard go to Ohio Theme → Theme Settings → Typography Settings → General;
- And choose the fonts source;
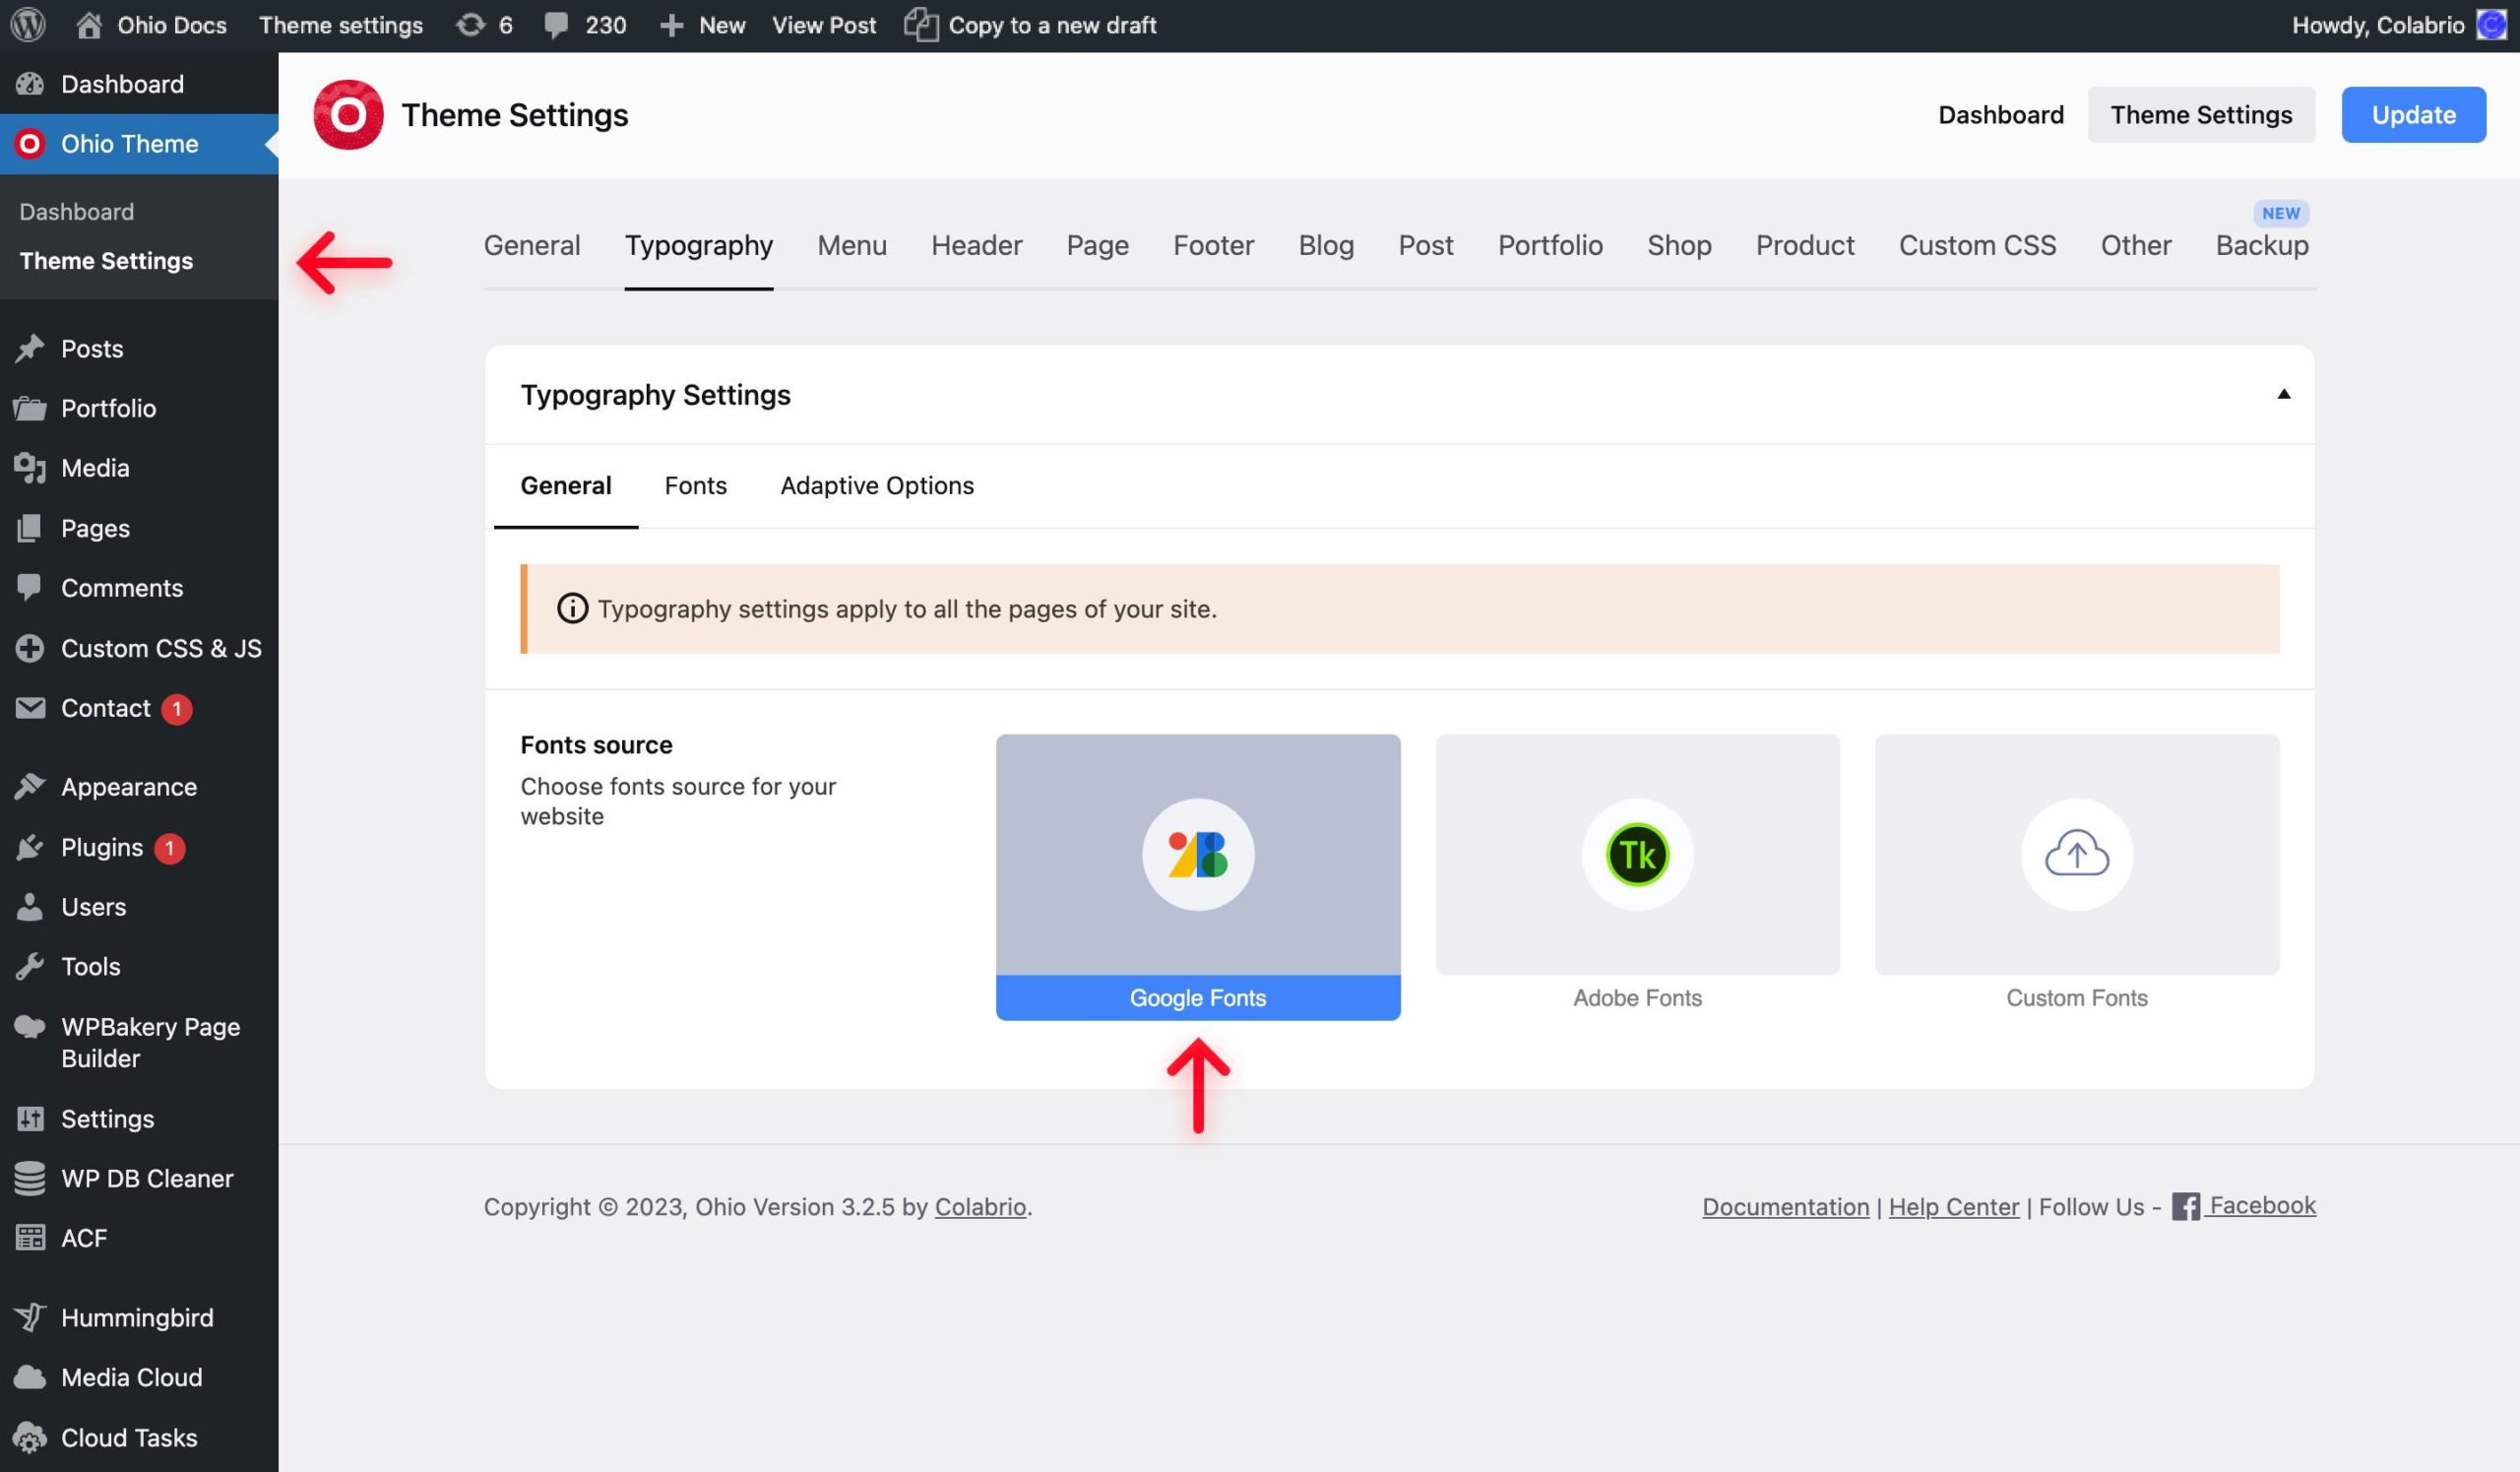
Google Fonts are installed by default, so you just have to choose the one you want to use on your website.
- From the WordPress dashboard go to Ohio Theme → Theme Settings → Typography Settings → Fonts;
- Choose a font from the Font family dropdown menu;
- Hint the Update button to save changes.
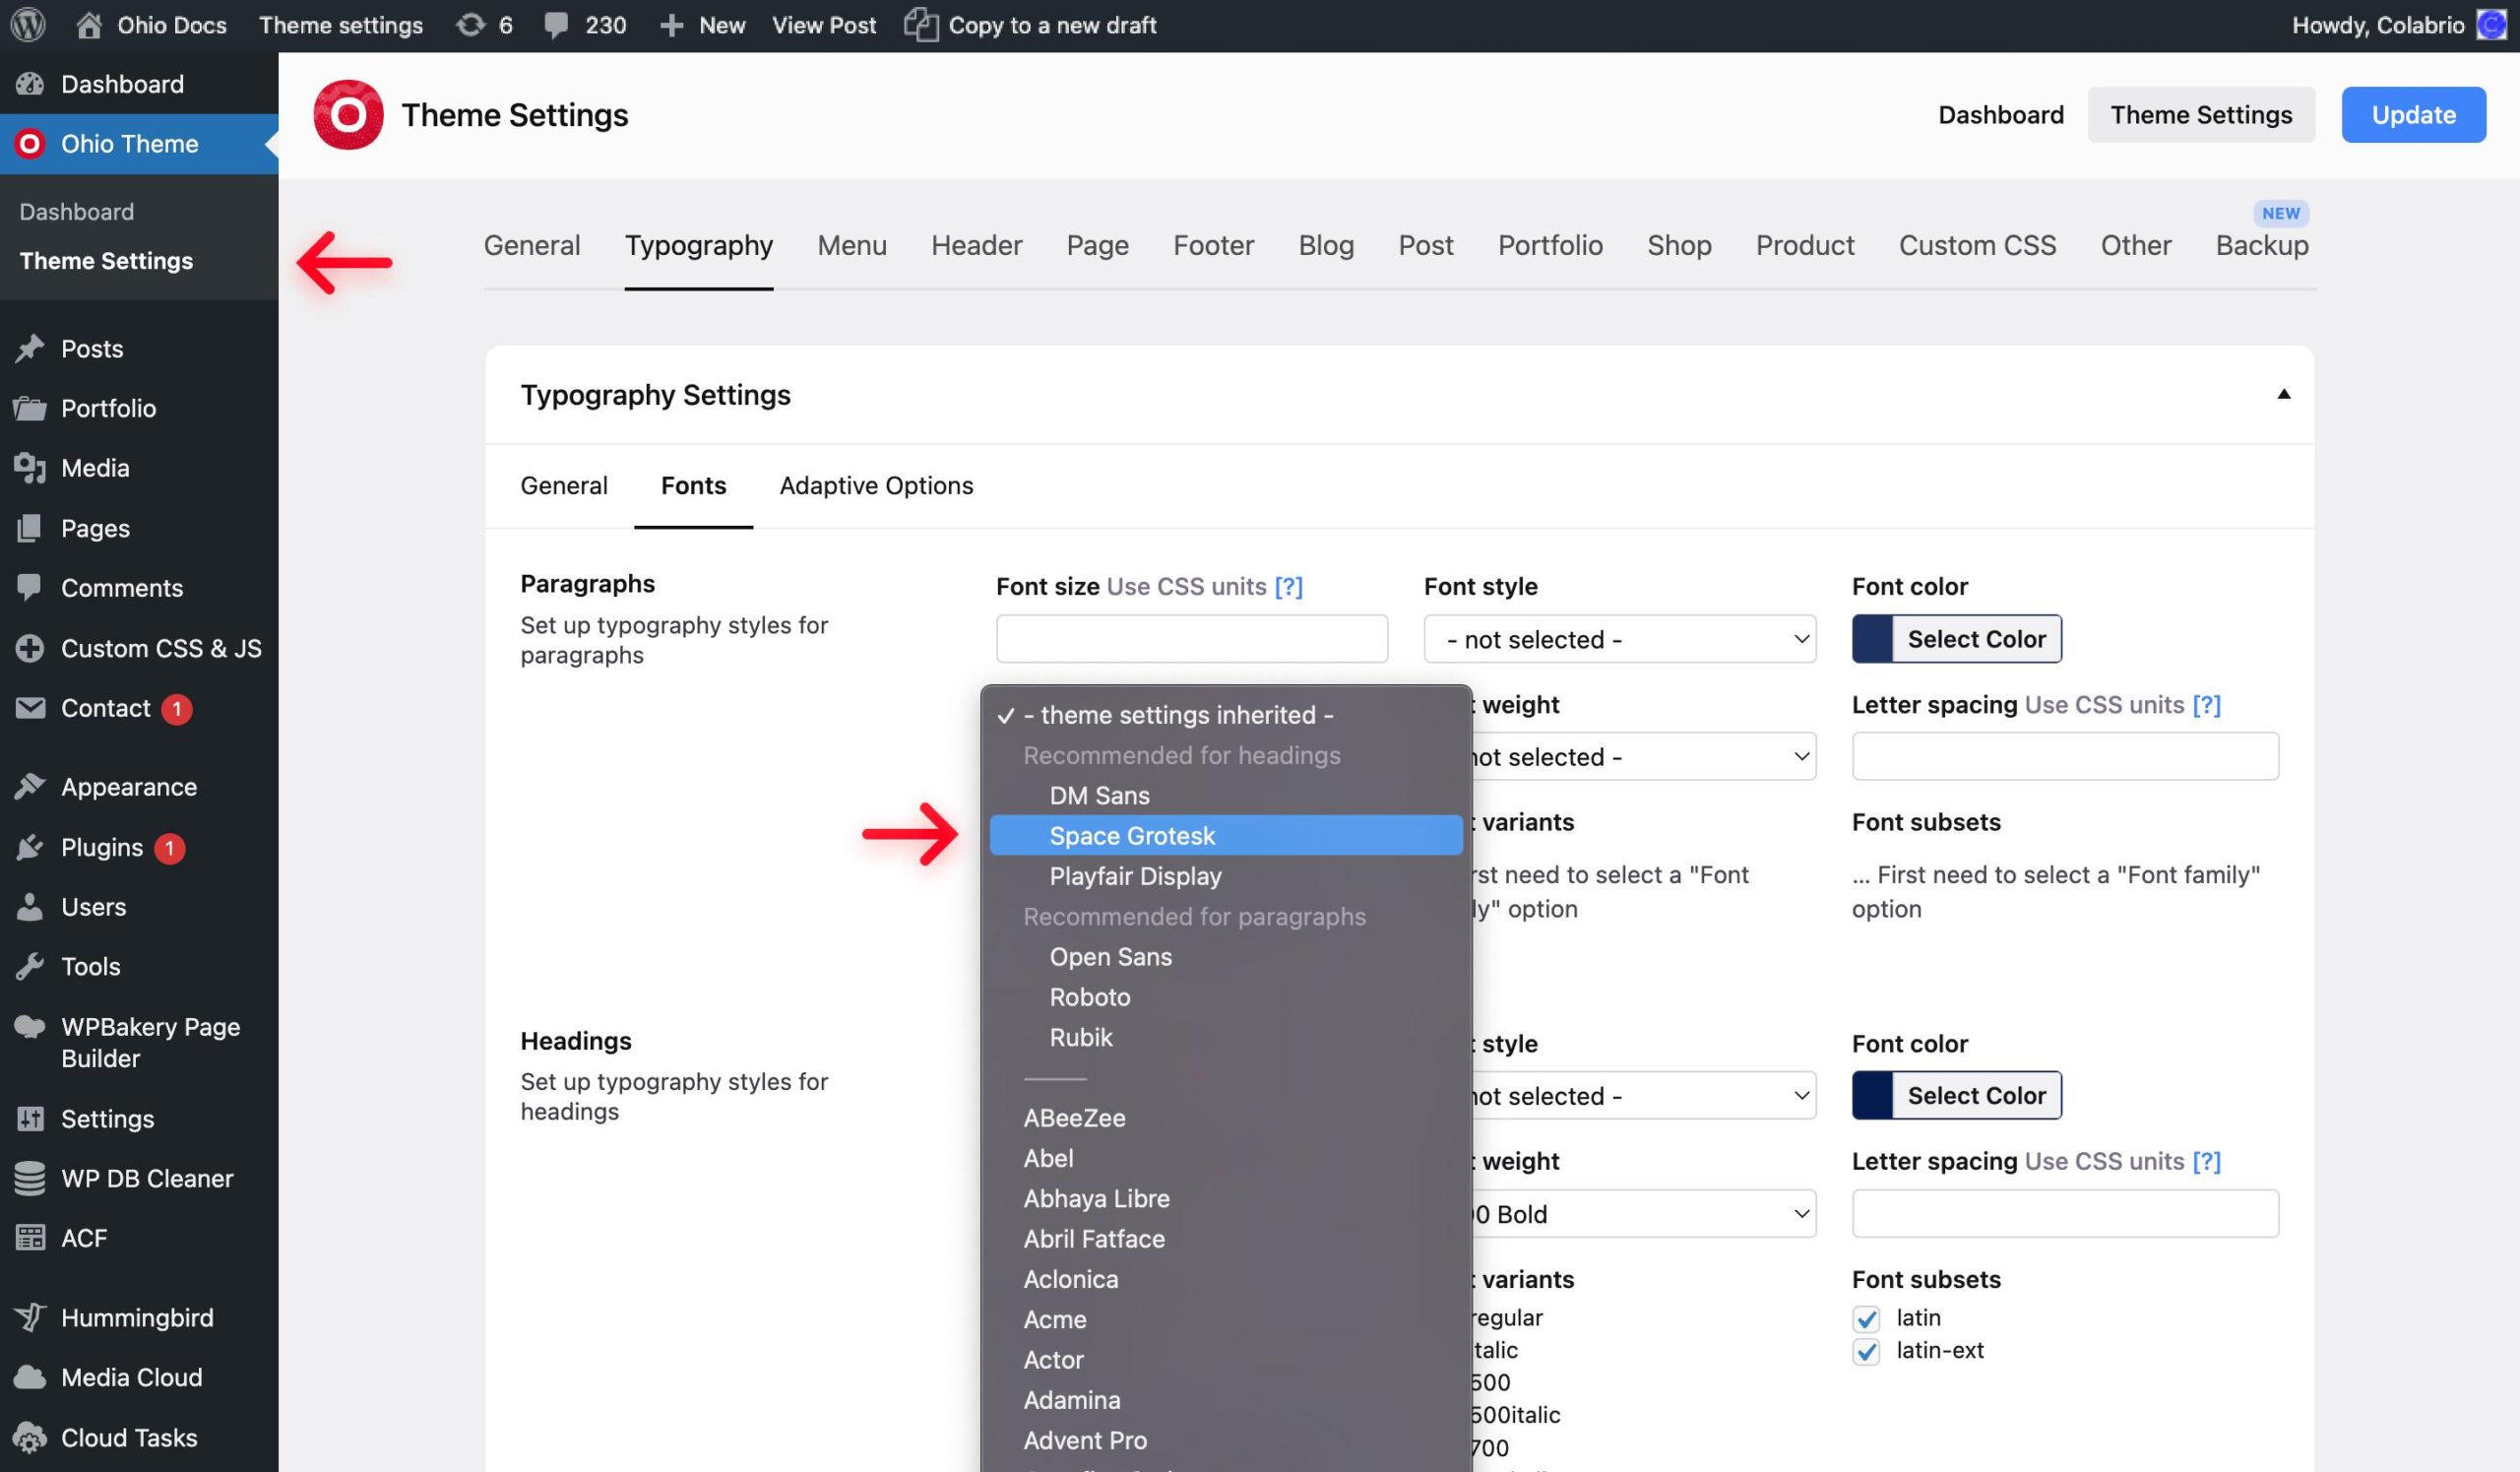
Now you should have a Google Font applied on your website.
All the premium font credits (e.g. Blacker Pro, Neue Helvetica Pro, Beatrice Display, etc.) on the Ohio website are used only for demonstration purposes and aren’t included with your purchase. After installing the specific demos you can find out that some fonts are missing on your website. In that case, you can add any custom font using the method below:
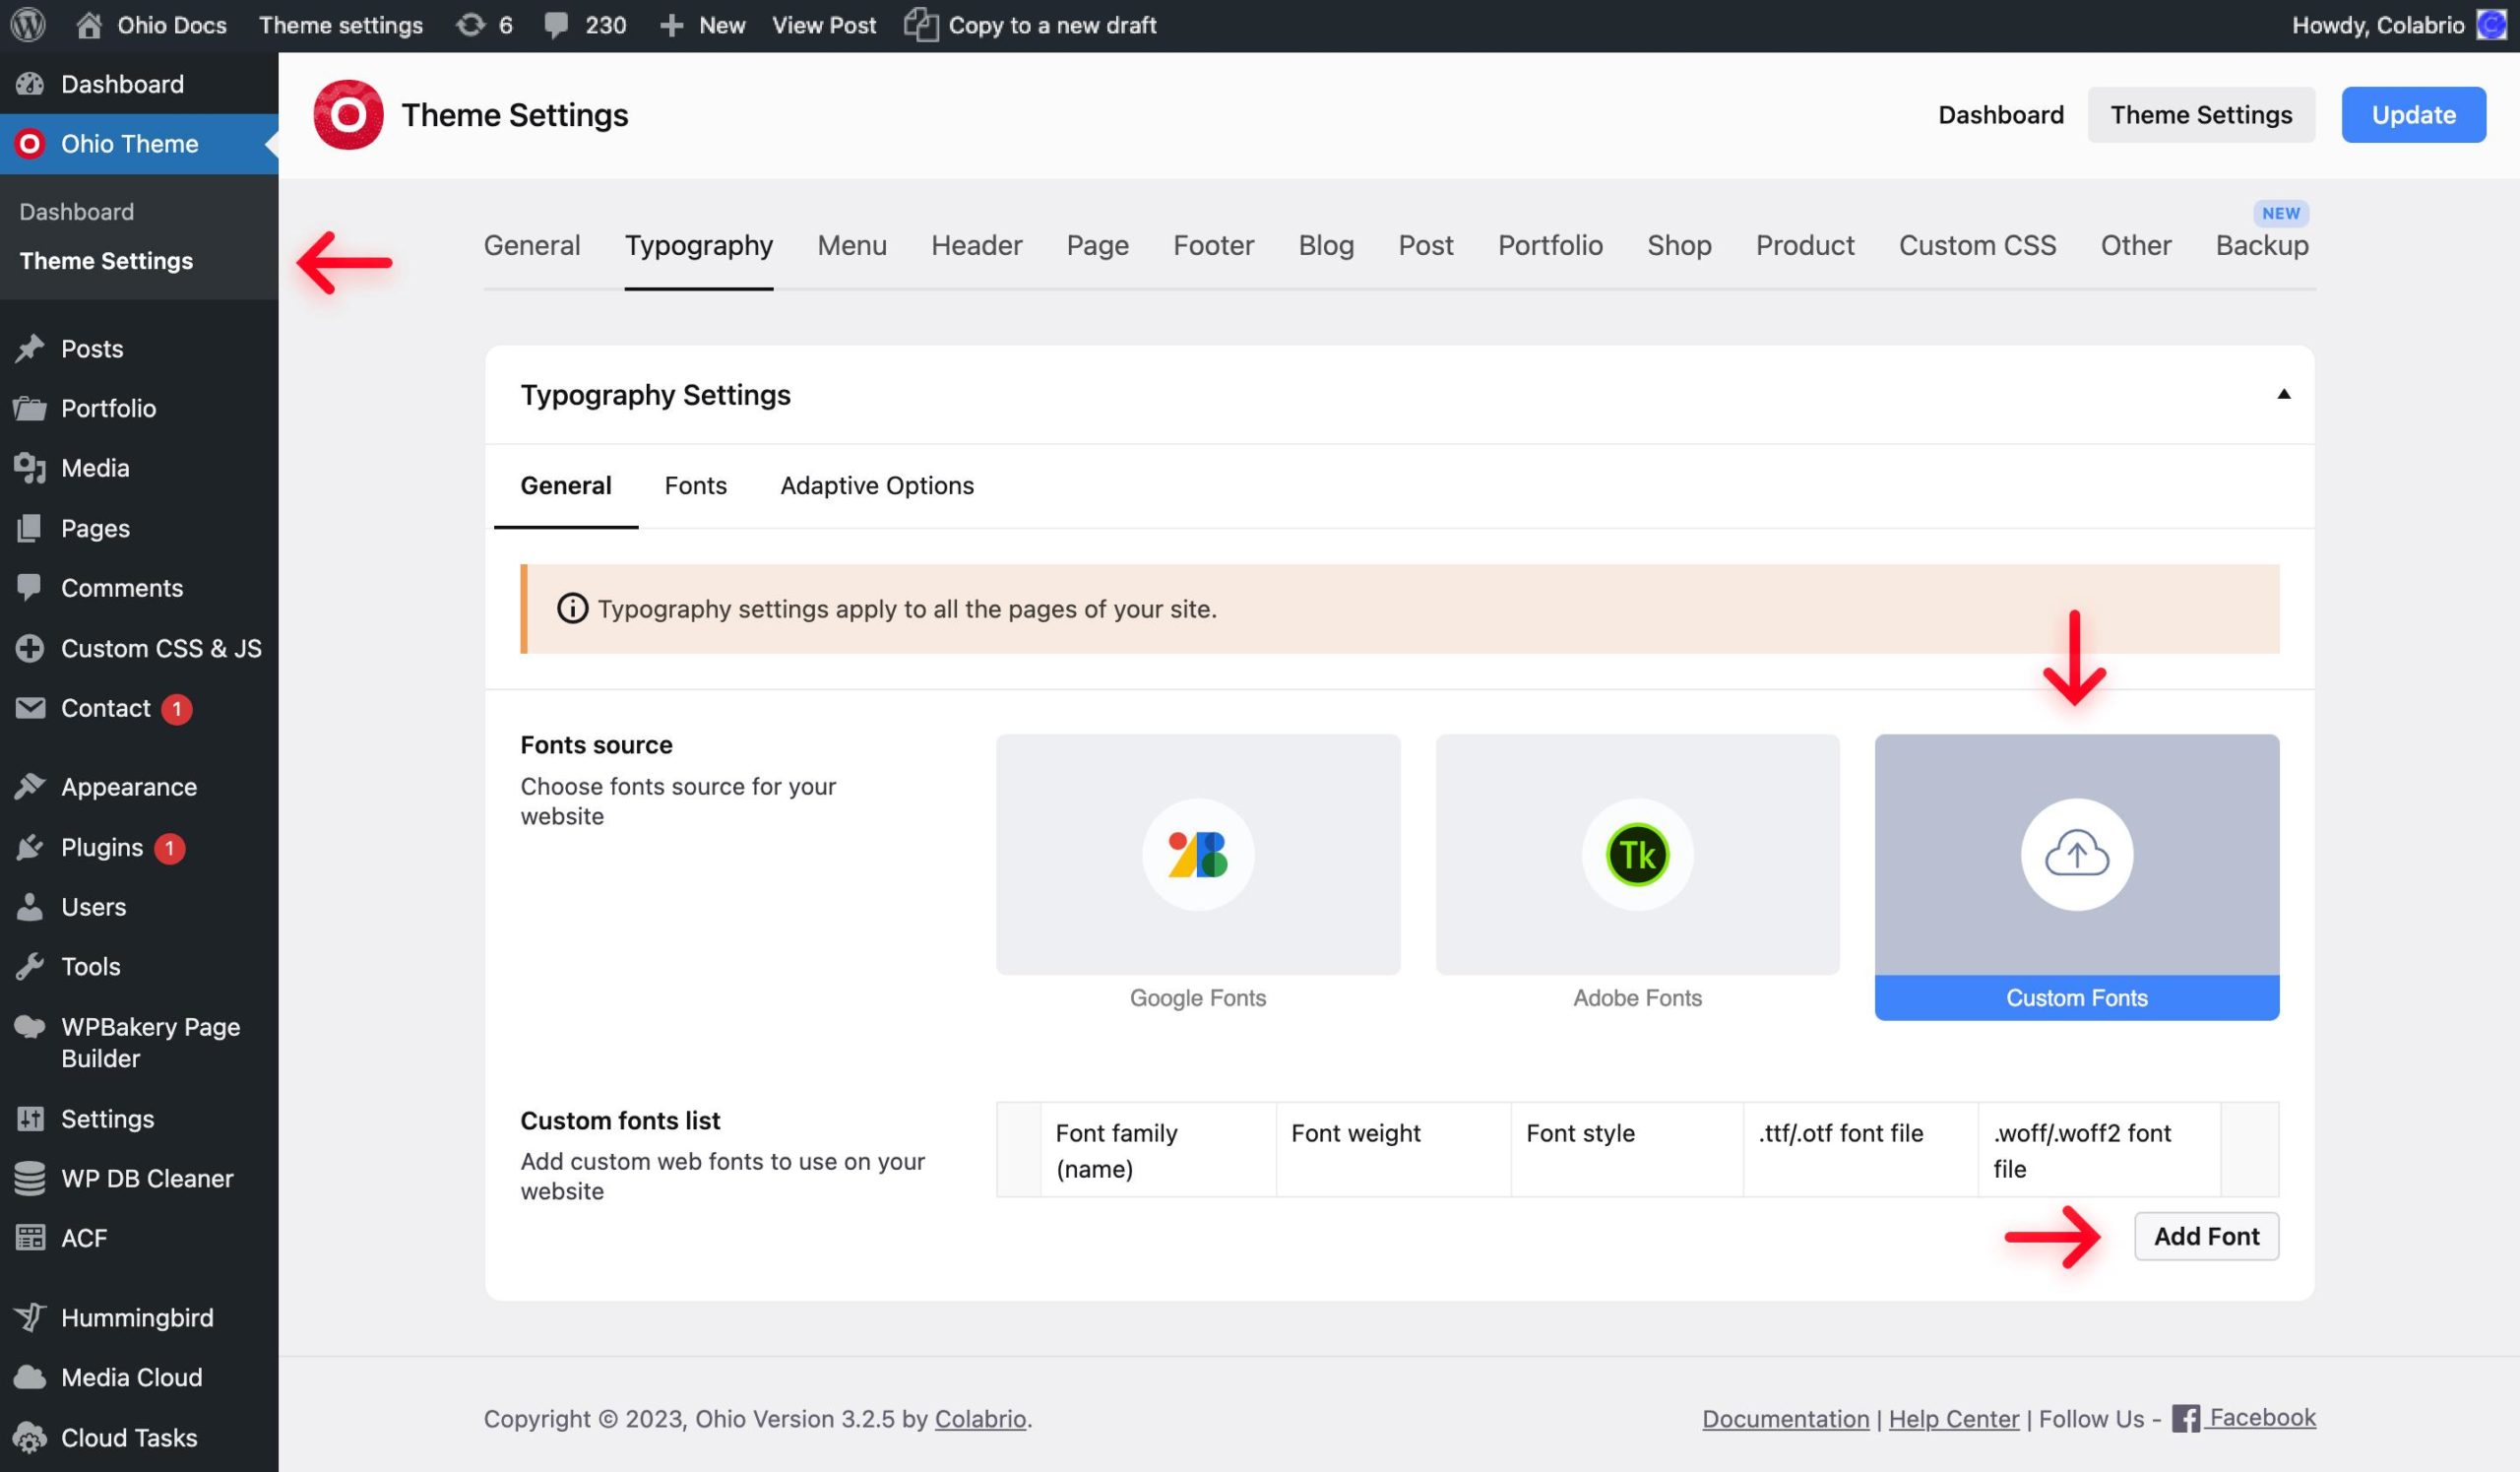
- From the WordPress dashboard go to Ohio Theme → Theme Settings → Typography Settings → General;
- Choose the Custom Fonts source;
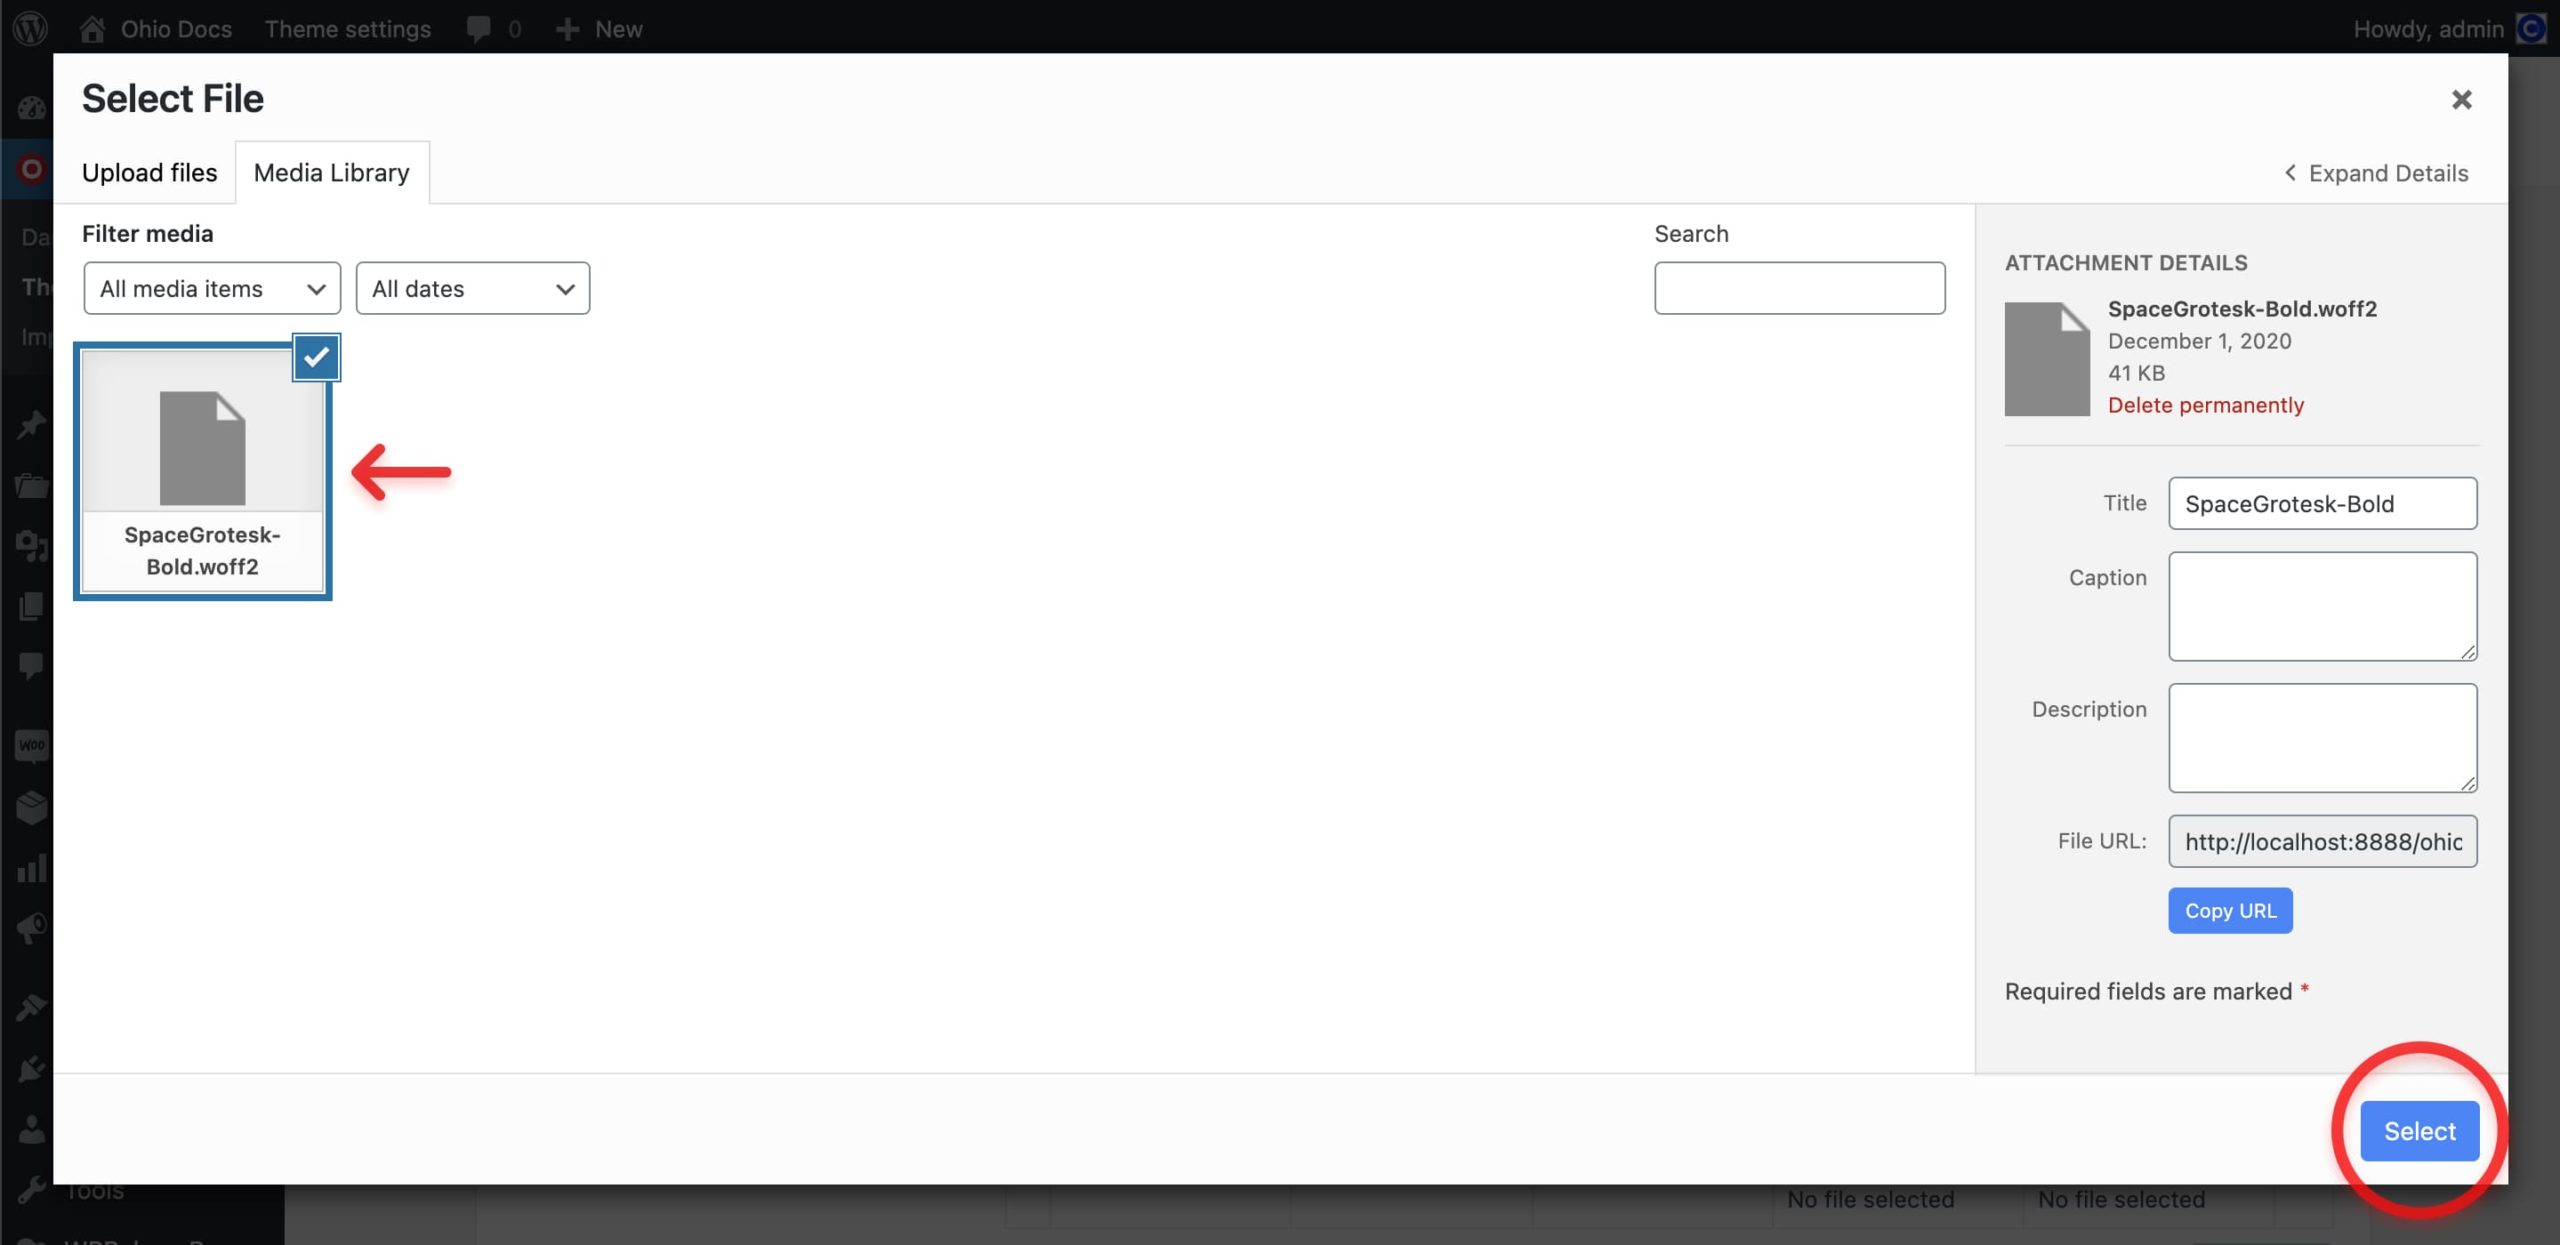
- Add a new font (e.g. SpaceGrotesk-Bold.woff);
- Add the font name and choose the font weight and style;
- Hint the Update button to save changes.
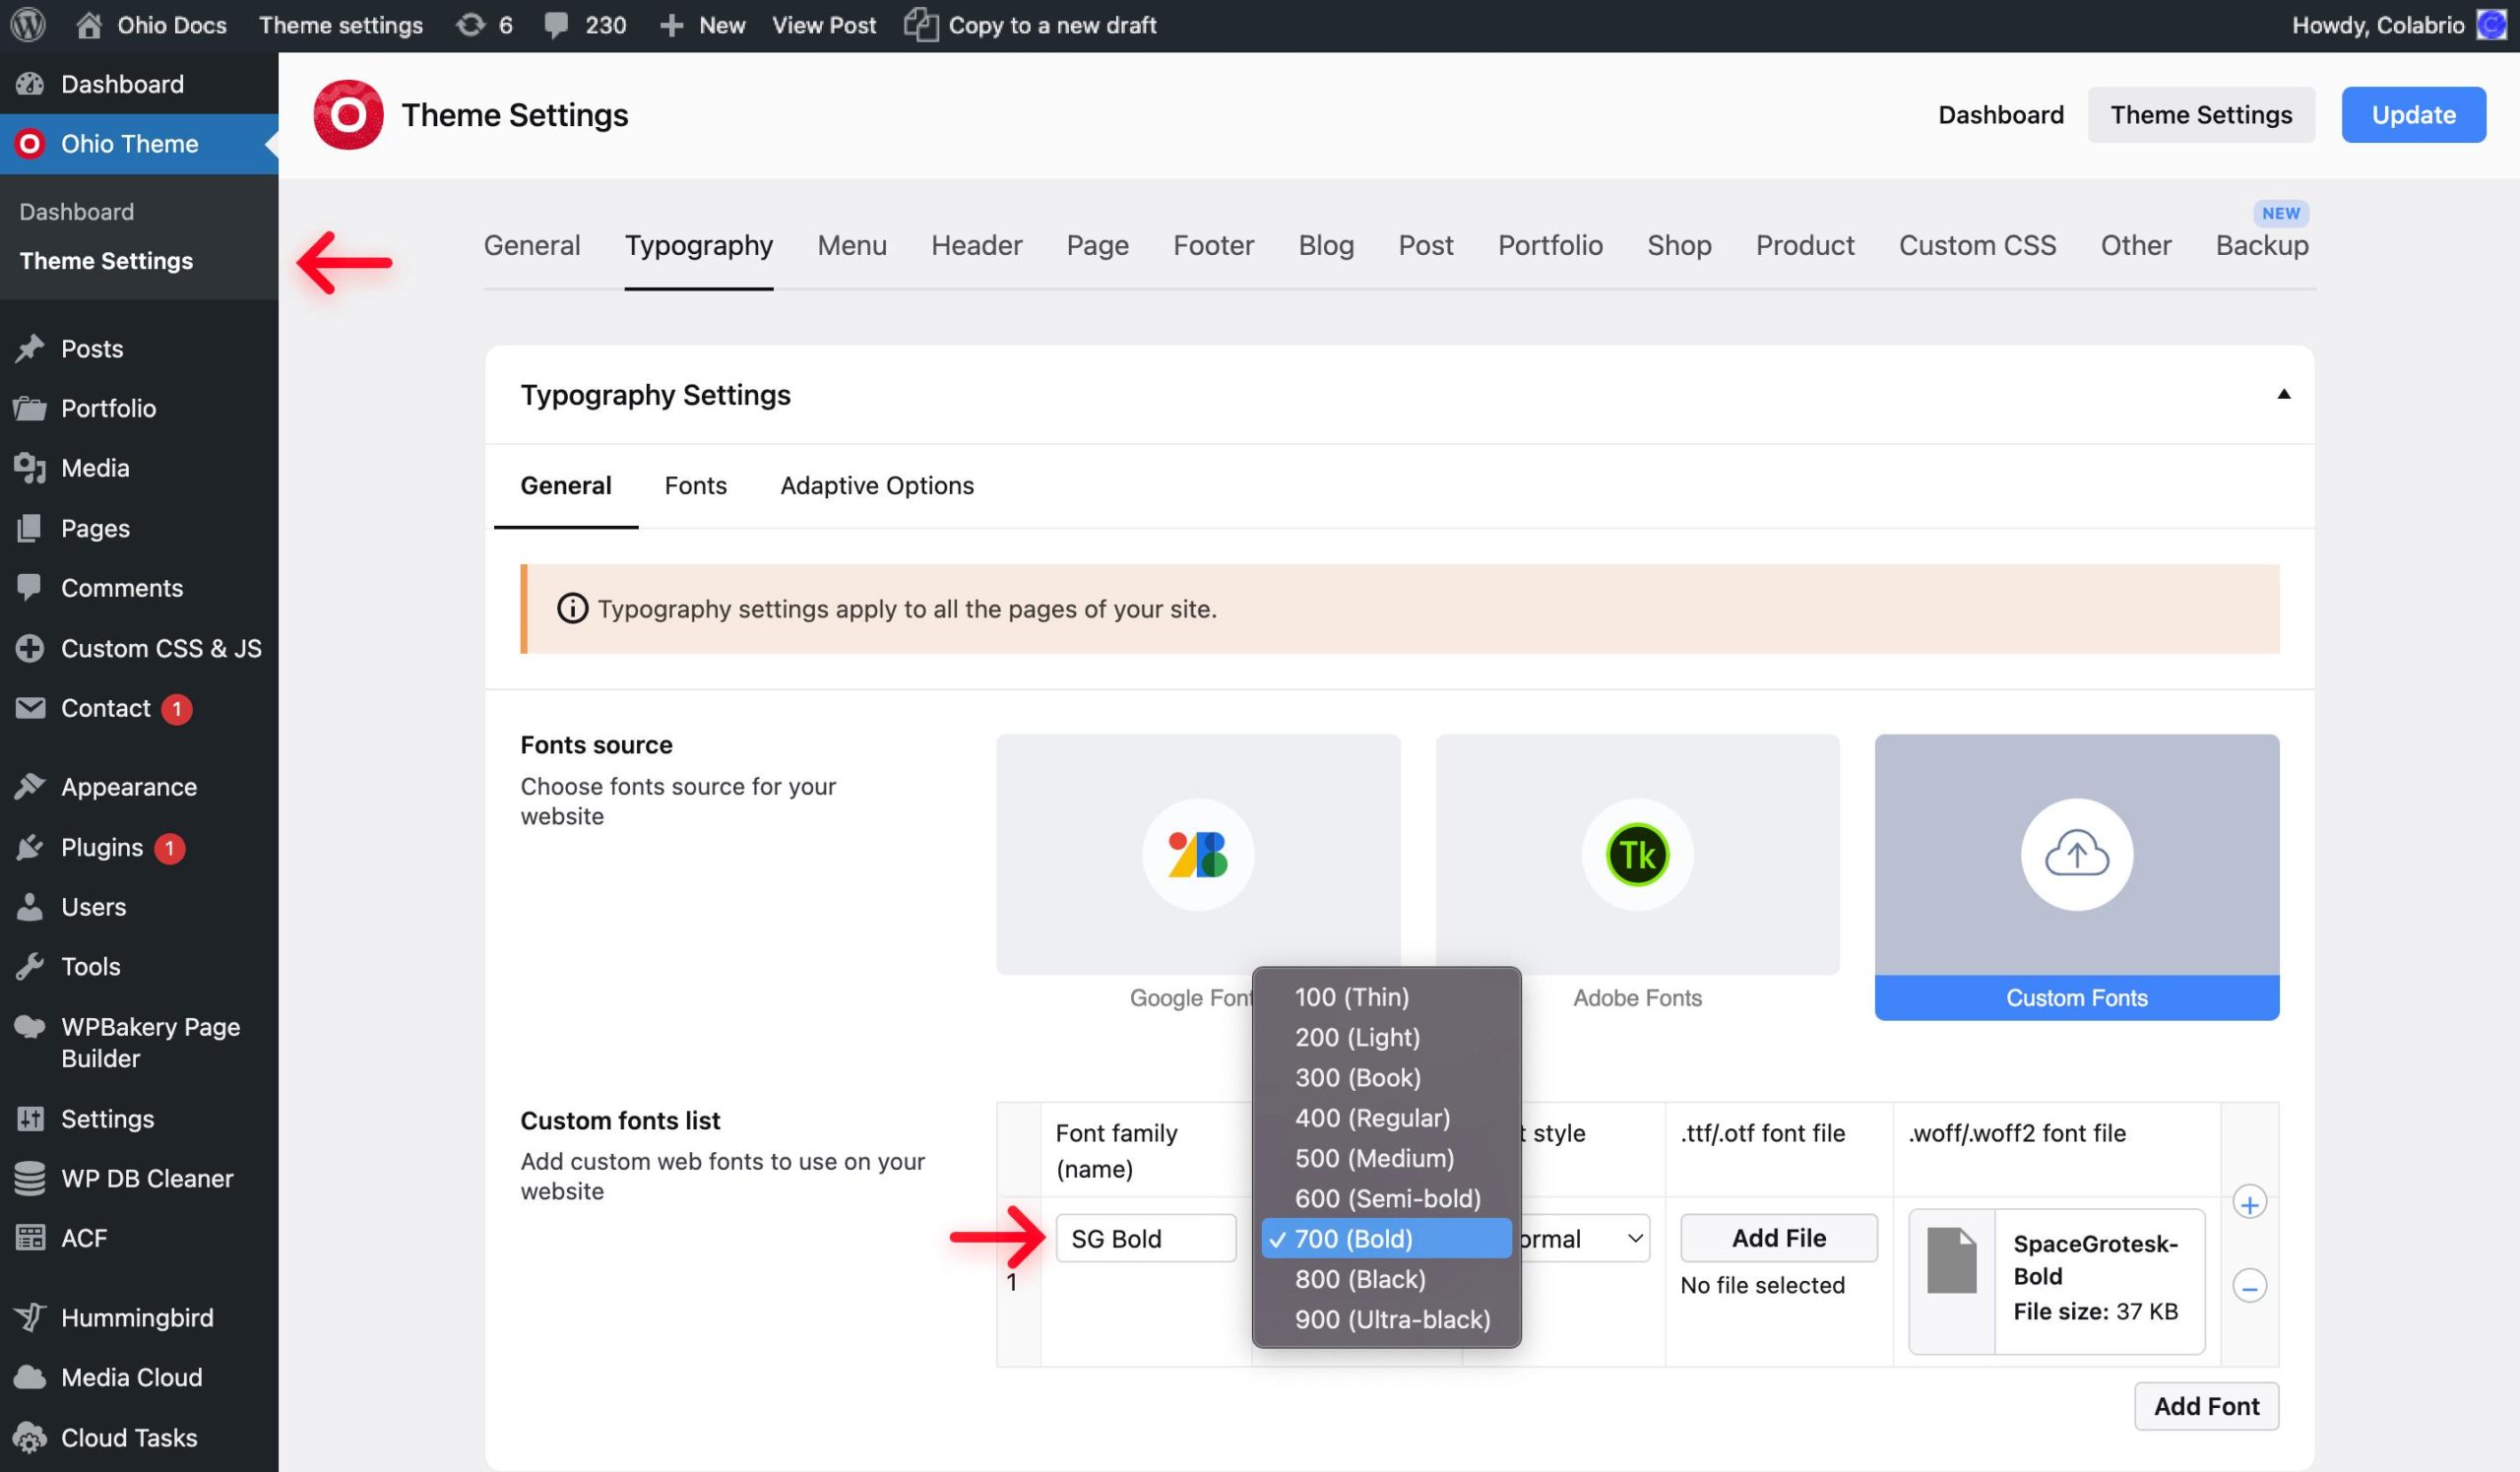
Now you should have an embedded Space Grotesk font and you can use it to change the standard typography of your website.
- From the WordPress dashboard go to Ohio Theme → Theme Settings → Typography Settings → Fonts;
- Choose the previously embedded font from the Font family dropdown menu;
- Save changes.
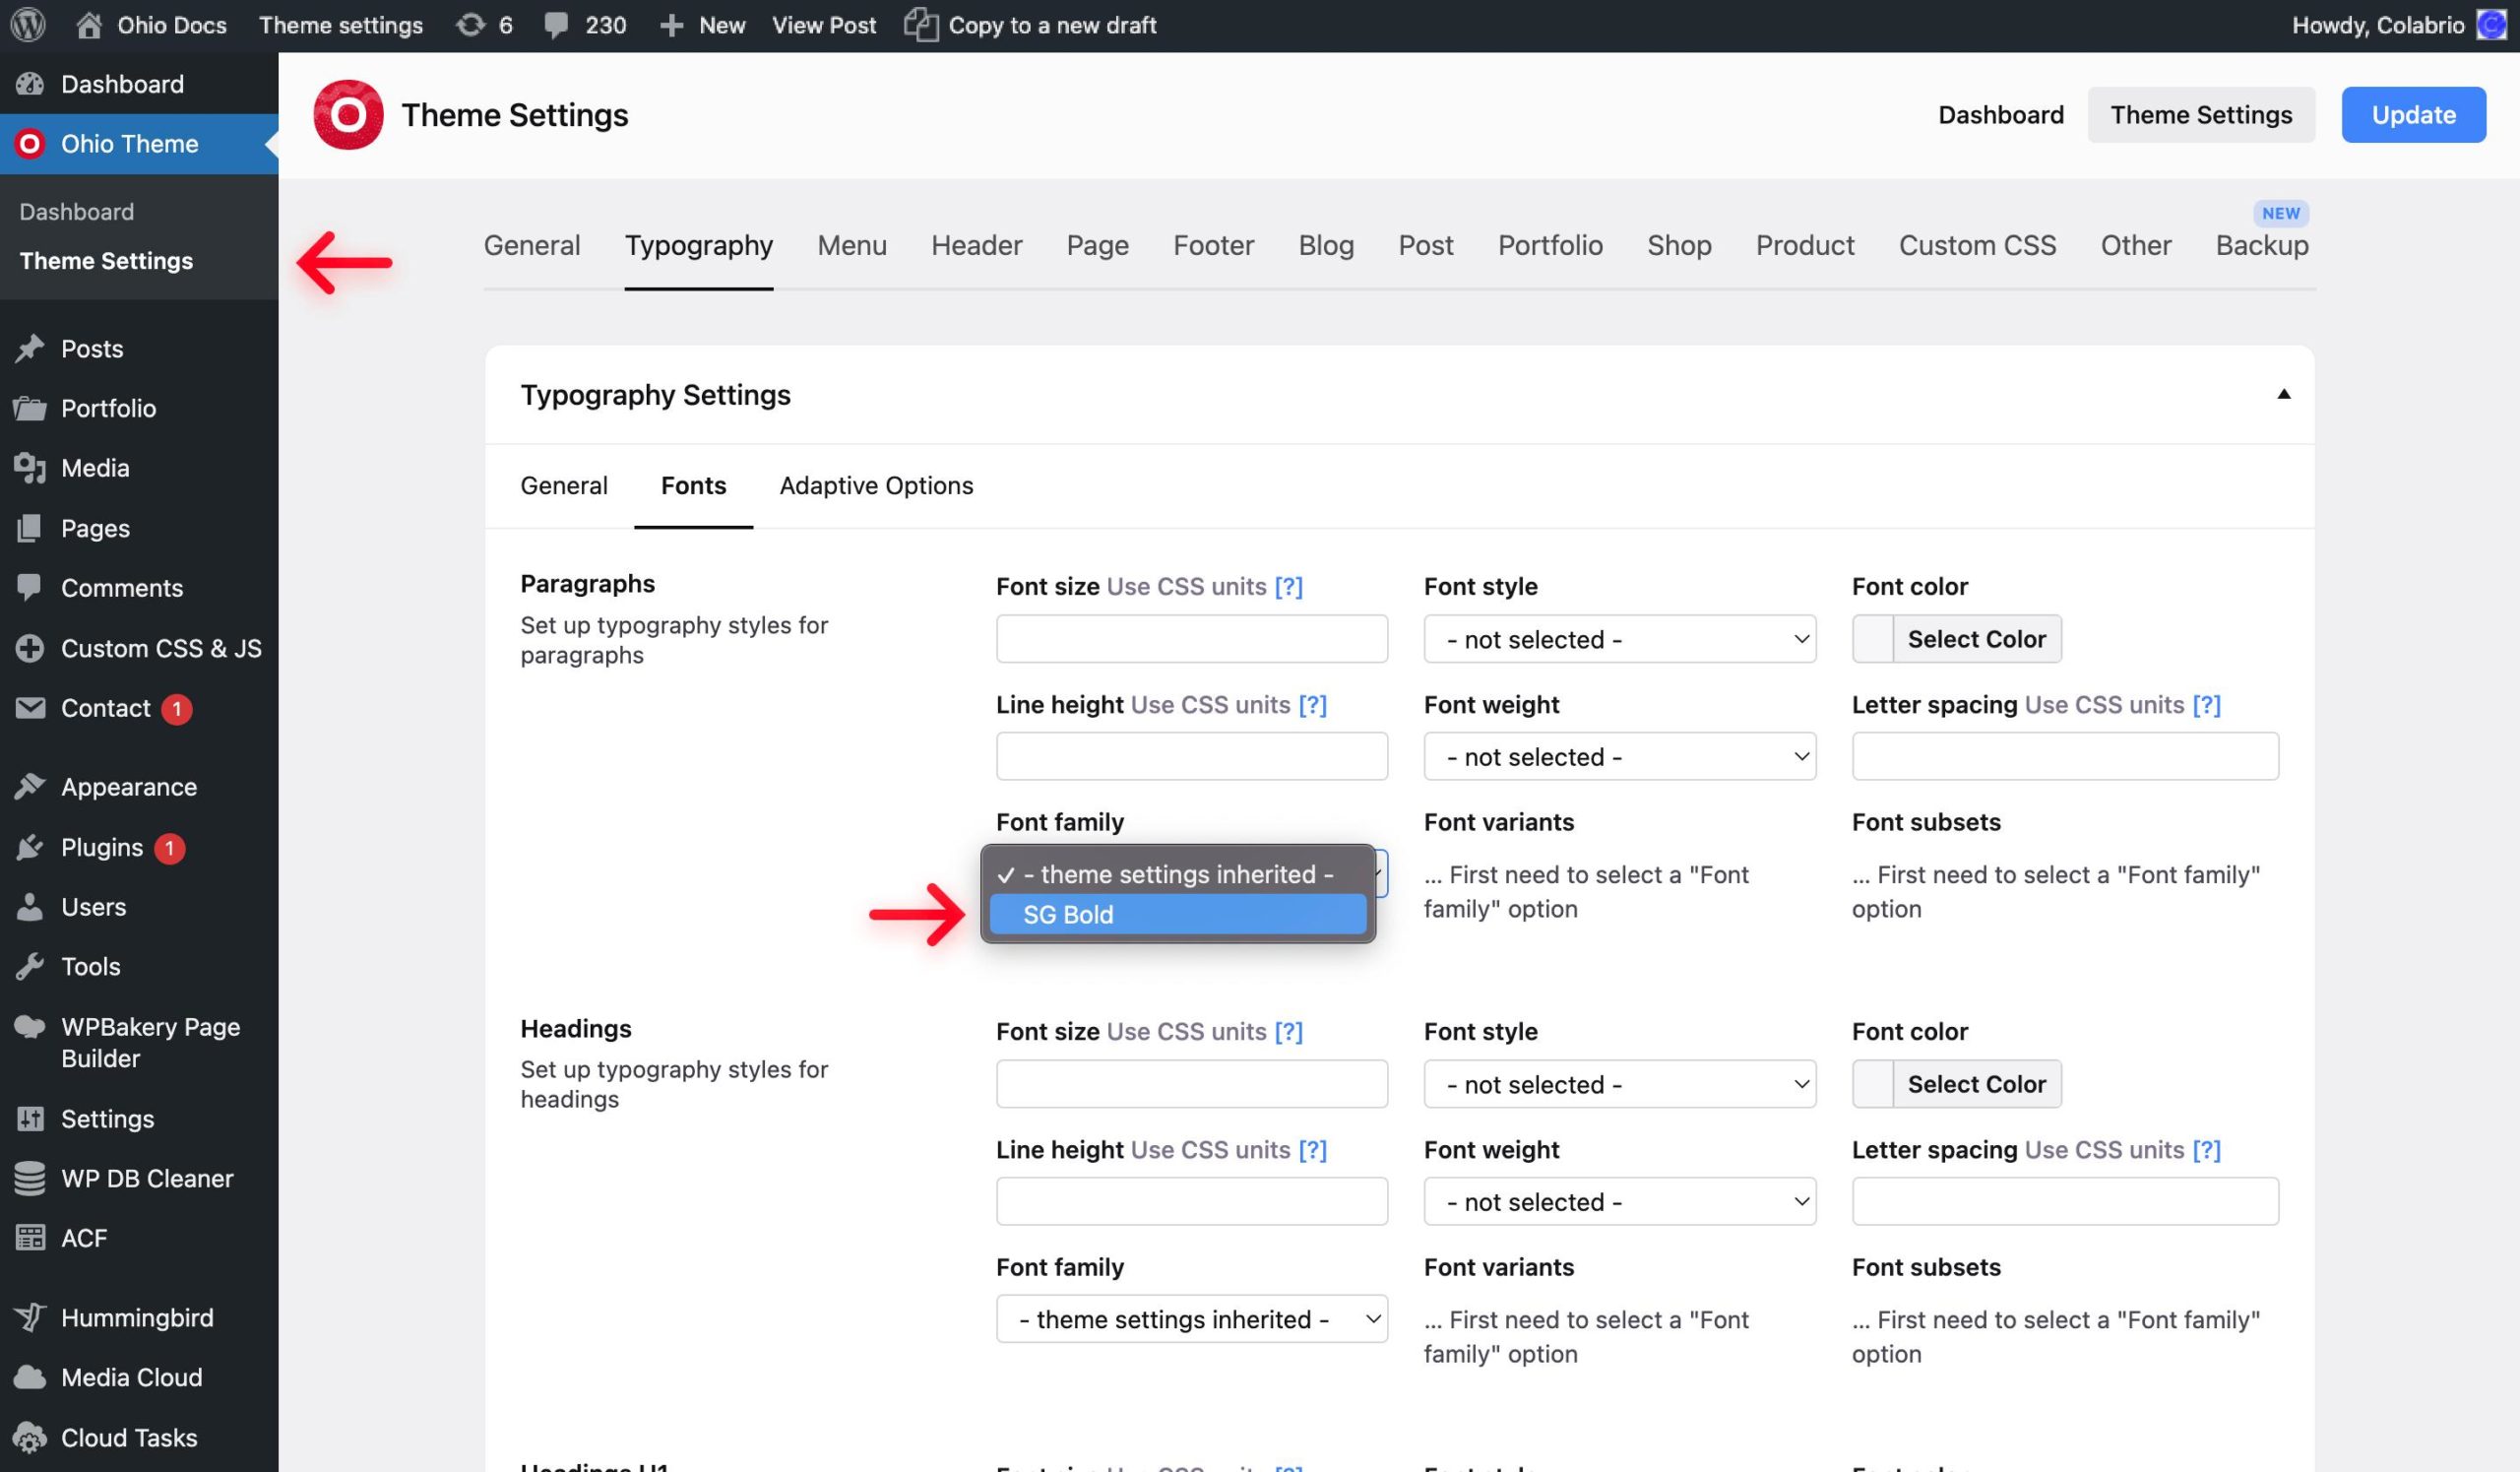
Now you should have a custom typography on your website.


