2. Blog #
2.1 Creating a post #
To create a new post for your blog do the following:
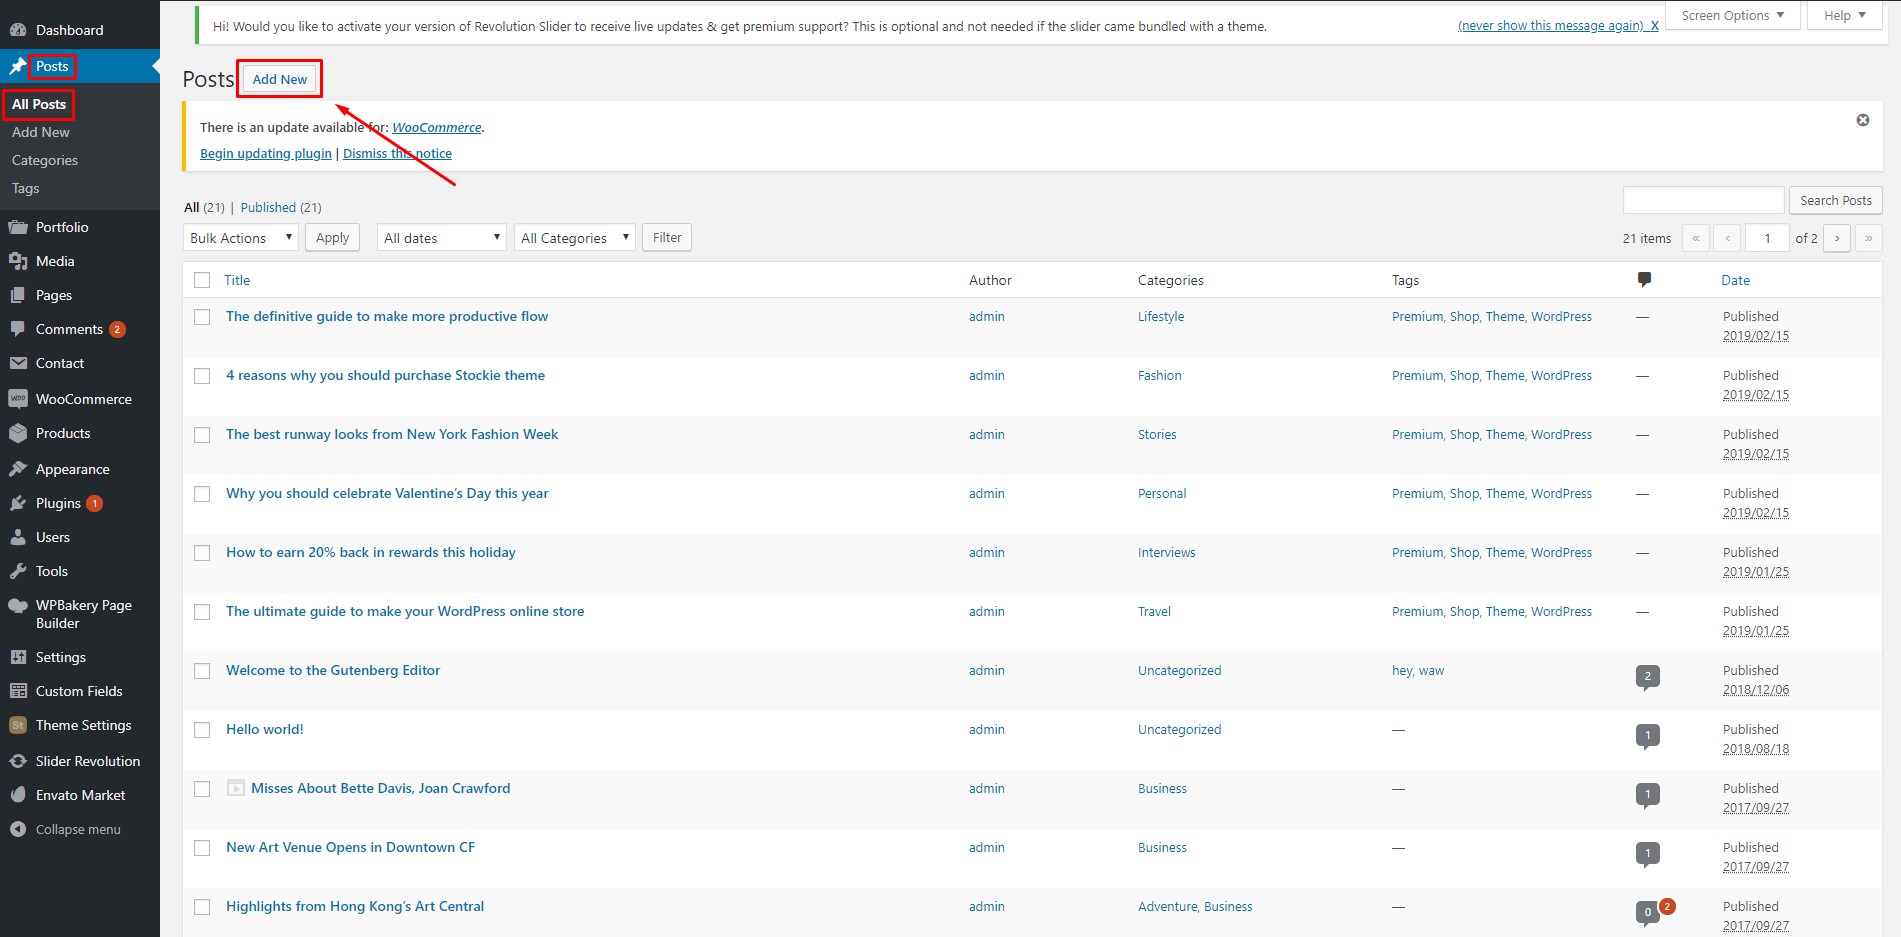
- Go to Posts>All Posts, find the “Add New” option and click on it.
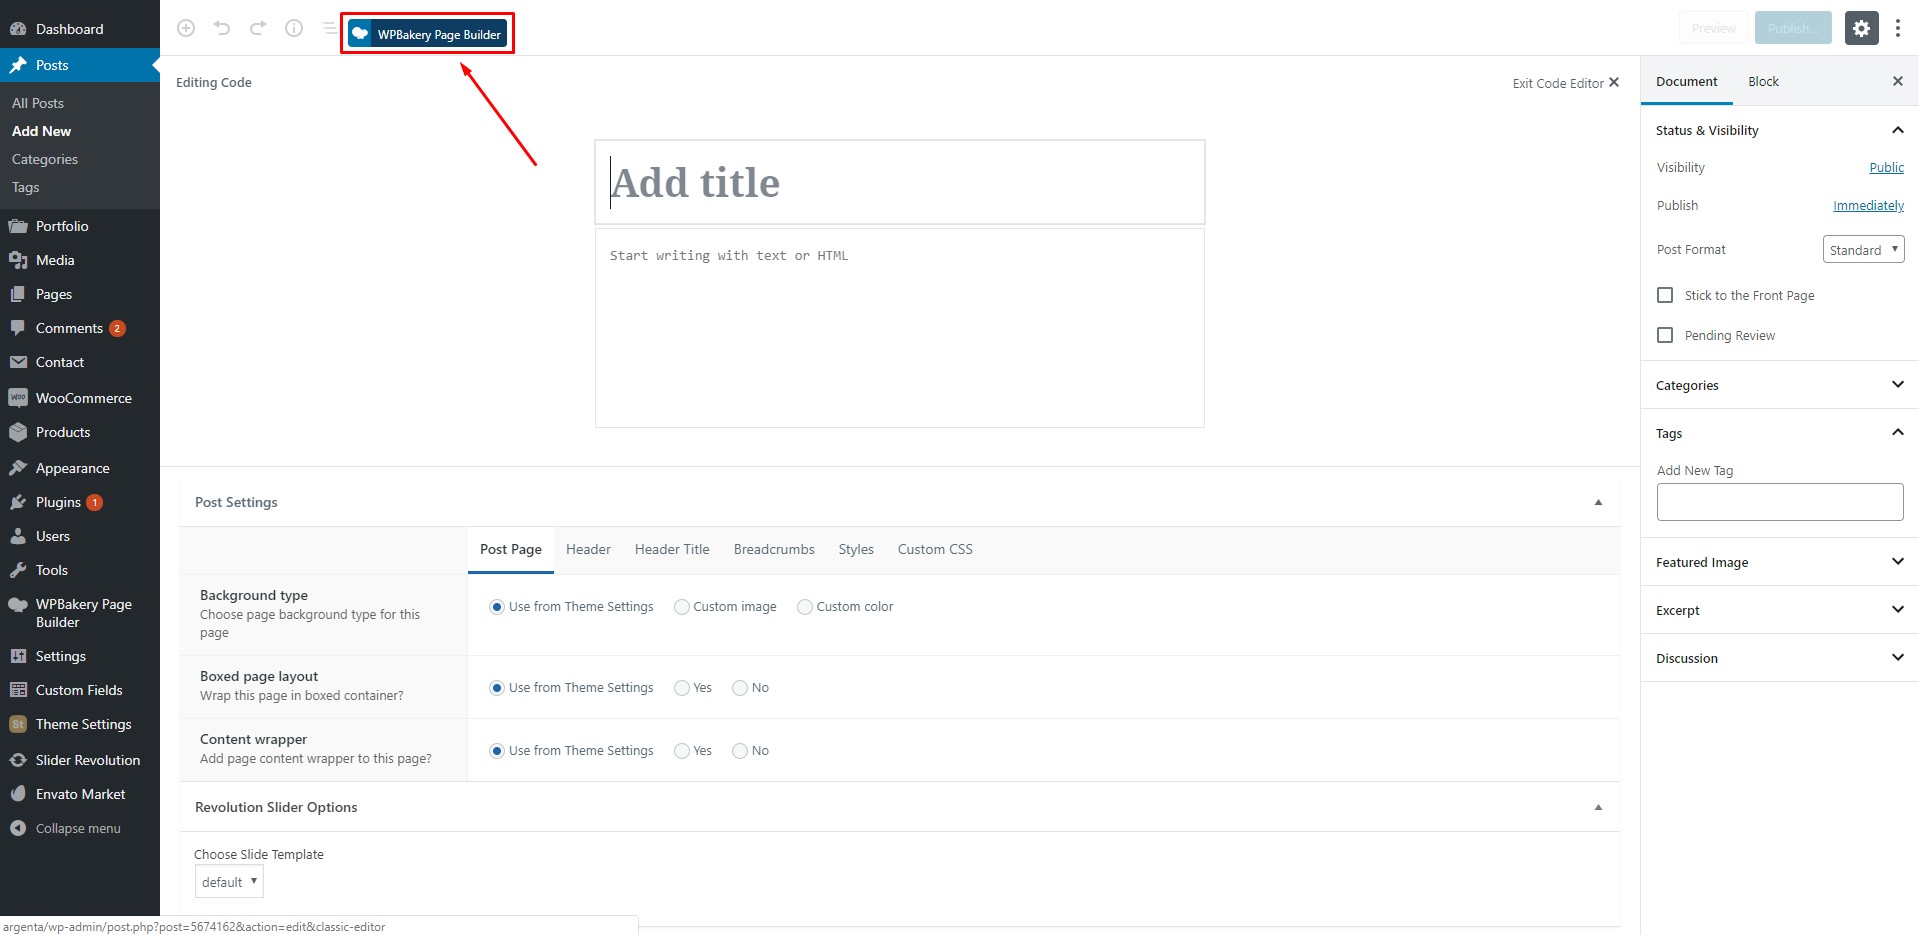
- Click on “WPBakery Page Builder” at the top to be able to add our elements to your post
- Type in the title and publish/save as draft your post. Now you can edit your post!
2.2 Setting the Post Format #
For each of your posts, you can set the format.
This is where you can do it:
Let’s go over the possible options. Supported post formats are: Standard, Video, Quote, Link, Gallery and Audio.
Standard post
This is a default blog format. Start adding content with the Visual Composer.
Video post
Copy and place a video URL (e.g. https://www.youtube.com/watch?time_continue=7&v=_GuOjXYl5ew) into blog post content area. Here’s how your video blog items will look like:
Gallery post
In order for it to work, you need to add a gallery at the top of your page. Here’s how your gallery blog items will look like:
Audio post
Upload and place an audio file into blog post content area.
2.3 Creating a blog page #
2.3.1 The Blog page template #
To create a blog page and add it to your website:
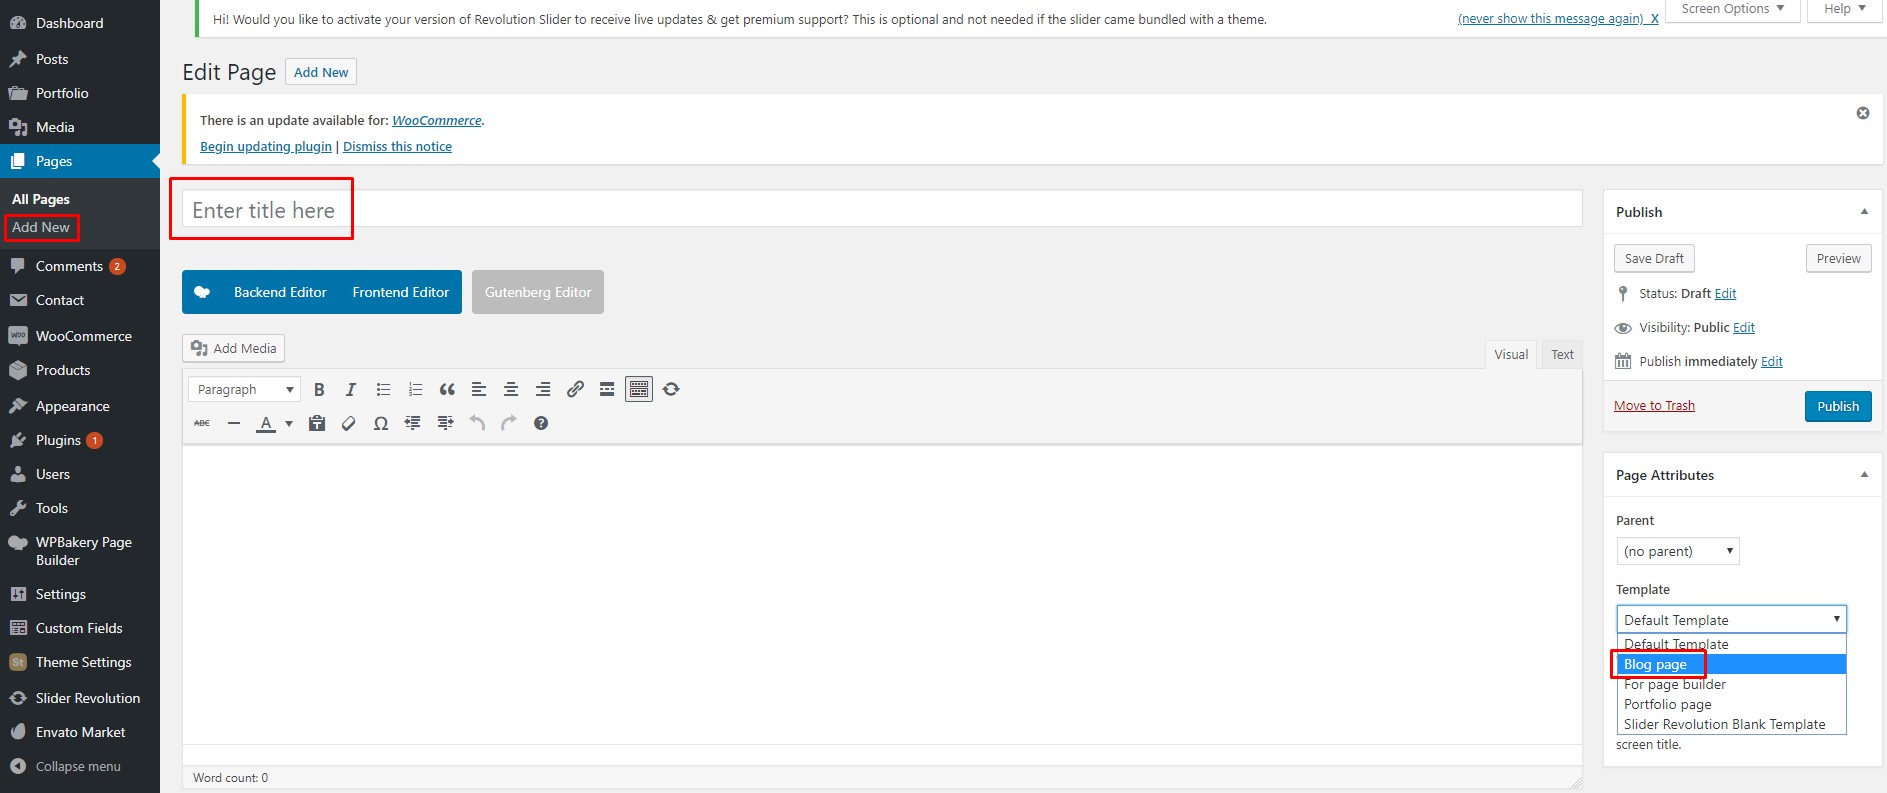
- Navigate to Pages > Add New from the WordPress admin panel;
- Fill the Title field;
- Choose “Blog page” in Page Attribute section;
- Add a description or any other content (optional);
- Click on the “Publish” button to save and publish the blog page.
2.3.2 The Blog Posts WPBakery element #
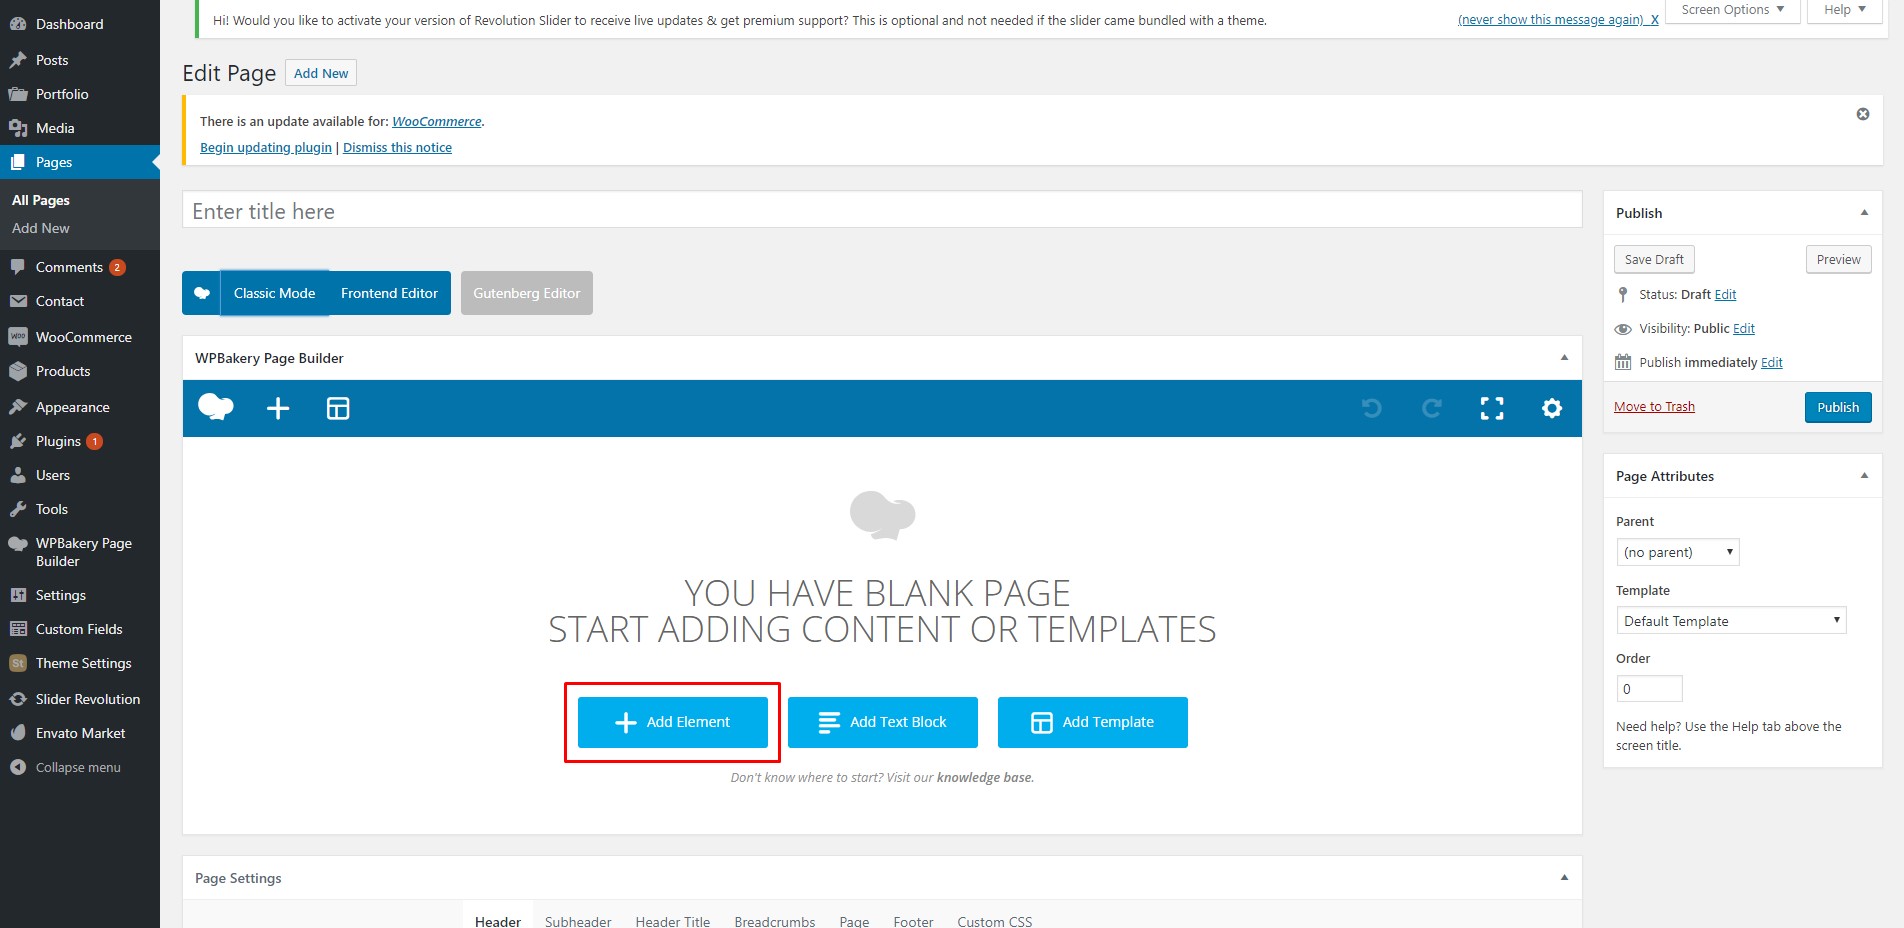
- Navigate to Pages > Add New from the WordPress admin panel;
- Fill in the Title field;
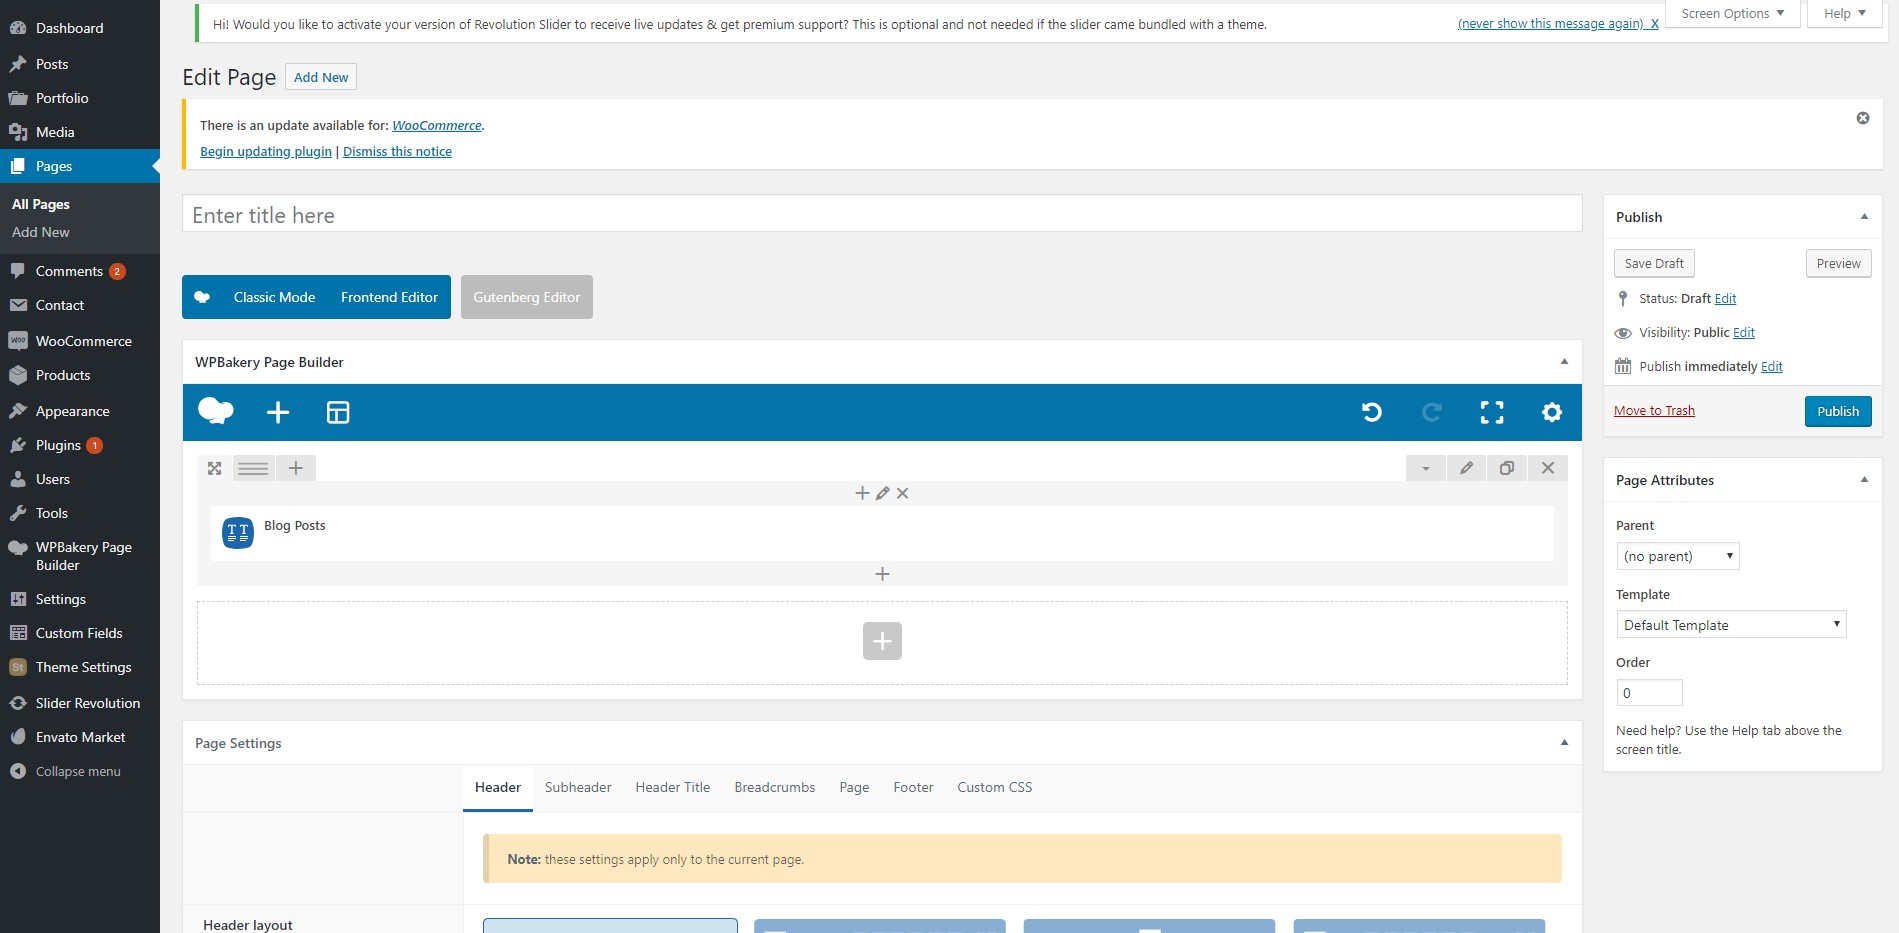
- Switch the page mode to Backend Editor;
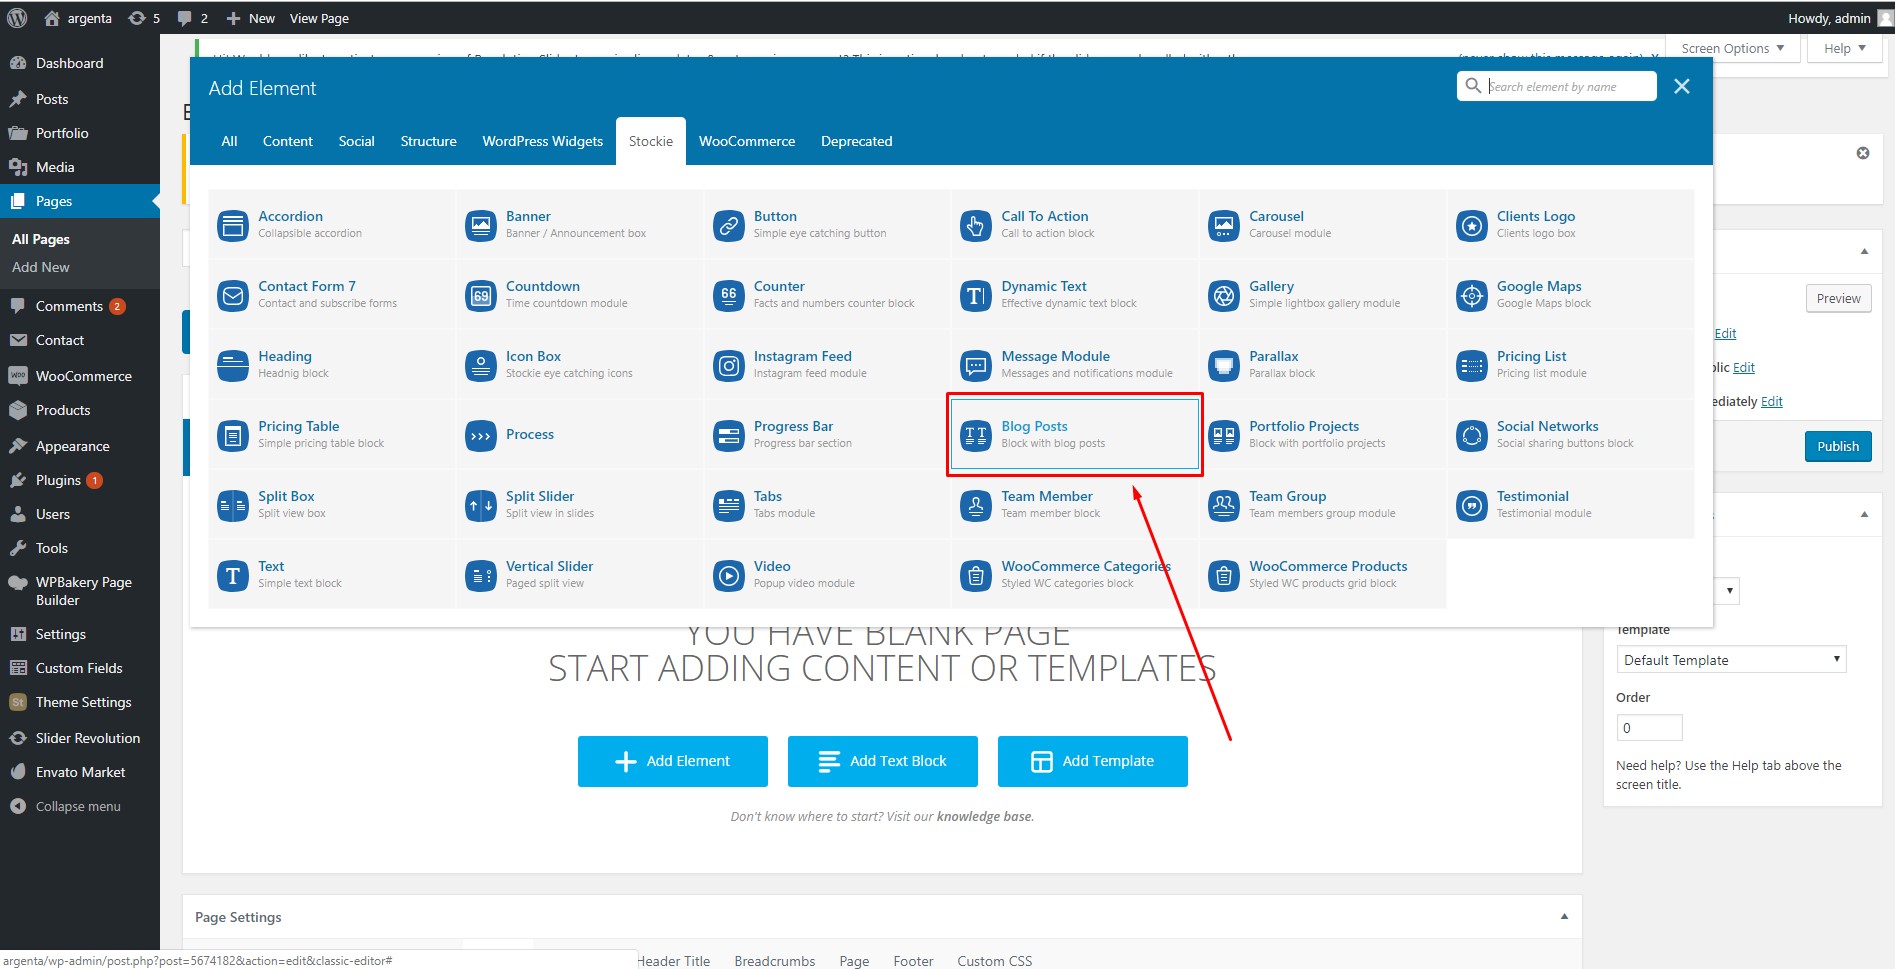
- Add a “Blog Posts” shortcode;
- Click the “Publish” button to save and publish the page.
2.4 Set your blog as posts page #
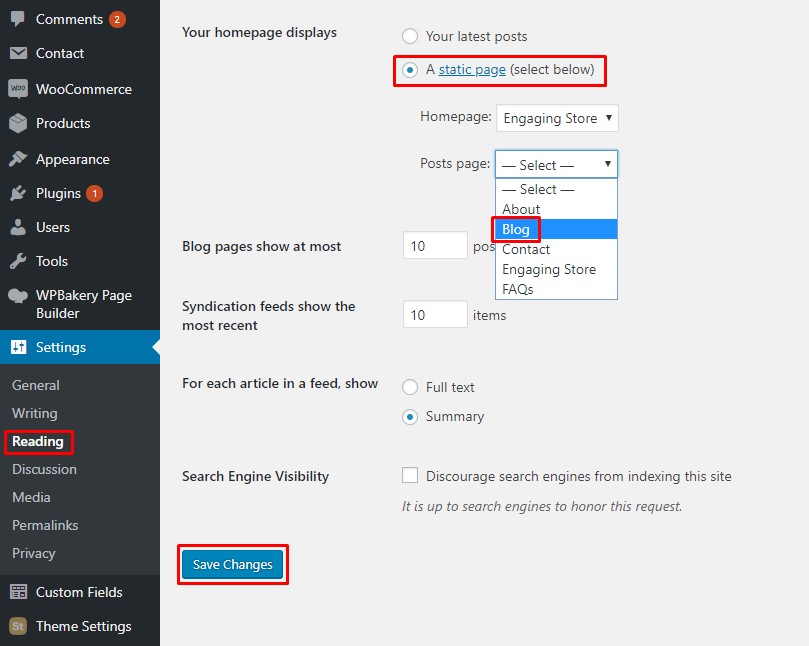
- Navigate to Settings > Reading from the WordPress admin panel;
- On the Posts page option choose your earlier created blog page;
- Click “Save Changes” button.
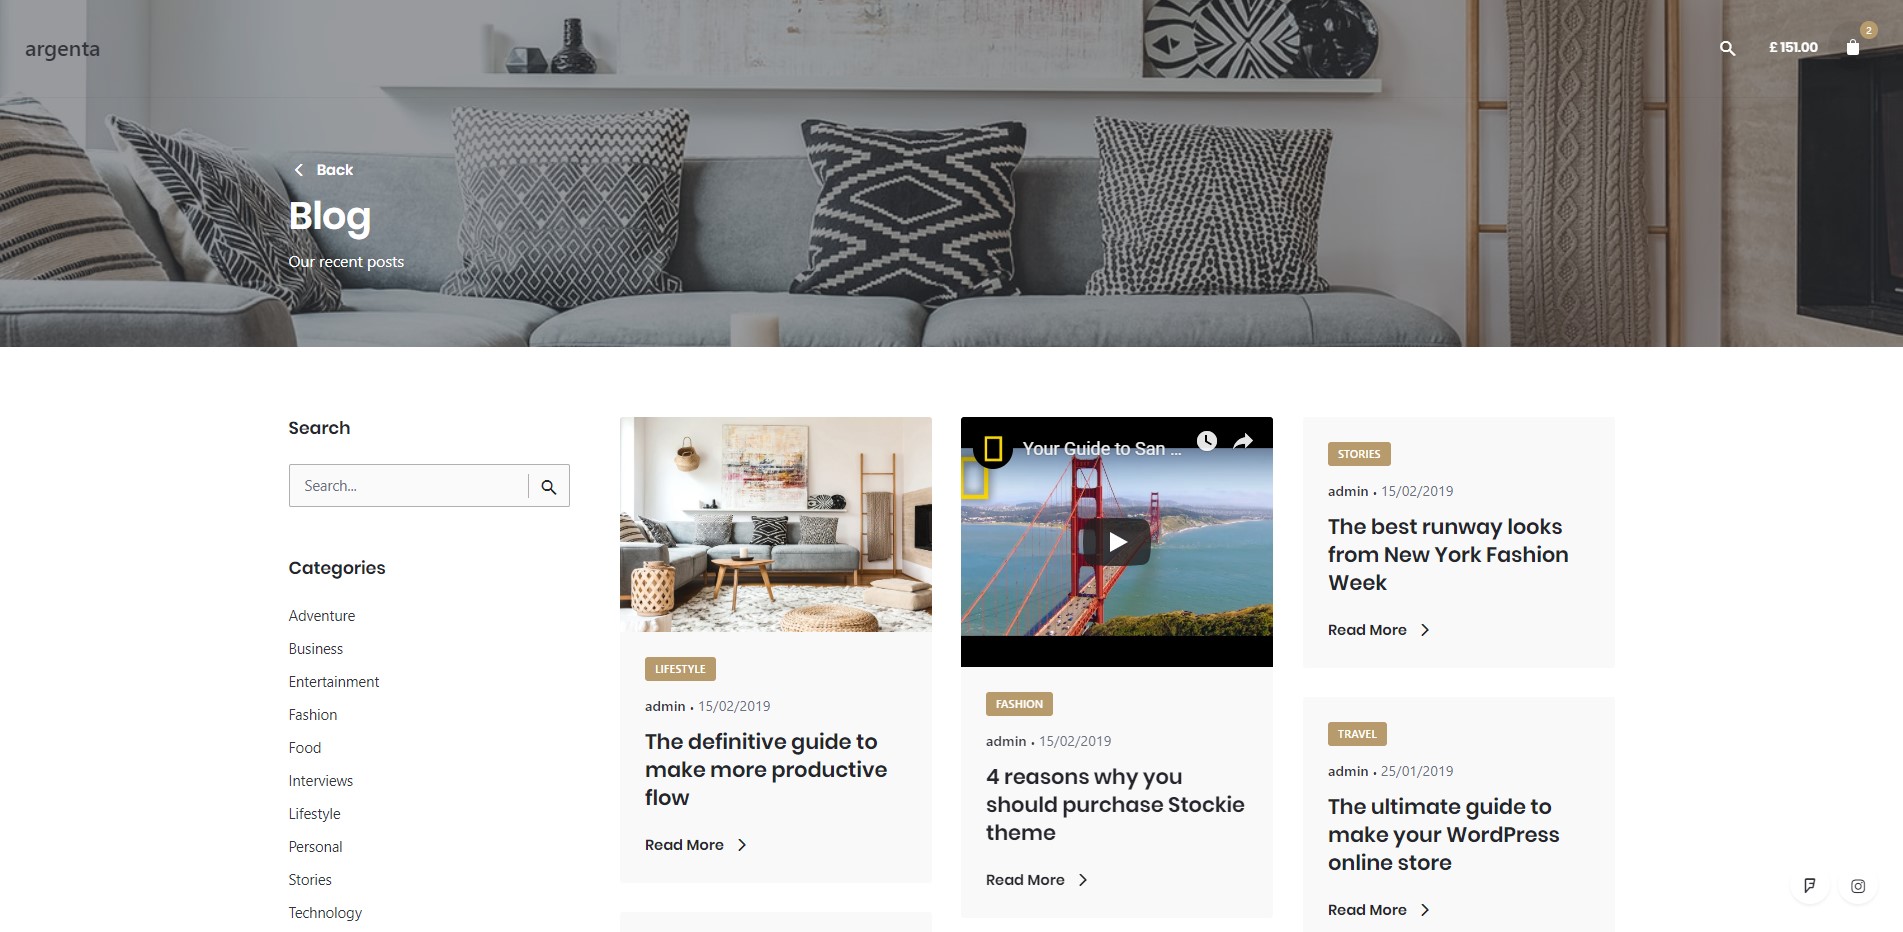
Now you should have a published blog page at yourwebsite.com/blog
